If you are looking for quick help, skip to a desired topic on this page:
- Inserting Videos
- Sitewide FV Player Defaults
- Editing the FV Player Skin
- Customizing the Shortcode Editor Functions
- Other Setting Boxes
- Manual Editing
- What Formats to Choose
The installation process of the FV Player video plugin is quite easy and has been covered in our Installation guide. Once the plugin is uploaded and activated, you will find a full page of settings, divided into tabs and sections. These can be found in Settings -> FV Player.
FV Player Pro settings
Inserting Videos
Here’s a simple guide to inserting videos into your articles with FV Player.
1. Open your post editor in wp-admin -> Posts -> Add New.
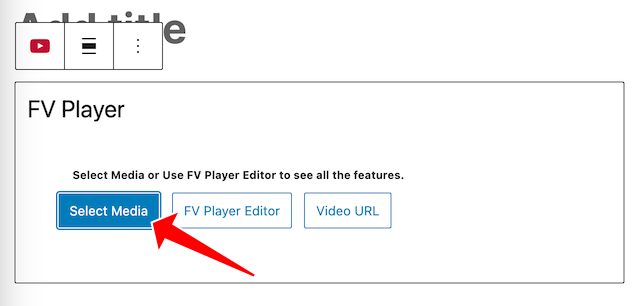
2. Click the FV Player button.
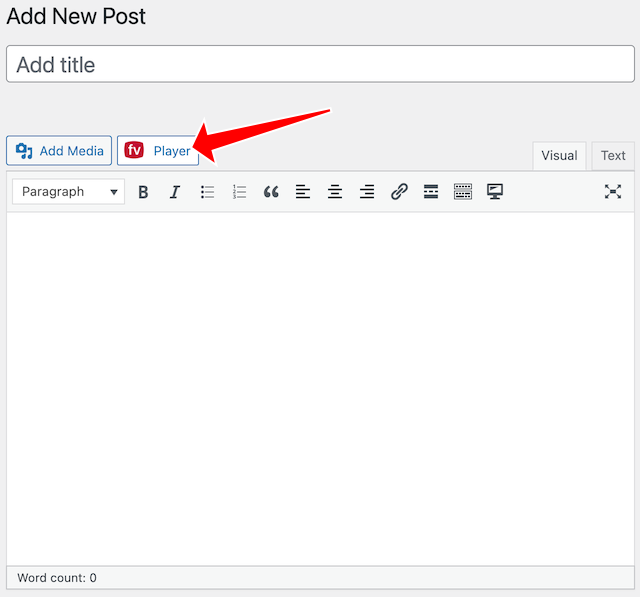
3. A popup dialog box will appear. You can paste in the video URL from the server where it’s stored, or you can click the button to pick the video from your WordPress Media Library.
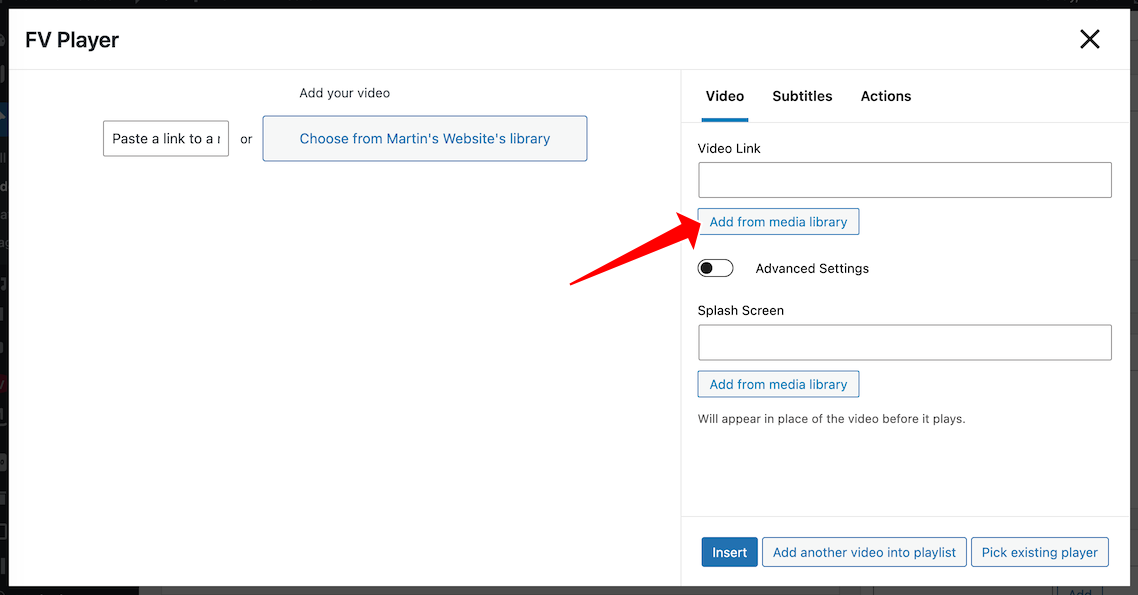
4. The WordPress Media Library loads and lets you pick your media. If you already integrated your FV Player with Coconut or AWS, you will see their tabs too.
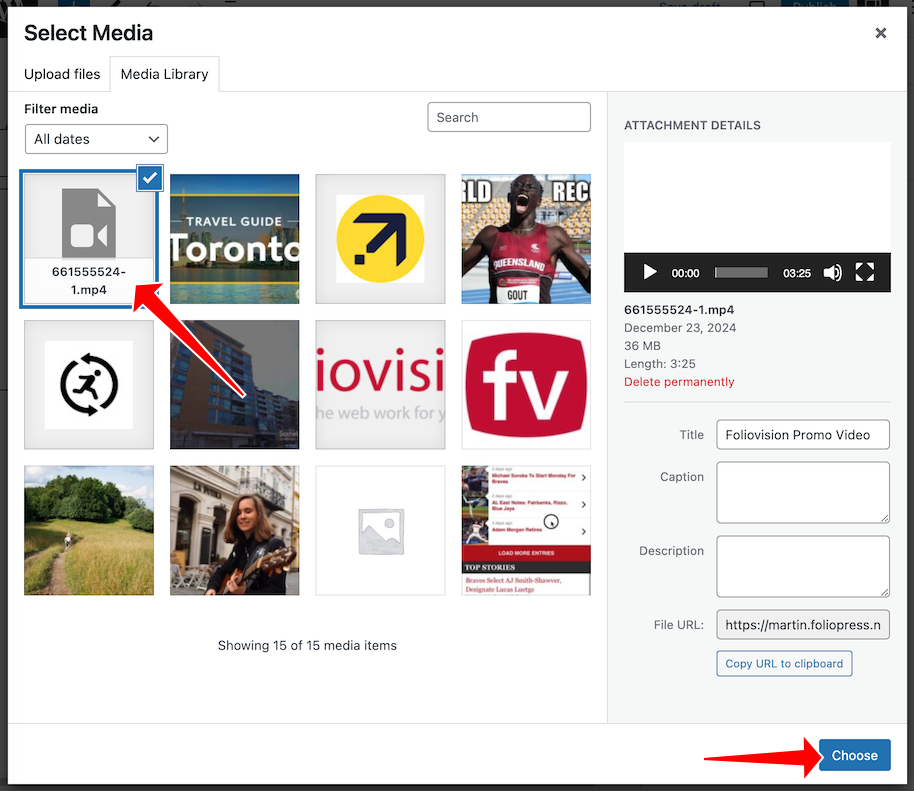
5. You will be directed back to the video editor. Height and width will be filled-in automatically. You can use a similar function to pick the Splash Image.
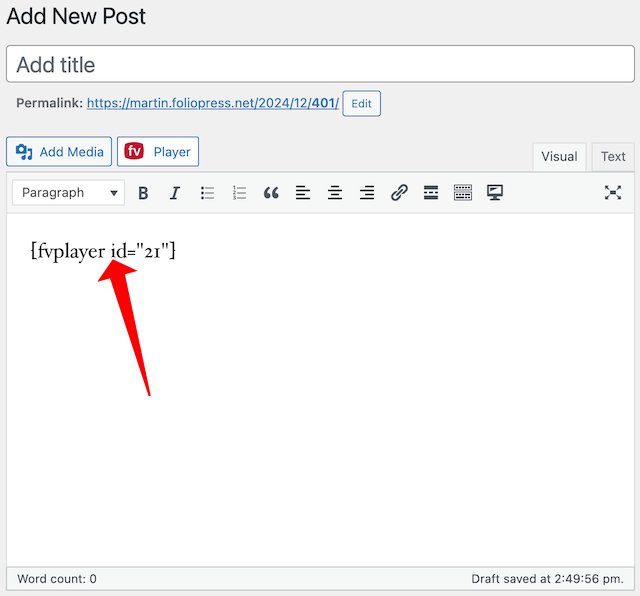
6. To edit the existing shortcode, just click anywhere on it and then click the FV Player button. The attributes will be loaded in the shortcode editor and you will be able to edit them easily.
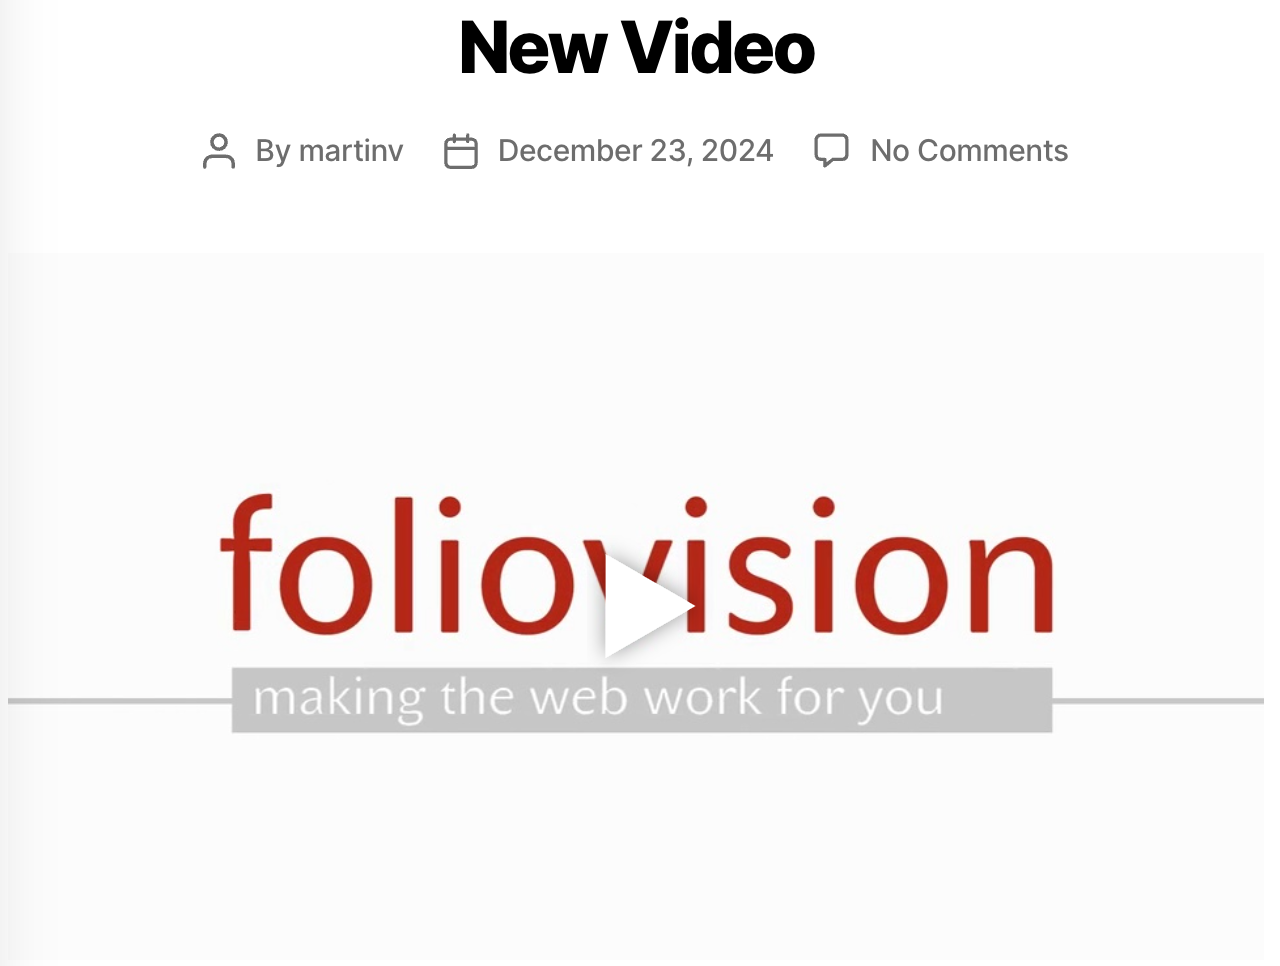
7. When you save the page and open it, you will see the video:
Inserting Video Using the Gutenberg Editor
1. Open your post and click on Add block. Search for FV Player and pick the FV Player block.
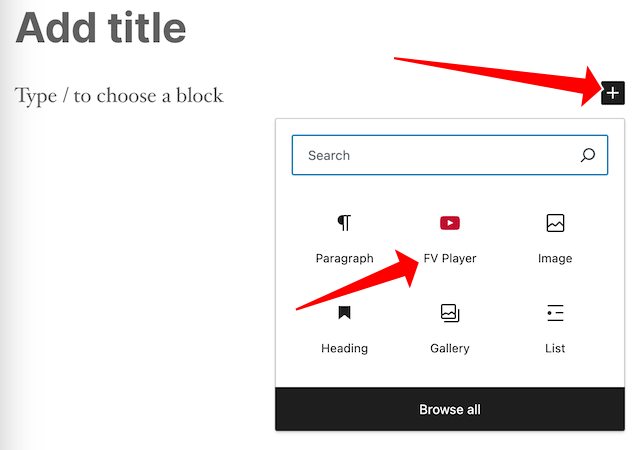
2. FV Player block will appear, click to Select Media.
3. The WordPress Media Library loads and lets you pick your media. If you already integrated your FV Player with Coconut or AWS, you will see their tabs too.
4. Once you pick your media you will get a working player right in your Gutenberg editor.
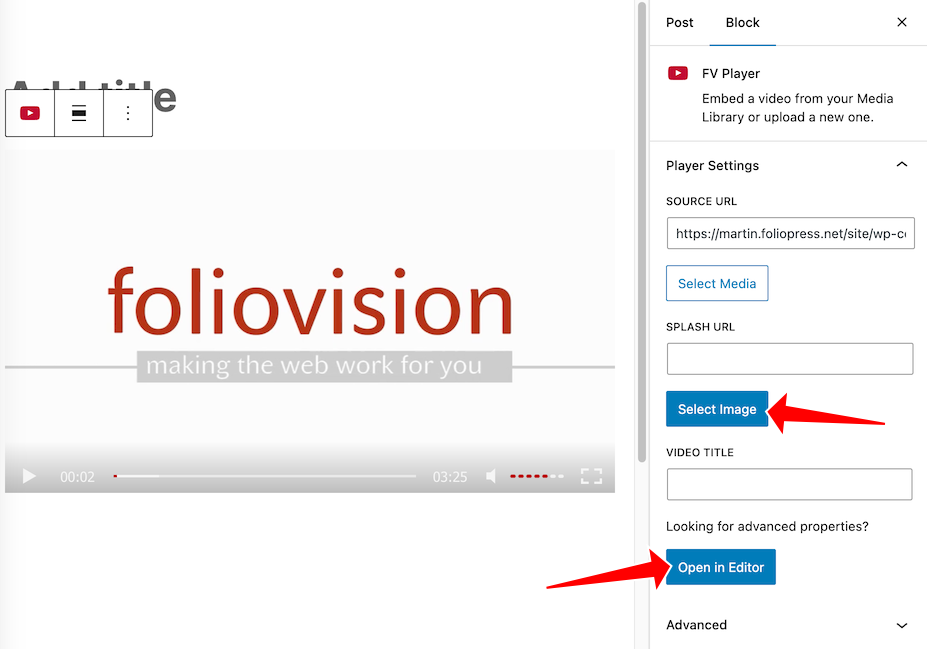
You can use the sidebar to add splash image or click “Open in Editor” to edit all the FV Player properties.
Note: FV Player block works the same way in Elementor and other block editors.
Make FV Player Work With Other Page Builders
FV Player offers special integrations with Elementor and LearnDash You can find out more in our guides.
Each page builder, or LMS, is a bit different and you might find that FV Player doesn’t work with your choice out of the box. That might be because of special JavaScript integrations. If you are having problems with FV Player not displaying properly, or you are getting Admin JavaScript errors, there’s an easy fix:
Go to Settings->FV Player->Integrations/Compatibility->Load FV Flowplayer JS everywhere:
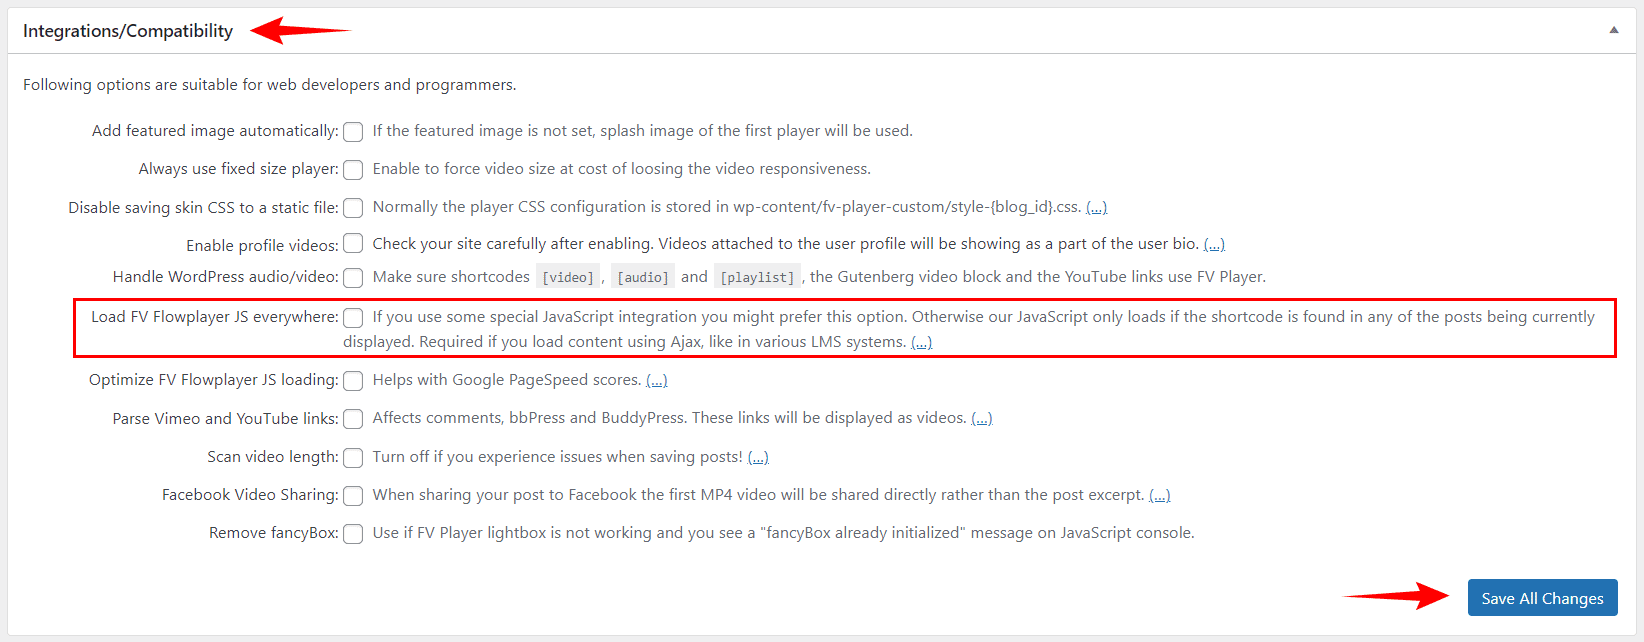
Note: If this does not help, the issue might be elsewhere. Try these troubleshooting steps or contact us.
FV Player is also sure to work well with Divi, Beaver Builder, Cornerstone, WPBakery and Oxygen.
Sitewide FV Player Defaults
Logo
To set up your logo (only in FV Player Pro), go to Settings -> FV Player Pro -> Setup tab -> Sitewide FV Player Defaults. This is the place where you can adjust general settings of the player that will be used for all the videos.

Adding and adjusting a custom logo in FV Player Pro
Here you can upload the image file of your logo and choose a position from the drop-down list on the right. We recommend using the transparent PNG format with width below 100 pixels. If you do not enter any image, no logo will be displayed.
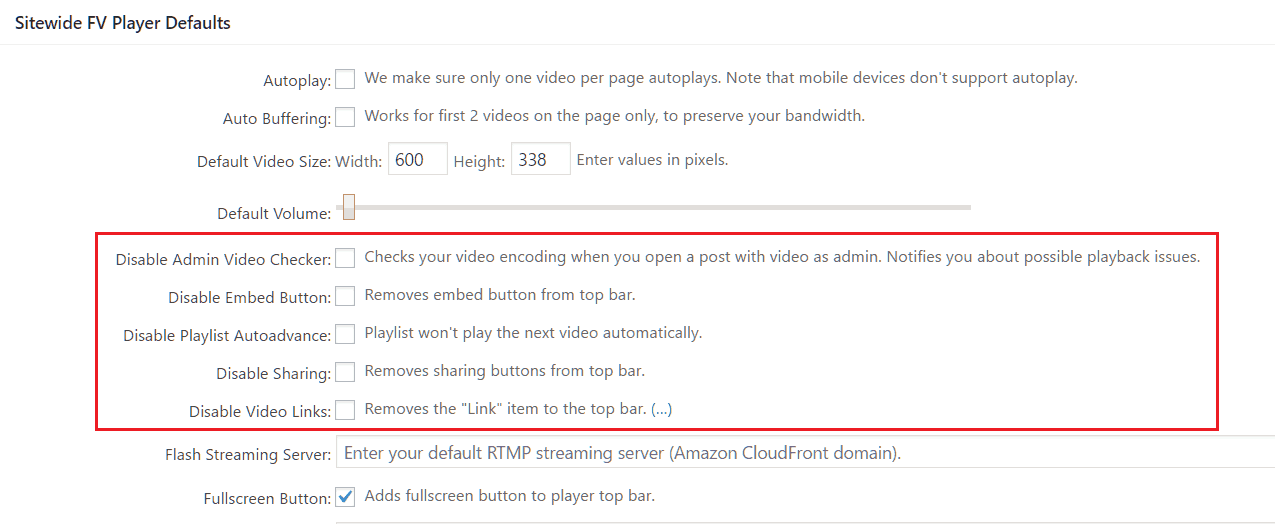
Disabling the Default Settings
In this part of the FV Player settings, you can disable some of the options that are turned on by default. These are:
- Disable Admin Video Checker – learn more in the guide How to Use the Built-in Video Checker
- Disable Embed Button – learn more in the guide Using the Iframe Embedding
- Disable Playlist Auto advance – learn more in the guide How to Create Playlists
- Disable Sharing – learn more in the guide Managing Social Sharing Buttons
- Disable Video Links – learn more in the guide Creating Video Links in FV Player

FV Player options that are turned on by default
Default Video Size
In the Sitewide FV Player Defaults, you can also set the default player size. Just go to the option Default Video Size and fill the width and height values (in pixels). This will be the default setting for all your new videos, unless you change the player dimensions for a video individually in the shortcode editor.
Default Splash Image
As mentioned above, you can set a splash image in the shortcode editor for each video individually. There is also an option in the settings that allows you to set a default splash image for all your videos, unless you change it manually. You can find it in Sitewide FV Player Defaults under the name Splash Image. Here you can upload the image in the same way, as you would upload a logo.
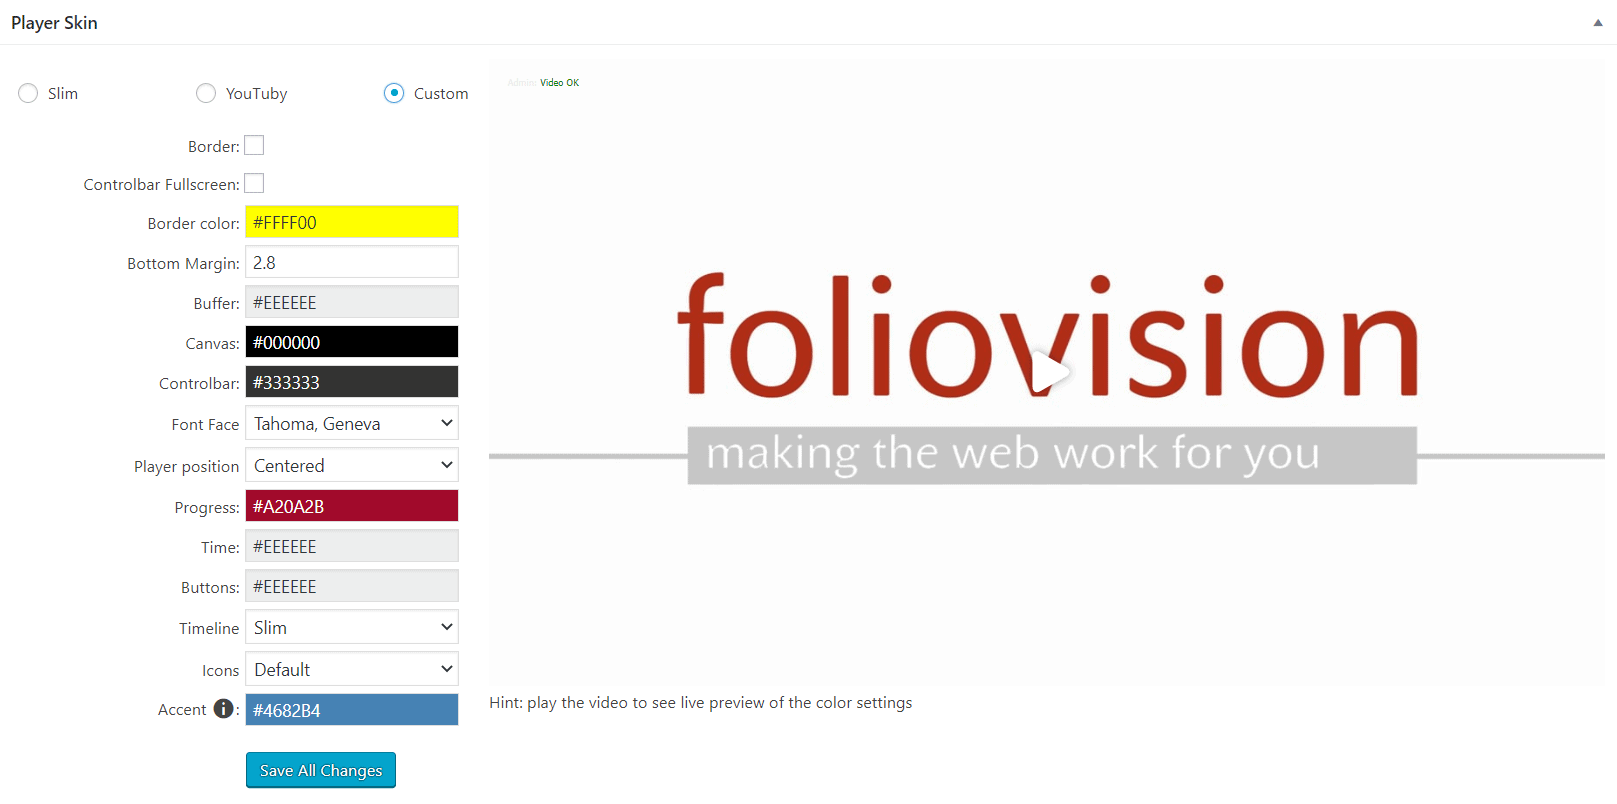
Editing the FV Player Skin
Player Skin is a part of FV Player settings, where you can customize the visual side of the player. You can find it under the Skin tab in FV Player settings. As you can see in the picture below, you can change the color of various parts of the interface along with the font type, size, and other things.
There is an example video on the right side, so you can see the changes immediately after clicking Save All Changes. Read more in the detailed guide Customizing FV Player Skin.

FV Player skin settings
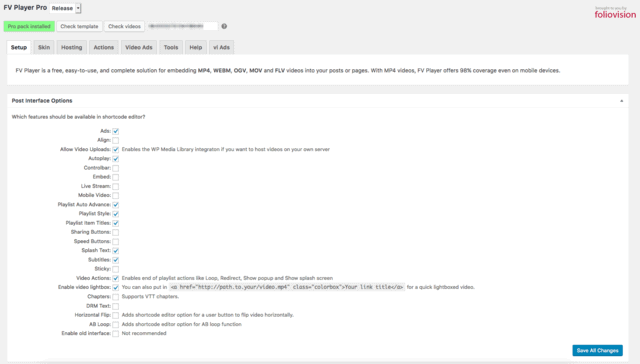
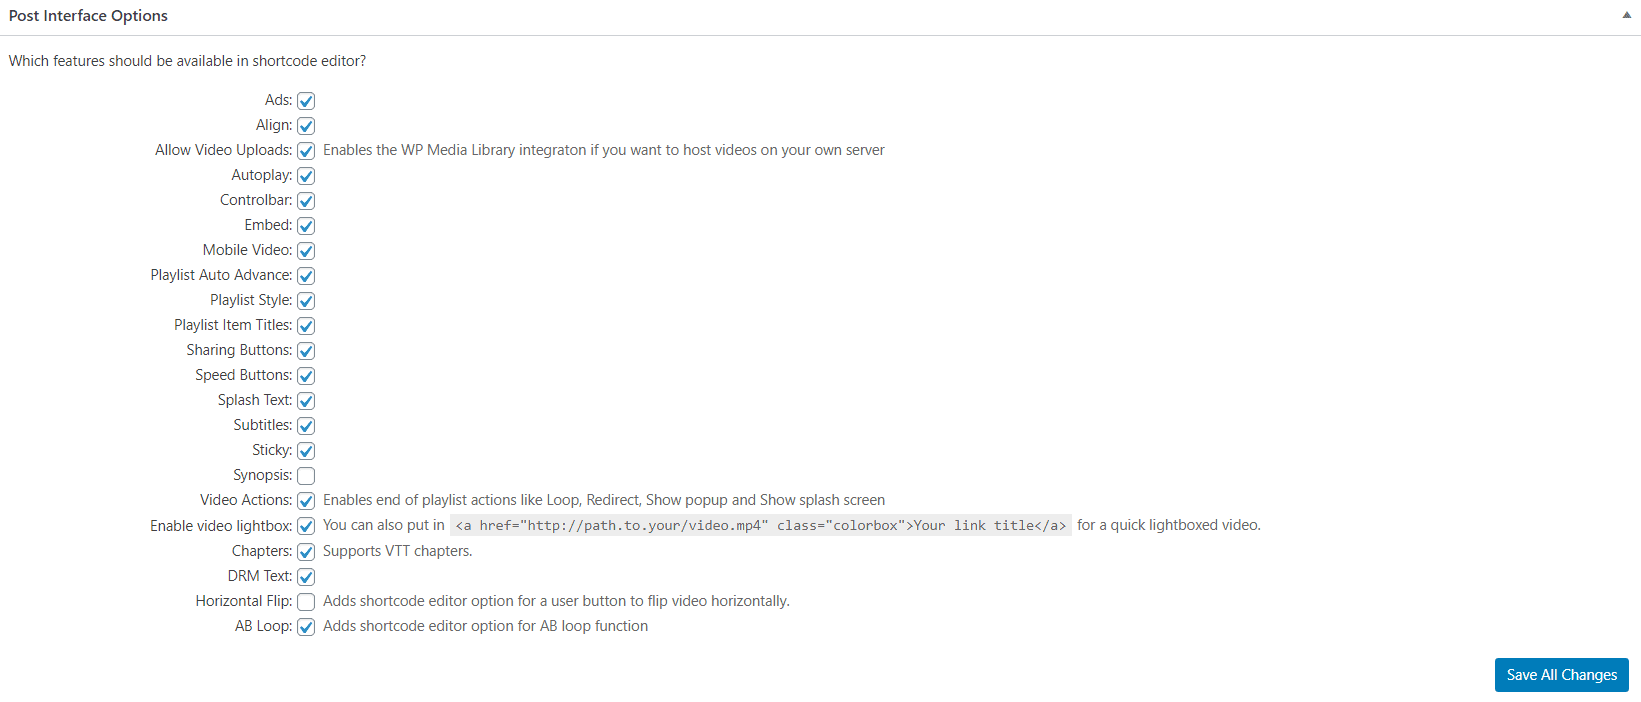
Customizing the Shortcode Editor Functions
Rather than cluttering the shortcode editor with options you don’t use, you can choose to enable only the options which are relevant to your site. The less of these options you select, the simpler the user interface will be to use. Just go to the Post Interface Options in FV Player settings. More detailed information can be found in the guide Post Interface Options.

FV Player’s Post Interface Options
Other Setting Boxes
There are additional setting boxes in the Setup and other tabs. Here are the settings for the free player.
- Amazon S3 Protected Content (more in the guide Serving Private Videos with Amazon S3)
- Ads (more in the guide Pop-up Advertising Options with FV Player)
- Integrations
- Quality Switching (more in the guide Setting Up Video Quality Switching)
If you’ve purchased the Pro license you will have these additional settings boxes and features:
- Amazon CloudFront (more in the guide Serving Private Videos via CloudFront)
- Vimeo (more in the guide How to Use Vimeo Plus/Pro)
- YouTube (more in the guide Using YouTube with FV Player)
You can find all the guides in our Documentation. We always announce new features on our blog, and if you have any questions or problems with our player, we will be happy give you free help in our Support Forums.
Manual Editing
Type in the [fvplayer] shortcode and add the src parameter. Use the full video URL. You can also add the splash parameter with the full path to the splash image.
[fvplayer src="http://site.com/videos/video.mp4" splash="http://site.com/videos/video.jpg" width="640" height="360"]
Additional Features
You can use several more features if you add the following pieces to the shortcode:
- Autoplay for single videos:
autoplay=true
- Redirect when a video stops playing:
redirect="http://example.com"
- Show or hide the controlbar – enter one of these or omit for default behavior:
-
controlbar="yes" - visible while playing
-
controlbar="no" - no controls visible
- Show the splash image also when the video finishes playing:
splashend=show
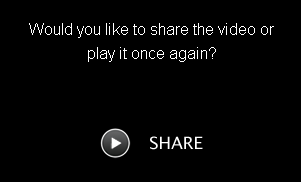
- Example of the popup at the end of the video:
popup="Would you like to share the video or play it once again?"

Click play or share the video at the end
You can see the full list of available shortcode parameters in the guide List of Shortcode Parameters.
What Formats to Choose
You can enjoy secure and trouble-free HLS video playback, by uploding the videos straight to WordPress Media Library via FV Player Coconut, or our integrations with Bunny Stream and Amazon Web Services.
If you’d like to do things on your own, you’ll be happy to know that FV Player supports most well-known video formats.This topic is covered in more detail in the Video Encoding for HTML 5 guide.
However, the most commonly supported formats we recommend using are:
- You can start by using a regular MP4 file.WEBM format is also supported.
- FV Player supports the two most widely used and supported streaming protocols: HLS (HTTP Live Streaming) and MPEG-DASH. Use the HLS protocol in M3U8 format, and MPEG-DASH in MPD. Check the guide Using HLS With FV Player if you want to find out more about HLS. Of course, FV Player also supports HTTPS Live Streaming.
Note: if you want the fastest possible delivery across the globe, you might consider using a Content Delivery Network (CDN). FV Player Pro integrates with several CDNs, but works great with most other CDNs too.