List of contents:
- Obtaining the AWS Access Keys
- Creating a New Bucket
- Uploading Videos to the Bucket
- Making Videos Public
- Posting S3 Videos In FV Player
- Troubleshooting with Video Checker
A simple guide to editing metadata of mp4 videos in Amazon S3 which do not have the proper MIME types:
Obtaining the AWS Access Keys
- First, log in to your Amazon AWS account at https://console.aws.amazon.com, make sure you are on the same account where your Amazon S3 buckets are, and click IAM (Identity & Access Management) in the Services menu.
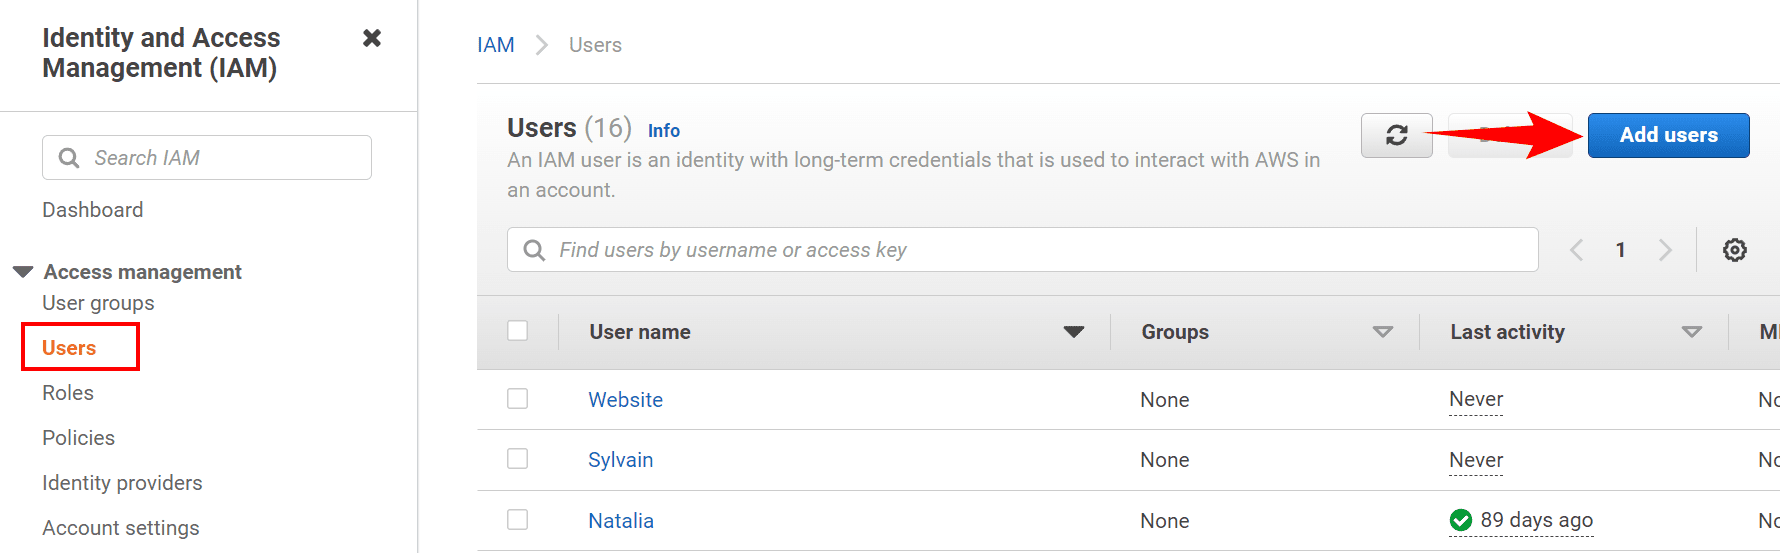
- Once the IAM screen opens, go to Users > Add users:
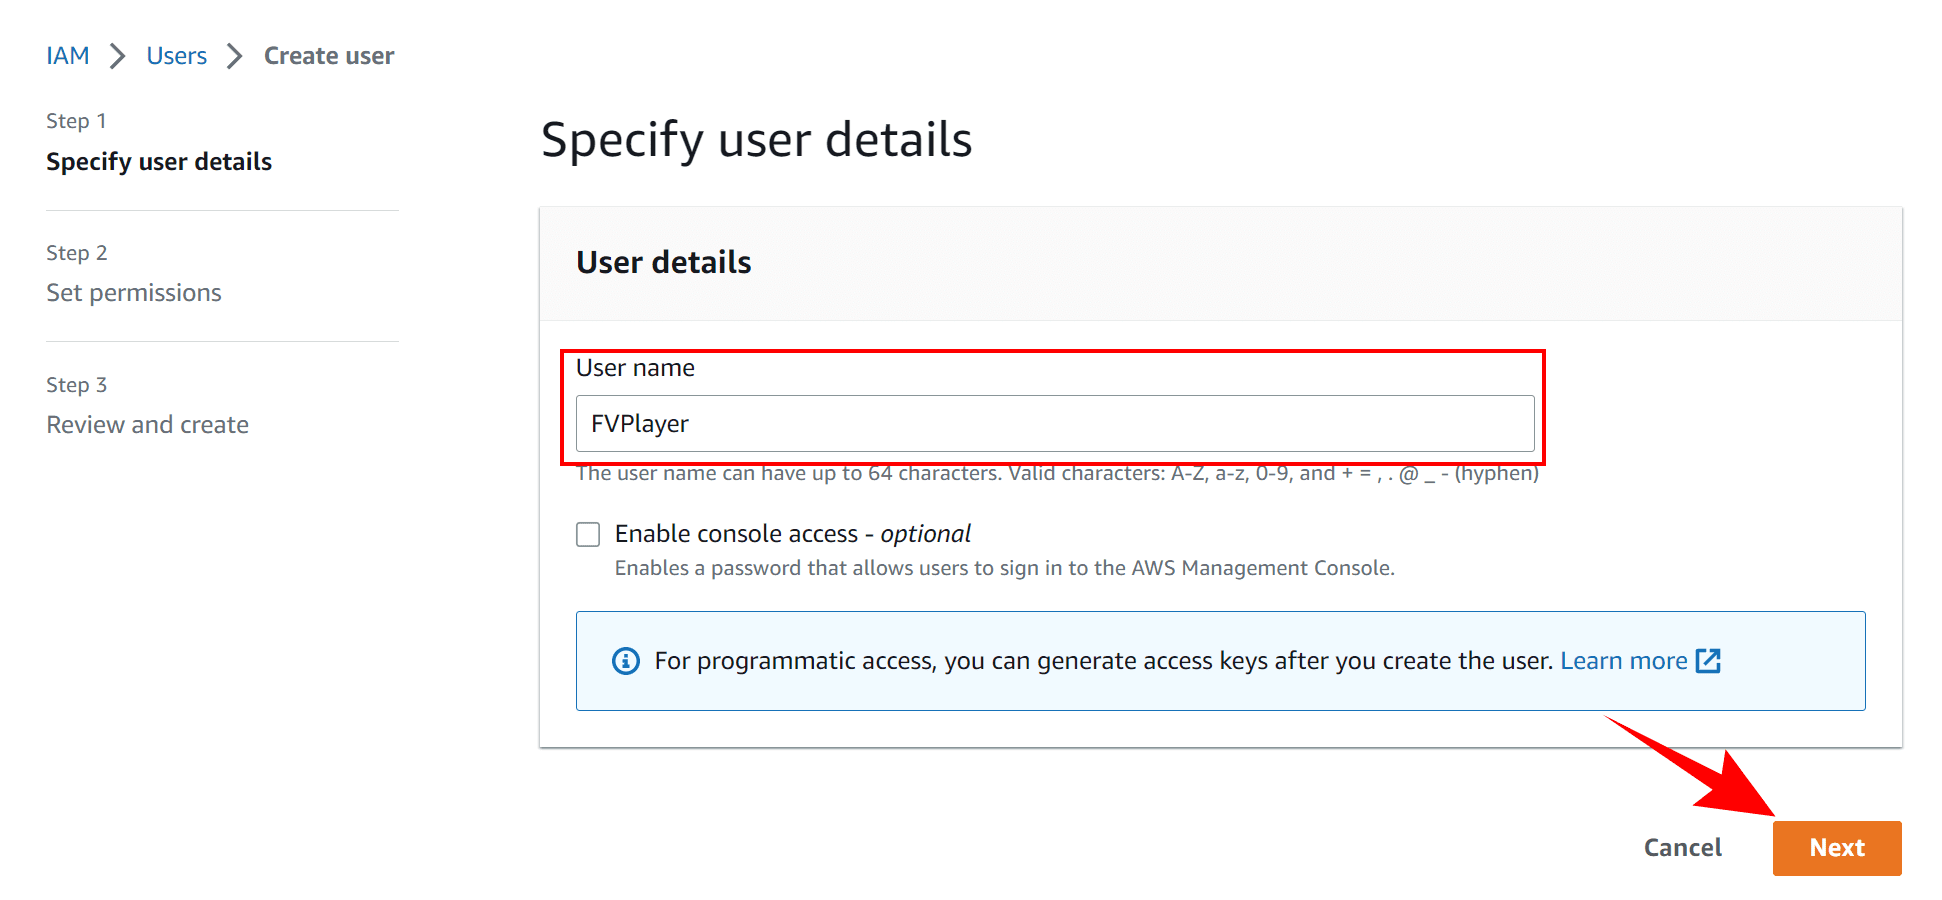
- Enter your IAM user name. Then click Next.
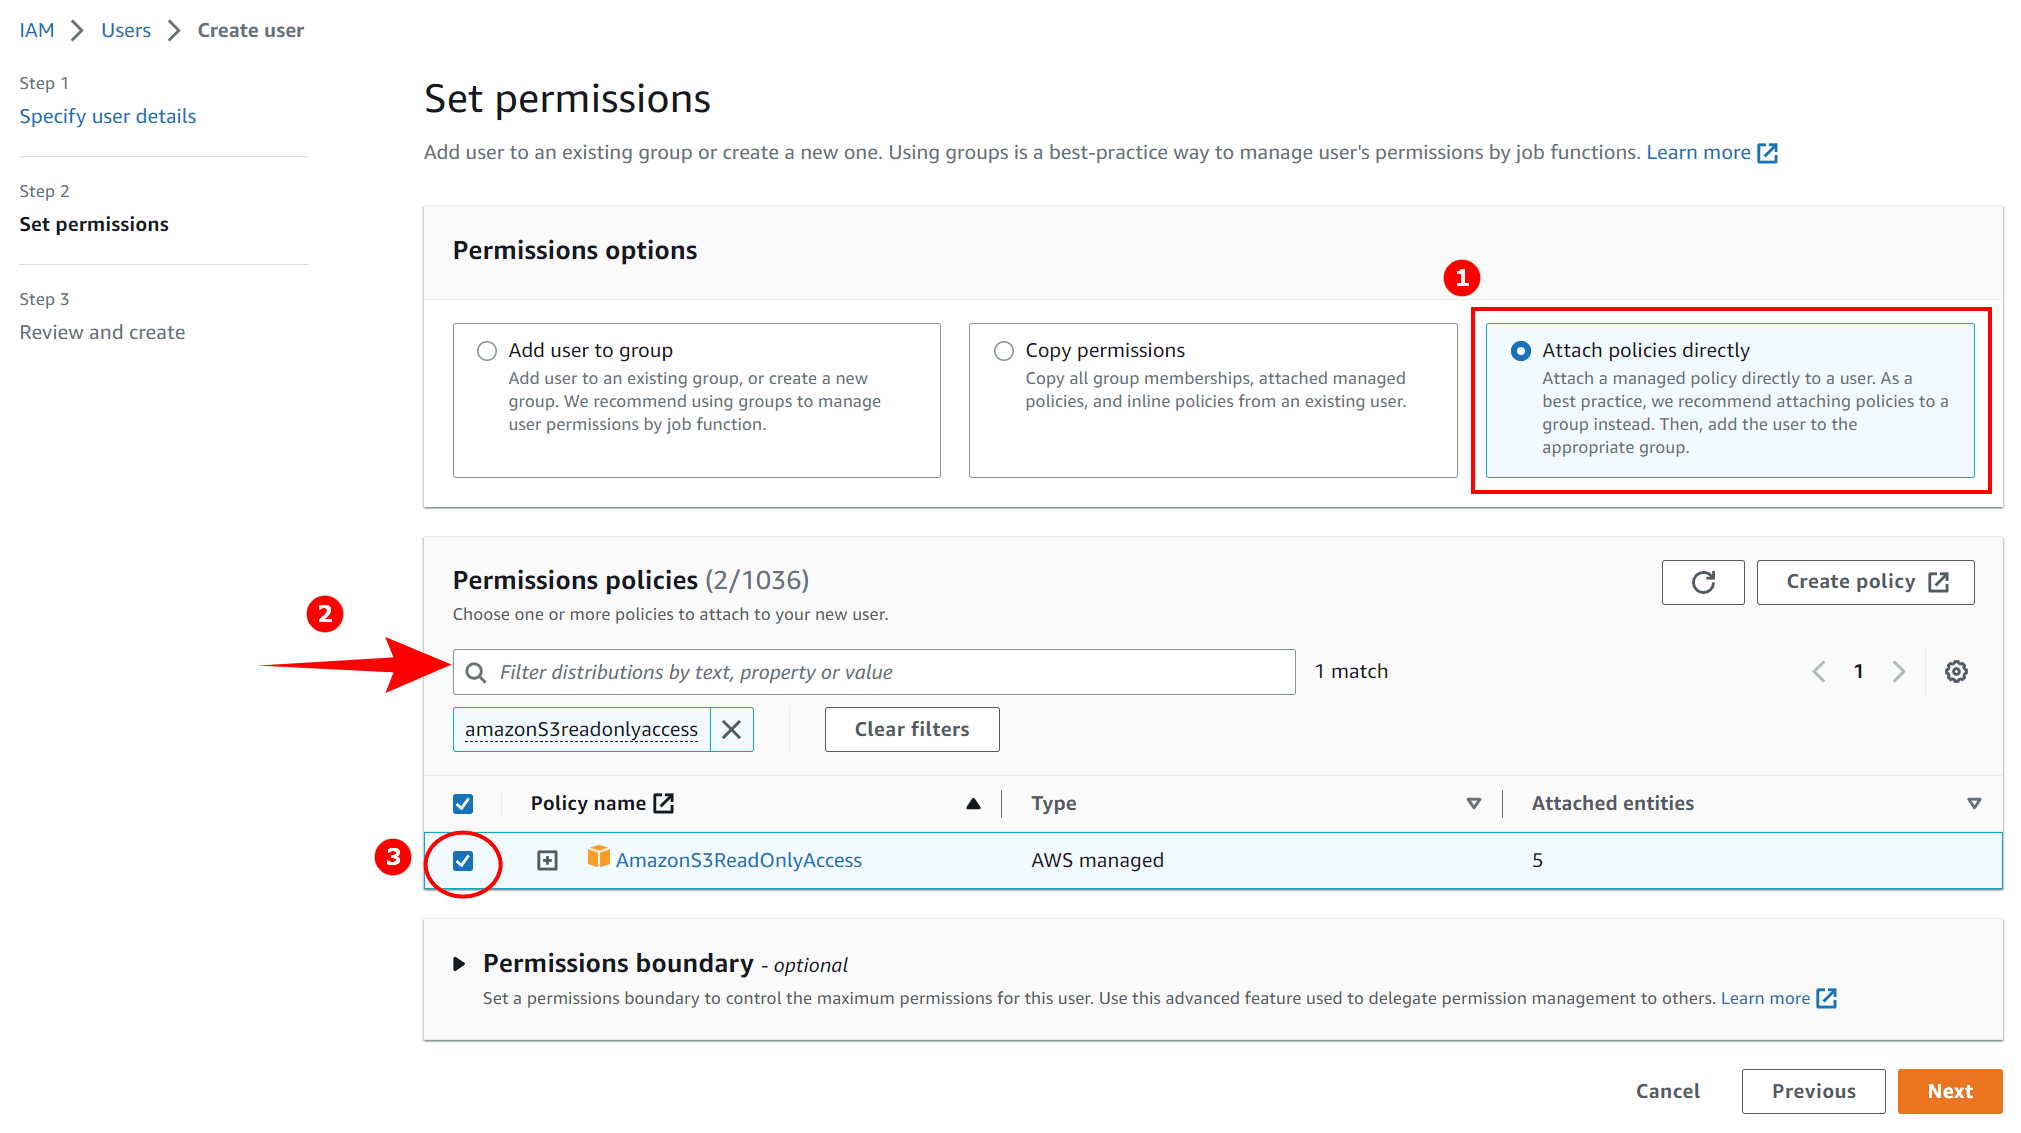
- Now you need to set the permissions for the new user. Click on the “Attach existing policies directly” icon.
- There is over 58 pages of possible permissions. Use the search bar to look for AmazonS3ReadOnlyAccess . Once there, don’t forget to add it by checking the square.
- If you’re going to be using CloudFront too, do the same for CloudFrontReadOnlyAccess. Search it up and don’t forget to add it.
- After adding the needed permissions, click next.
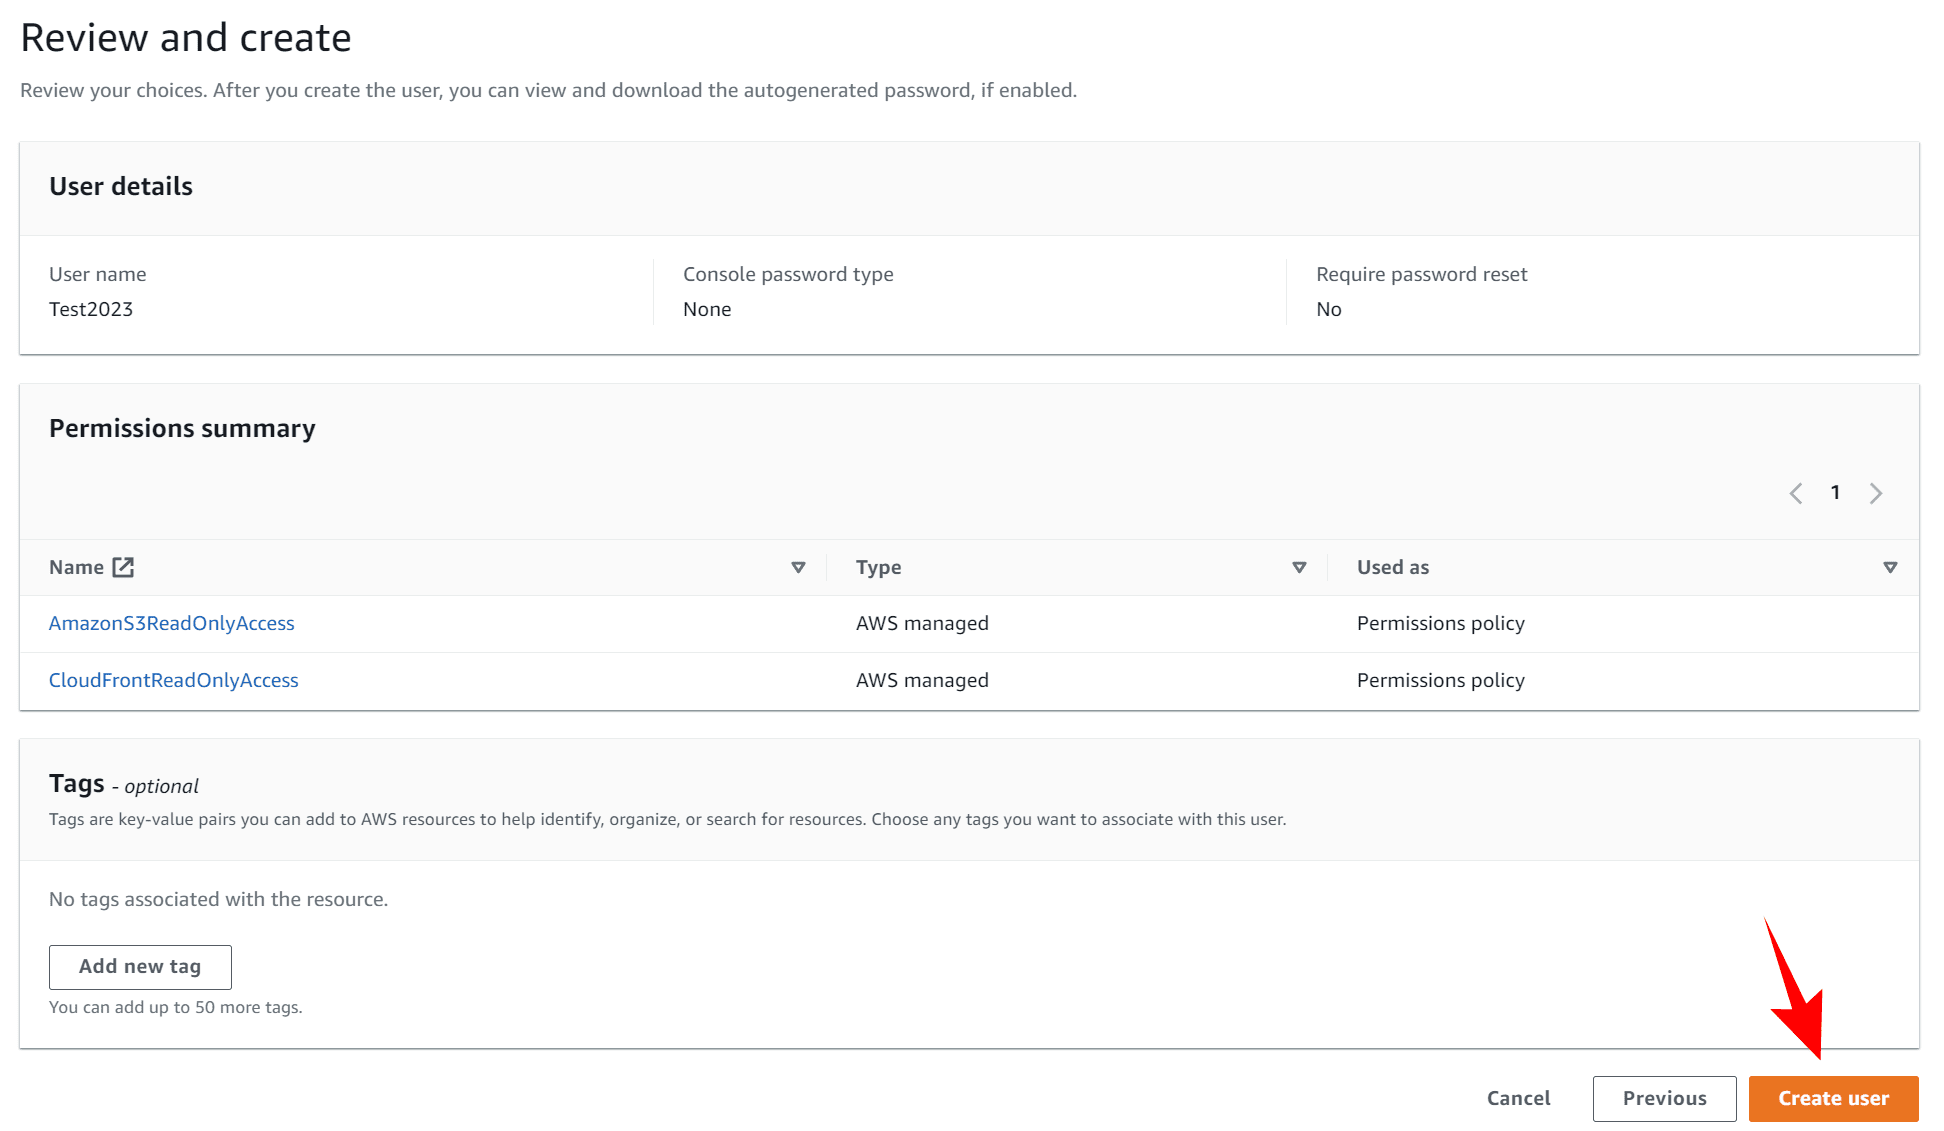
- The next screen is for review and adding tags. Adding tags is optional, you can add them if you wish. After you’re done reviewing, click Create User.
- Now it is time to set up the Access Keys. Find the user you’ve just created and click on it.
- Navigate to the Security Credentials tab.
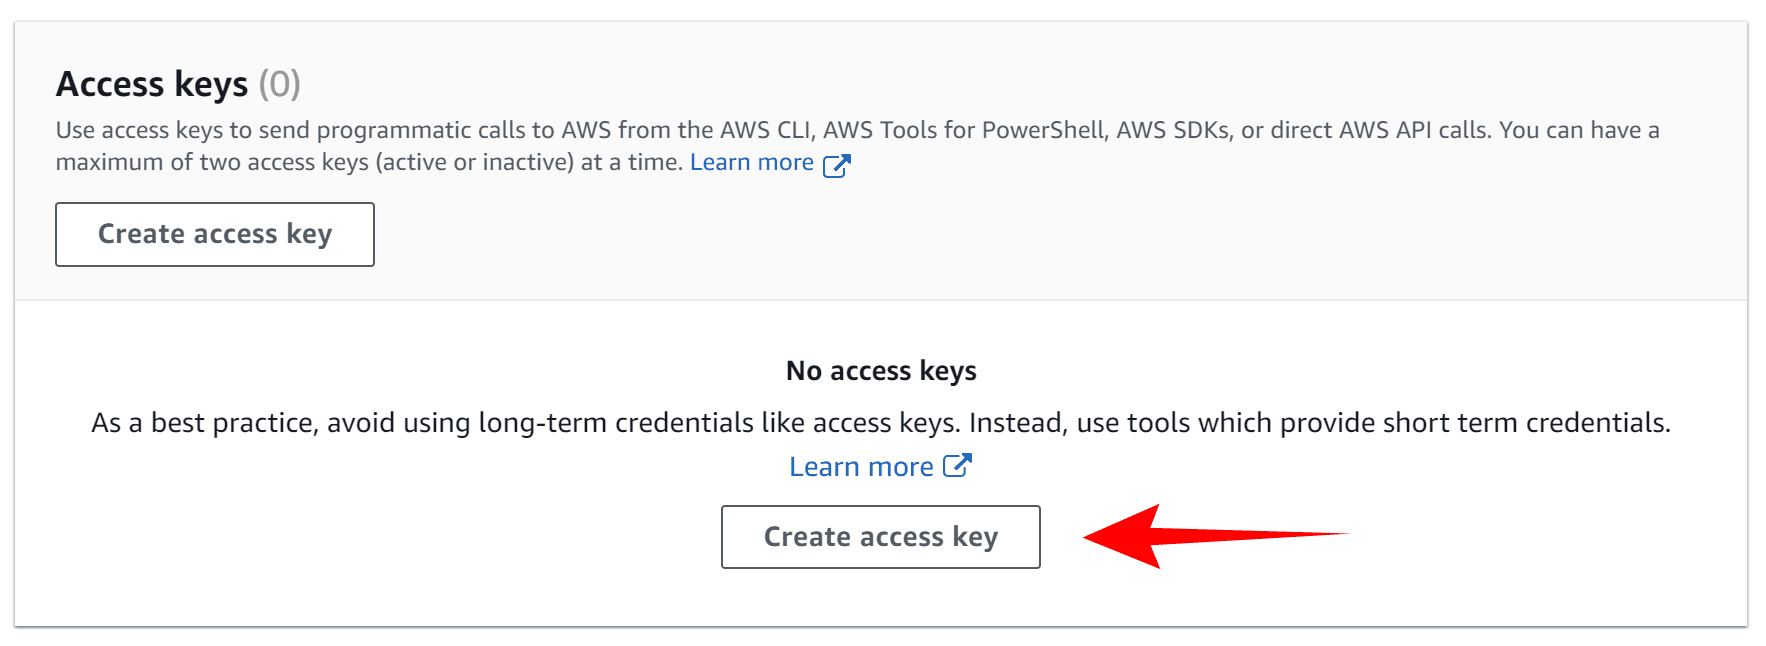
- Scroll down to Access Keys and click Create Access Keys.

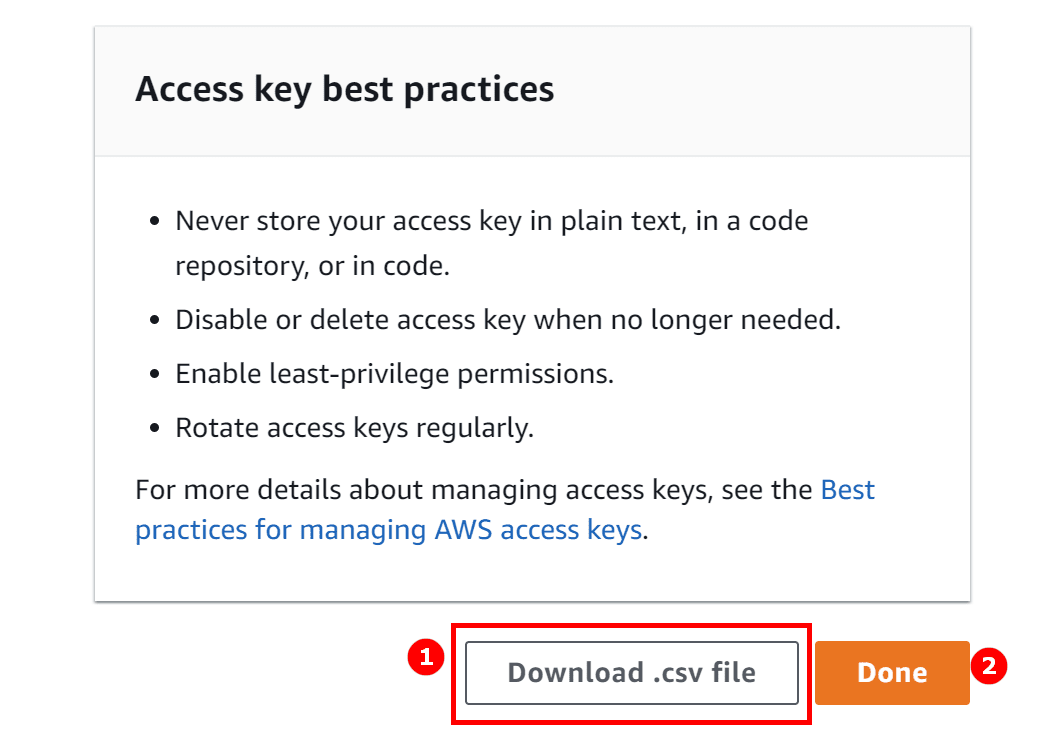
Access Key tab in Security Credentials - Remember that once you leave this screen, you won’t be able to get to the Secret access key again, so it’s important to save it now. Click Download .csv.
- Now copy the Access and Secret access keys and paste them into FV Player’s settings – namely to Settings > FV Player > Hosting tab > Amazon S3 Protected Content.
- Paste the copied access keys into the corresponding fields of the Amazon S3 Protected Content section and click Save All Changes.


Pasting access keys into FV Player settings
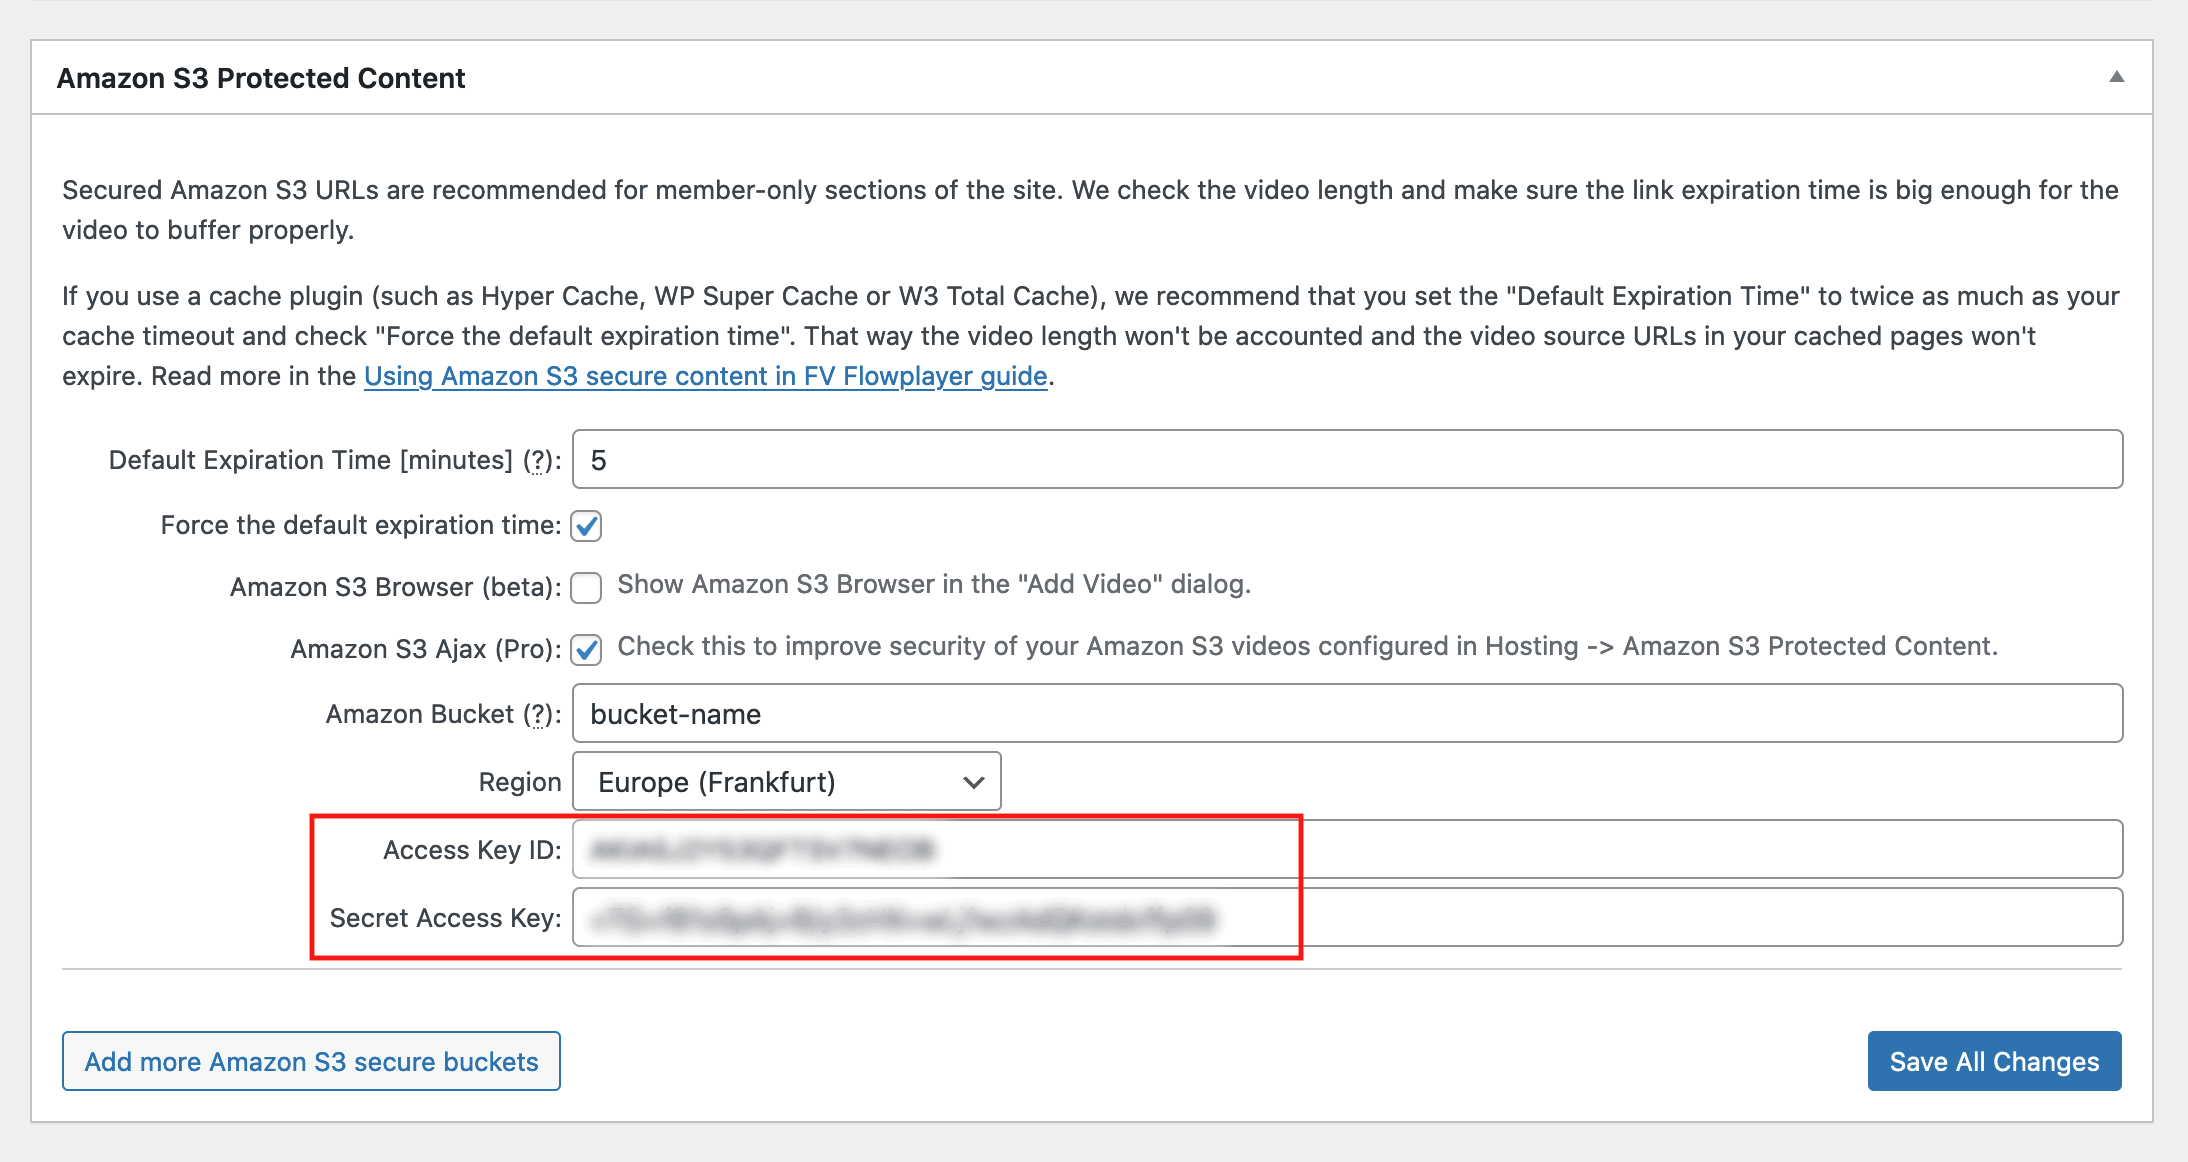
You will also need an Amazon bucket name and the location of your bucket, which we will create in the next section of this guide.
That’s it. Now the access keys can be used to play private videos from your Amazon S3 account.
Creating a New Bucket
- First, log in to your Amazon AWS account. Then go to Services > Storage and select S3.
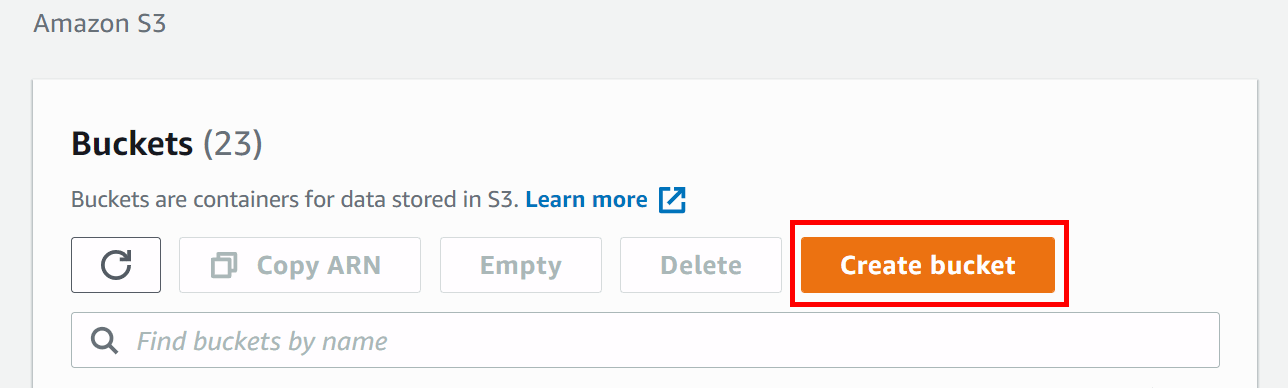
- Now you can create a new bucket by clicking on the Create bucket button
-
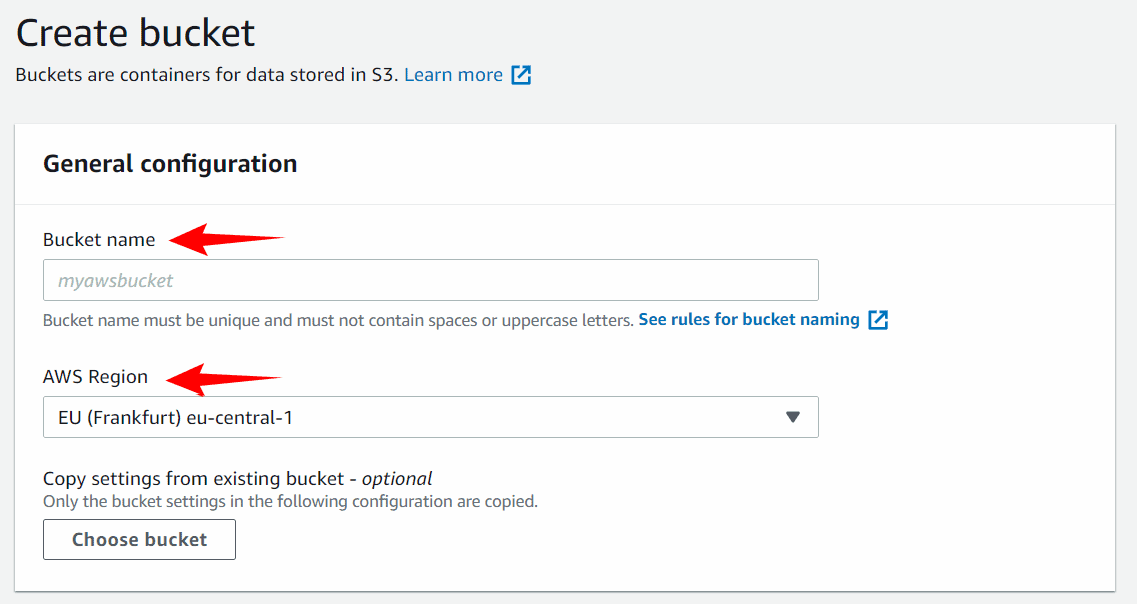
Define your unique bucket name and select the Region, based on your location or the location nearest to you. Then click Next.

-
The second step is setting the access permissions. The most important settings here are the Public access settings. (you can leave the rest in the default setting)
That will allow you to choose if you do not want to grant public read access to your bucket (default) and protect the content, or, if you want to make it openly accessible.
This guide is aimed at private and secure video. Therefore, the next steps will show you how to make the video inaccessible to anyone but your account.
-
The next step is setting the properties of the bucket, namely Versioning, Logging, Tags and default encryption. These are not necessary to set right now, so you can skip to the next step. You can always set these later.
-
Last step will show you the review of your previous settings. If all is okay, you can click on the Create bucket button.

Creating an Amazon S3 bucket
To make videos private, simply pick ACLs disabled in Object Ownership:

Thanks to that, access is specified by policies and you can ignore the Block Public Access settings.
If you want to grant public read access to your bucket, you will find out more in the Making Videos Public part of this guide.
Bucket Content Protection in FV Player Settings
-
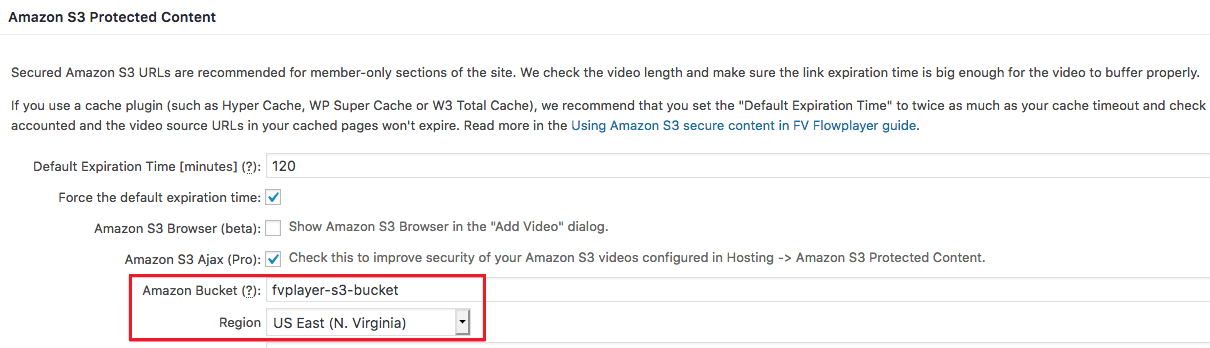
If you are interested in file protection, also enter the bucket name and its location into Amazon Bucket and Region fields at Settings > FV Player > Hosting tab > Amazon S3 Protected Content. Obtaining the access keys is described in the previous part of this guide.

Bucket name and region in FV Player’s settings -
Here you can also see the Default Expiration Time field. When you post your video, FV Player checks its length and makes sure the link expiration time is big enough for the video to be loaded into the buffer properly. If the check fails, the value of the Default Expiration Time field is taken into account. You can also force the time you set by turning on the Force the default expiration time option.
- If you use a WordPress caching plugin, Make sure you set the Default Expiration Time to twice as much as your cache timeout, and check Force the default expiration time checkbox. Otherwise the video source URL’s in the cached HTML will expire and the videos won’t be playable. This way the video duration won’t be used for calculation of expiry time.
- If you use the protected Amazon S3 videos only for your membership section, make sure the cache plugin is turned off for logged in users :
- If you use Hyper Cache, it already excludes logged in members from cache (read why we recommend Hyper Cache over other plugins)
- If you use WP Super Cache, turn on Settings > WP Super Cache > Advanced > Don’t cache pages for known users.
- If you use W3 Total Cache, make sure Performance > Page Cache > Don’t cache pages for logged in users is turned on
- If you use other plugins, you should be able to find this setting as well.
Uploading Videos to the Bucket
-
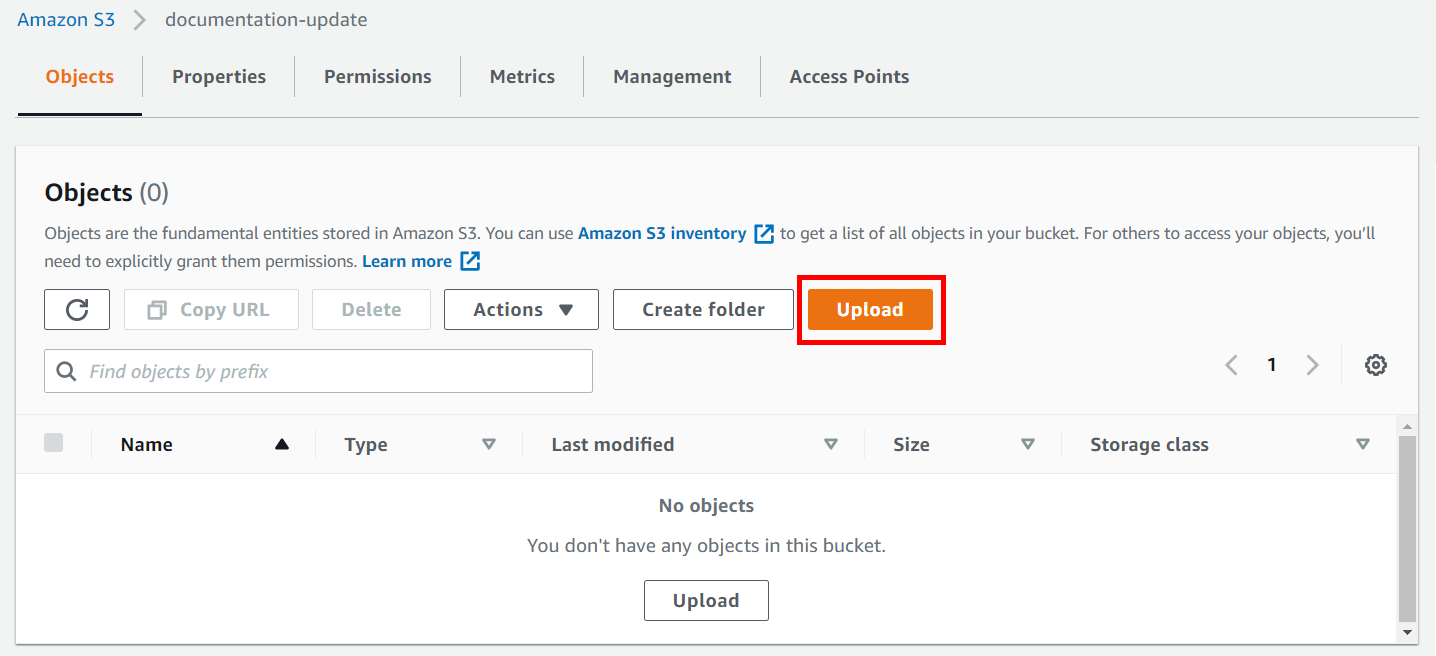
Open your bucket by clicking it. You will see there are no files yet. Click on the Upload button.

Uploading files to the bucket -
Click Add Files to pick the desired video files from your computer (or drag and drop them in the respective area). You can select as many files as you want and add them from different folders, just click Add Files again. Then click Next.

- Important note: The names of your files and folders shouldn’t contain spaces. S3 will convert the spaces to “+” symbols and links with these symbols may cause some trouble on certain mobile devices (for instance iOS devices). Use “-” instead of spaces, for example “my-test-video.mp4”, instead of “my test video.mp4”.
- Naming scheme: S3 recommends naming files using only letters, numbers, underscores and dashes. And folders using lowercase letters, numbers, dots and dashes (NO underscores front or back slashes). Improper naming will cause video issues and no video will be displayed.
- The next step is to set the permissions. Set the same option you have selected for your bucket, and proceed to the next step.
-
Now you can edit the Properties Setting up additional checksums and encryption is optional.
For Storage class, pick Standard. The classes are divided by frequency of access. Standard are frequently accessed data, which in this case means more than once or twice a month. If you’re unsure if all of the objects in this bucket will be frequently accessed, you can opt for the Intelligent-Tiering which will move files between tiers automatically.
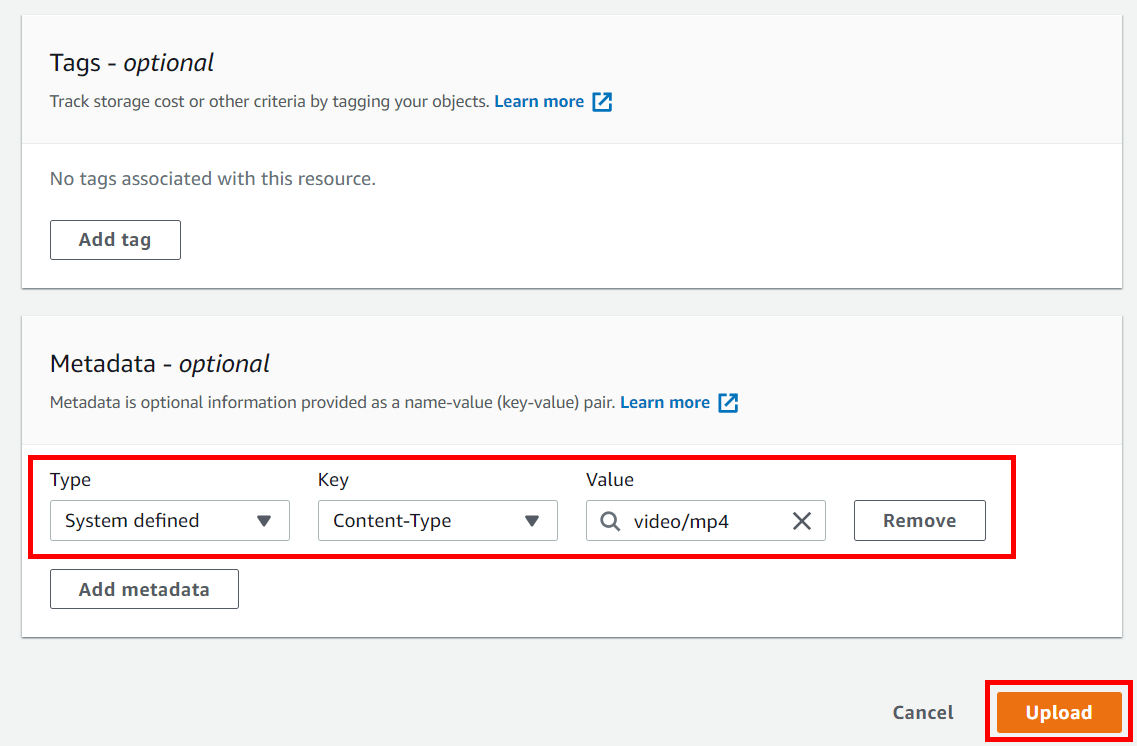
Lastly, there’s metadata (also known as Mime type). Setting correct metadata is a very important part of this process. It will ensure the maximum video compatibility. In Type field select System defined, and in Key select Content-Type. The value you write in the value field depends on what video format you are uploading. Here are the correct content type values for various file extensions. It should definitely not be application/octet-stream:
.mp4 video/mp4
.webm video/webm
.ogv video/ogg
.m4v video/x-m4v
After putting in the correct value, you can click on the Save button and then move on to the next step.

Setting bucket metadata -
If everything is okay, click the Upload button. You will be taken to an upload status page. You will be able to see the videos appearing in the bucket once they are uploaded.

Posting S3 Videos In FV Player
Now you can click on the video you want to post on your website with FV Player. Copy the Object URL.
![]()
You can now paste it into the Video field of the FV Player shortcode editor.
We recommend that you use the built-in S3 browser that lets you view all the videos in your bucket in your Media Library:
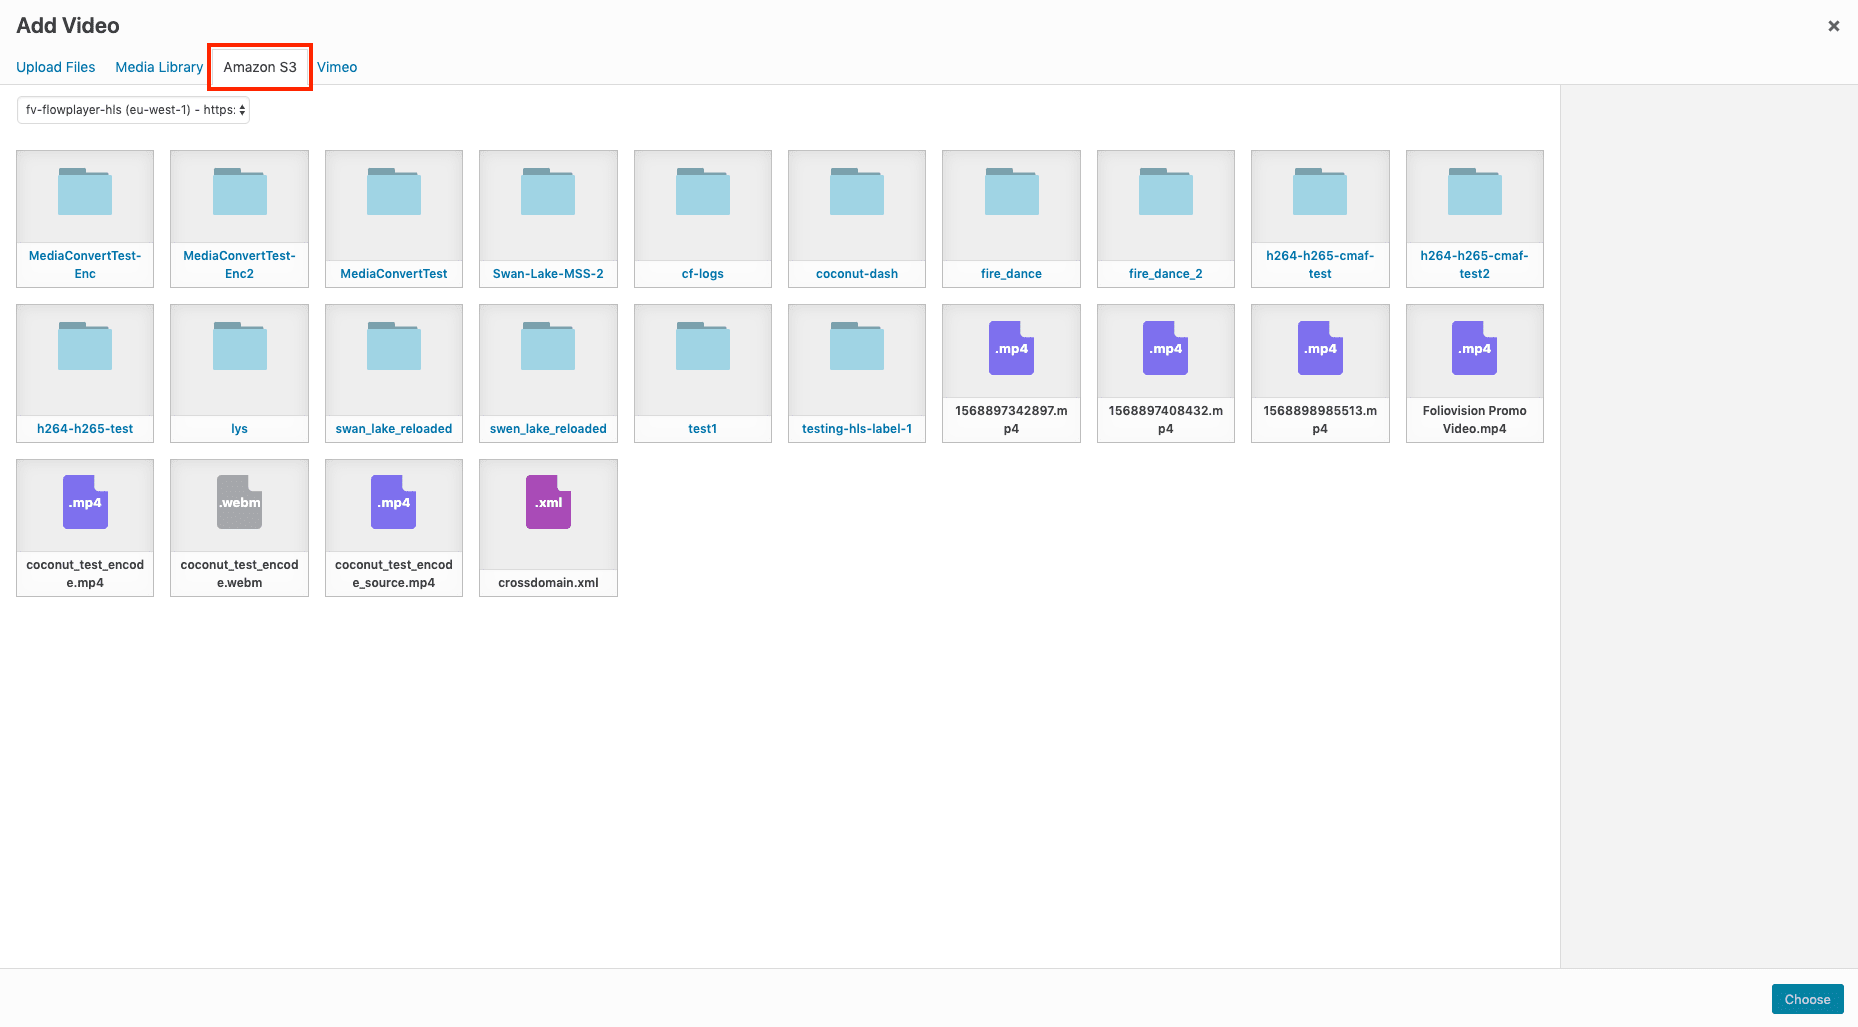
Learn how to enable and use the built-in S3 browser in this guide
.
Making Videos Public
This guide was aimed at making sure the videos are only accessible to your account. However, if you’d like to make it open to everyone (let others embed it), follow these steps:
The next steps will illustrate how to set the permissions for an individual video, but these settings can also be applied to the whole bucket.
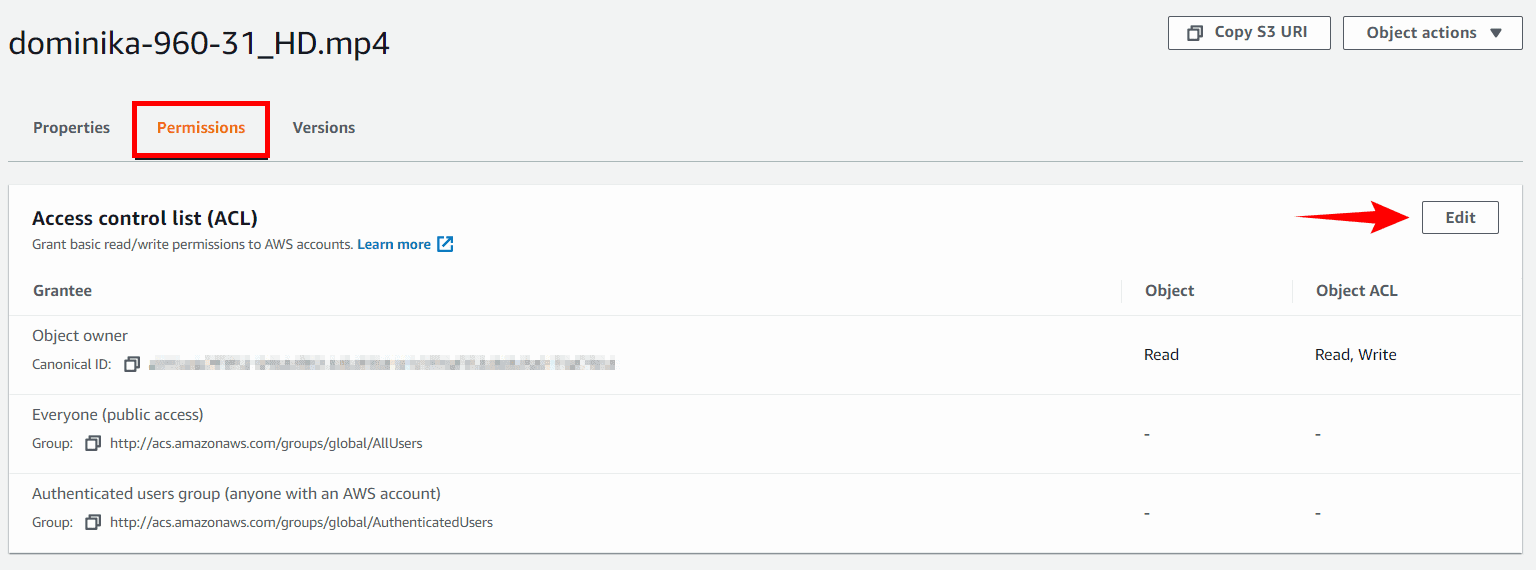
- To make the video accessible to everyone, click on the video in your bucket to access it’s settings, and select the Permissions tab, and click Edit.
-
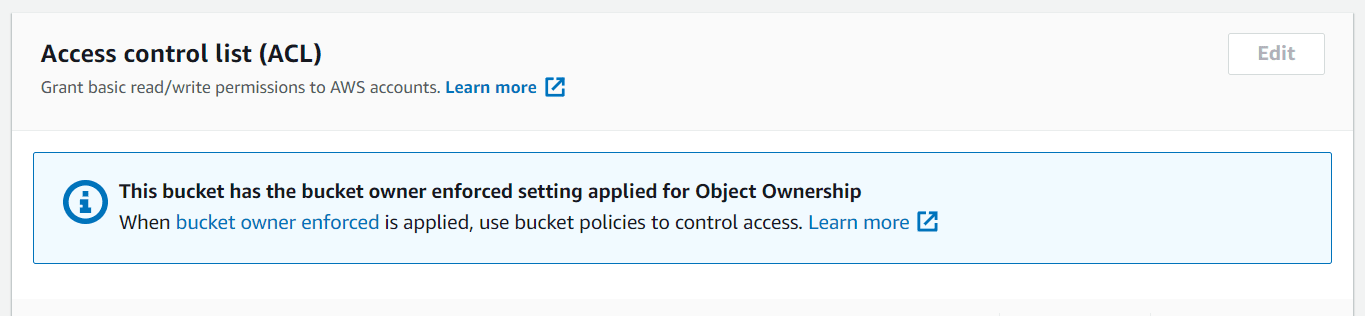
You may find that you have the bucket owner enforced or block public access settings turned on. AWS will warn you about this:

You can turn off both of these in the bucket’s permissions.
-
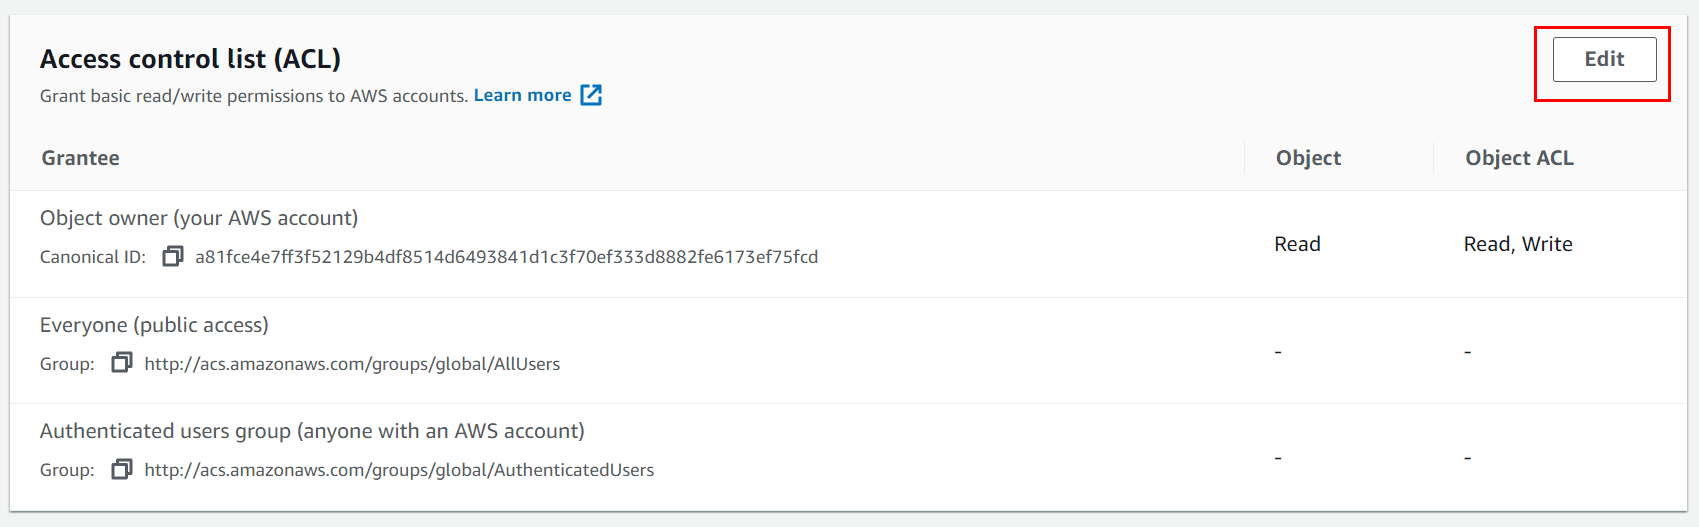
If/when the Access Control List is accessible to you, click Edit:
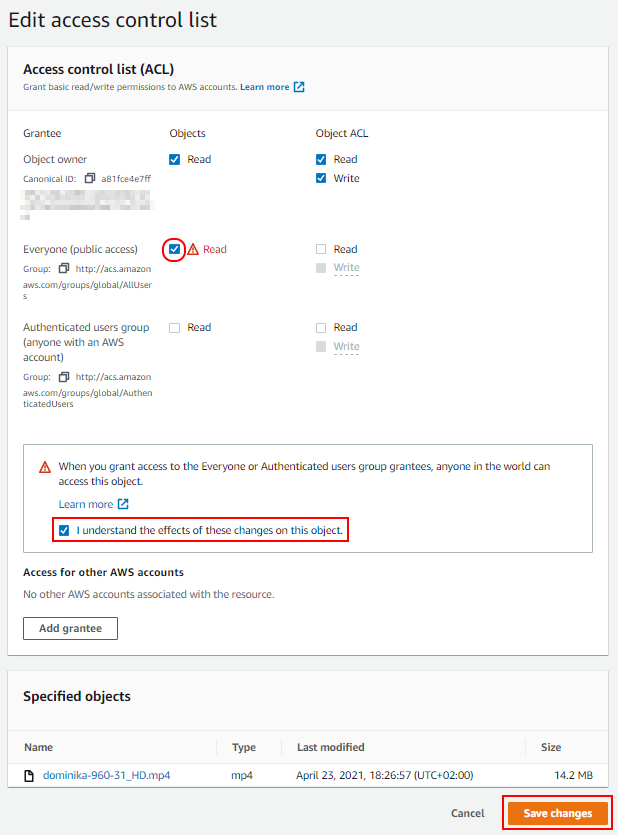
- Enable Read permission for Everyone. Confirm your choice by checking the warning box. Then click Save Changes.

Editing access permissions
Troubleshooting with Video Checker
The Video Checker is a built-in feature used for detecting issues with the source video. It generates an overview of the video’s encoding settings, and if there is something wrong, then it also shows suggestions on what should be changed. You can read more about this feature in the guide How to Use the Built-in Video Checker.
Here are a few tips that will help you resolving some common video playback issues:
-
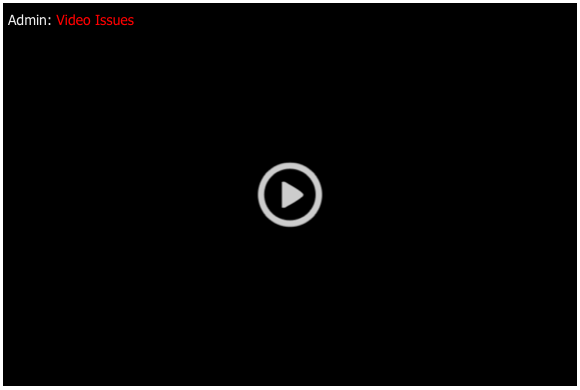
If the video doesn’t play, make sure you view it while you are logged in as admin. You will notice a message in the top left corner of the video. If it’s green and says “Video OK“, it means our video checker found no issues.
Note: If you don’t see any message then double check that Disable admin video checker is not selected at Settings > FV Player > Sitewide FV Player Defaults.

FV Player – Admin Video Checker -
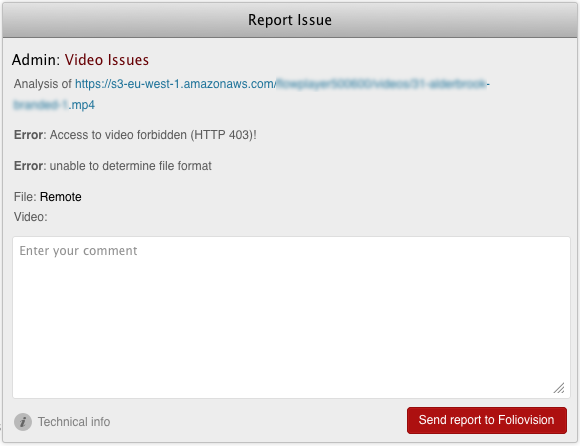
Clicking on the error message reveals the error details.

FV Player – Admin Video Checker – Details- Access to video forbidden (HTTP 403) – it means that your video file is private and there are no keys for the bucket the video is supposed to be read from. Therefore you need to:
- make sure you set up the access keys.
- if you already have the access keys, make the video public, and rename the Amazon Bucket temporarily, to disable the URL signature, and try to play the video again. If it works, then the access keys are invalid or the IAM user is not set properly
- Make sure to enable CORS Headers on your bucket. Here’s how.
- The AWS Access Key ID you provided does not exist in our records – it means that you provided the wrong access key. To obtain the proper access key, refer to the Obtain your Amazon AWS access credentials part of this guide.
- We recommend that you check this guide step-by-step to find the cause of the issue.
- Also do some basic troubleshooting:
- is there any Policy attached to the bucket? If you are limiting access by HTTP referrer, the videos won’t play on Androids browser
- is my file or folder in a bucket named correctly?
- try setting up a new key pair for your IAM user – perhaps you just failed to copy the key properly. Refer to the Obtain your Amazon AWS access credentials part of this document.
- try setting up a new IAM user altogether – are you using the same AWS account which has the S3 bucket you defined in step no. 17 of this guide?
- try to setup a new Amazon S3 bucket and start with public permissions
- Access to video forbidden (HTTP 403) – it means that your video file is private and there are no keys for the bucket the video is supposed to be read from. Therefore you need to:
-
If the video checker says “Admin: Video OK“, then your setup is correct, and the video plays correctly! The video URL is visible in the page HTML, but it’s only valid for a short time (depending on your Default Expiry Time setting or the video length), so the video can’t be linked from other (unauthorized) websites.