Cross-origin resource sharing (CORS) is a mechanism allowing websites to request restricted resources from other websites with different domain. CORS defines the rules that are used when server is trying to determine whether it is safe to share resources or not.
Both HLS Streaming and our Thumbnail generator require enabled CORS headers to work properly. Here’s a guide on how to do it for various types of video hosting.
Apache
Add this to your .htaccess file:
<IfModule mod_headers.c>
  <FilesMatch "\.(vtt|srt)$">
    Header set Access-Control-Allow-Origin "*"
  </FilesMatch>
</IfModule>
Then you can test the CORS headers here: cors-test.codehappy.dev by entering the subtitles URL there.
AWS
Enabling CORS in Amazon S3
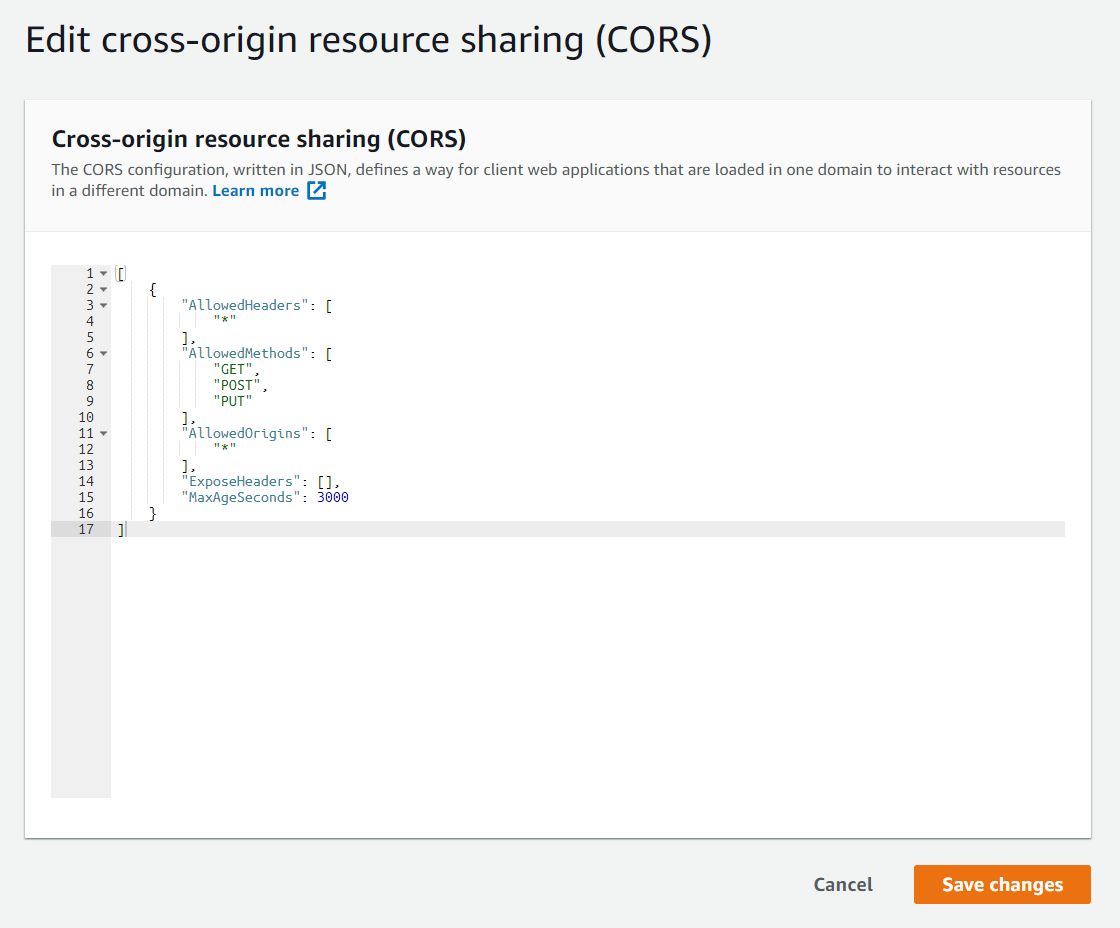
To configure CORS in Amazon S3, simply copy this content into your bucket properties:
[
    {
        "AllowedHeaders": [
            "*"
        ],
        "AllowedMethods": [
            "GET",
            "POST",
            "PUT"
        ],
        "AllowedOrigins": [
            "*"
        ],
        "ExposeHeaders": [],
        "MaxAgeSeconds": 3000
    }
]
To allow this in Amazon S3, you just need to:
1. Open your source bucket.
2. Go to Permissions and scroll down to Cross-origin resource sharing (CORS), and click edit.
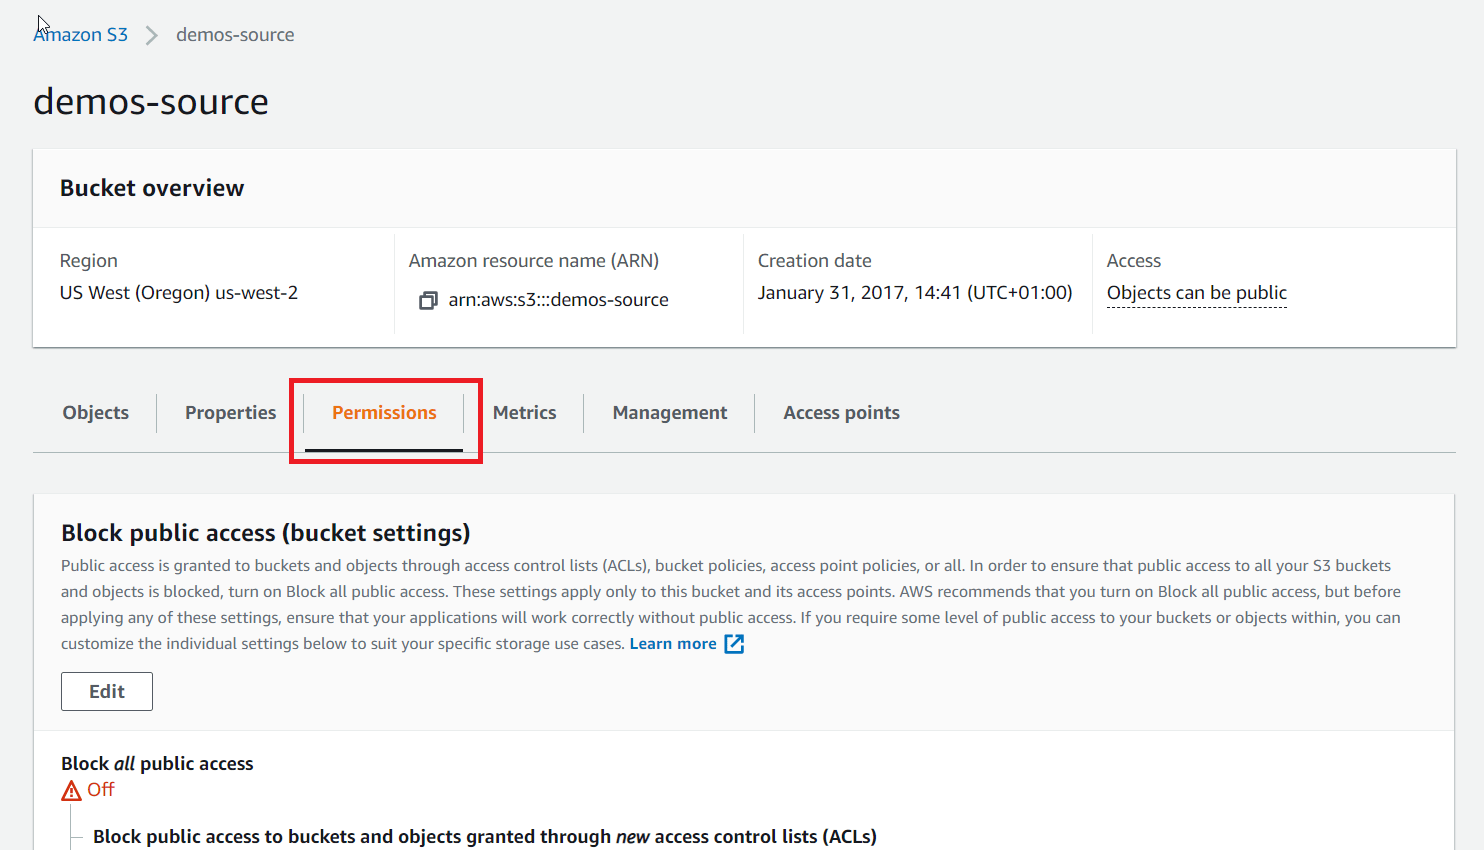
3. Paste in the code above and click Save changes.
Enabling CORS in CloudFront
To allow CORS with your CloudFront distribution, you will need to do some additional configuration:
- Select the distribution you want to use (if you don’t have an existing distribution, check this guide - Serving Private Videos via CloudFront)
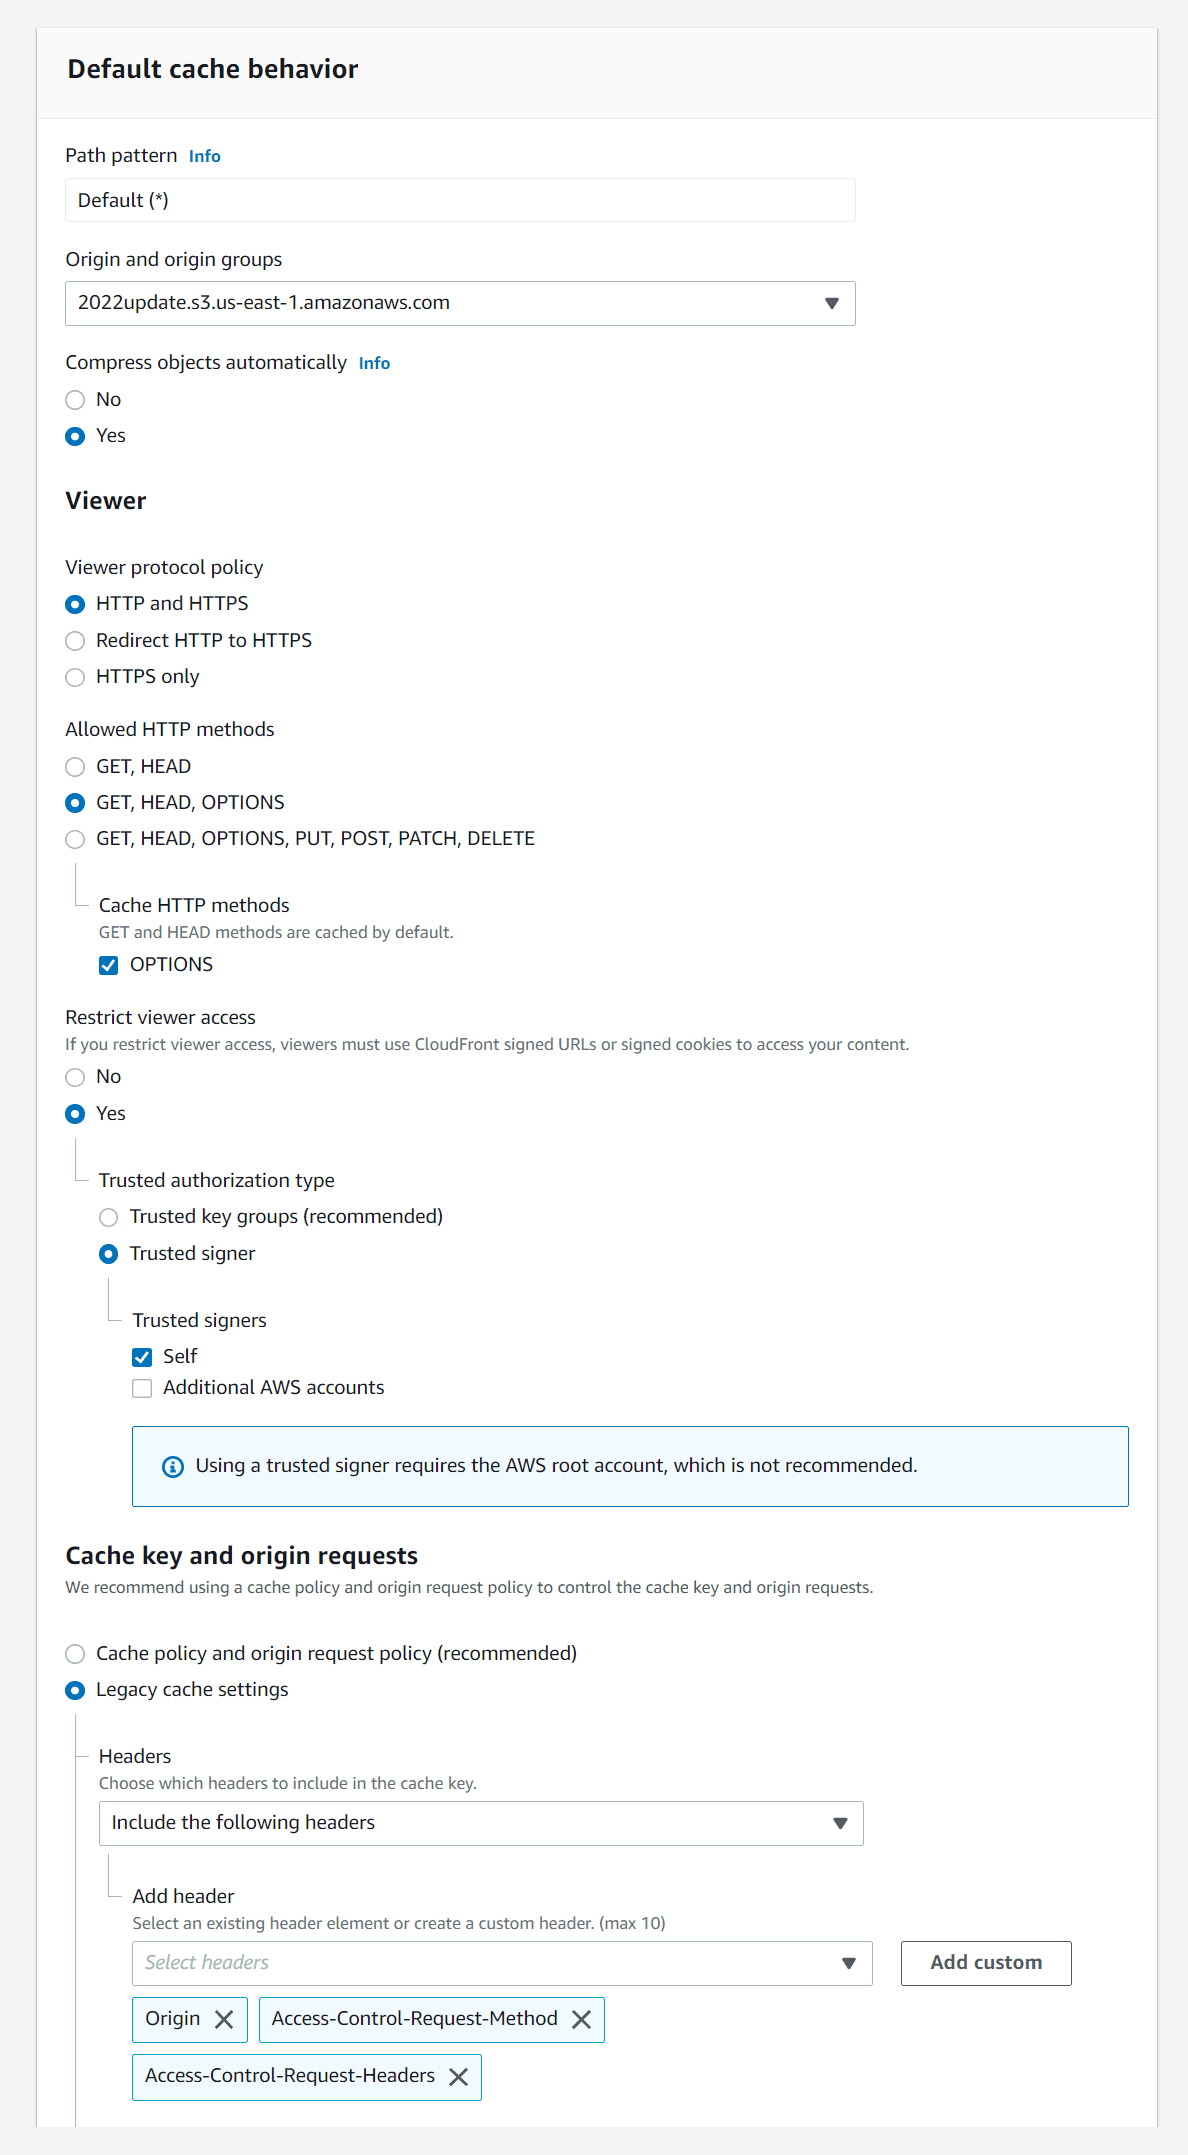
- Once in the distribution settings, go to Bahaviors tab. Pick the Default(*)behavior and click Edit:
- Follow these settings. Especially make sure you’ve picked the correct headers in the Cache key and origin requests part:
- It will take some time for these changes to take effect due to caching of the CloudFront network.

Clearing the CloudFront Cache
If you have an existing distribution that is already used for serving video content and you add the CORS headers, or do any other change that can affect the videos, you should clear the cache on all edge servers. This way you can make sure that the changes are really applied instead of using the cached old version.
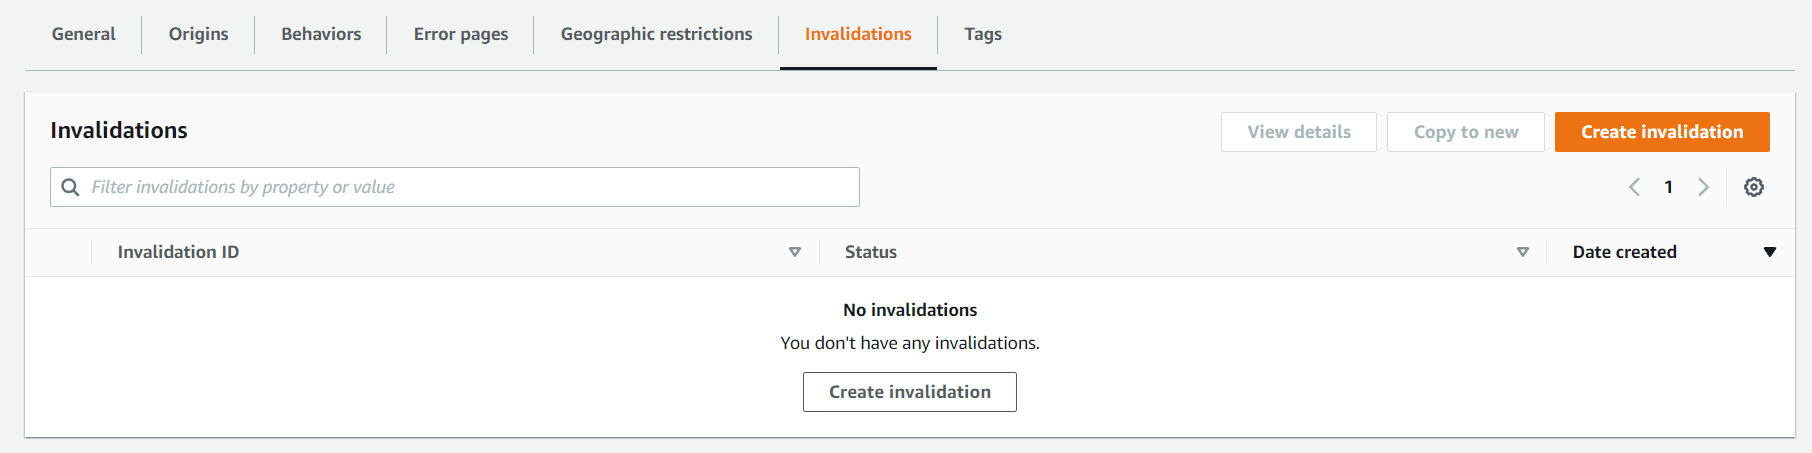
To clear the cache, you will have to create an invalidation in the distribution settings.
- Start with opening the settings of the distribution you want and go to the Invalidations tab. There click on the Create Invalidation button:

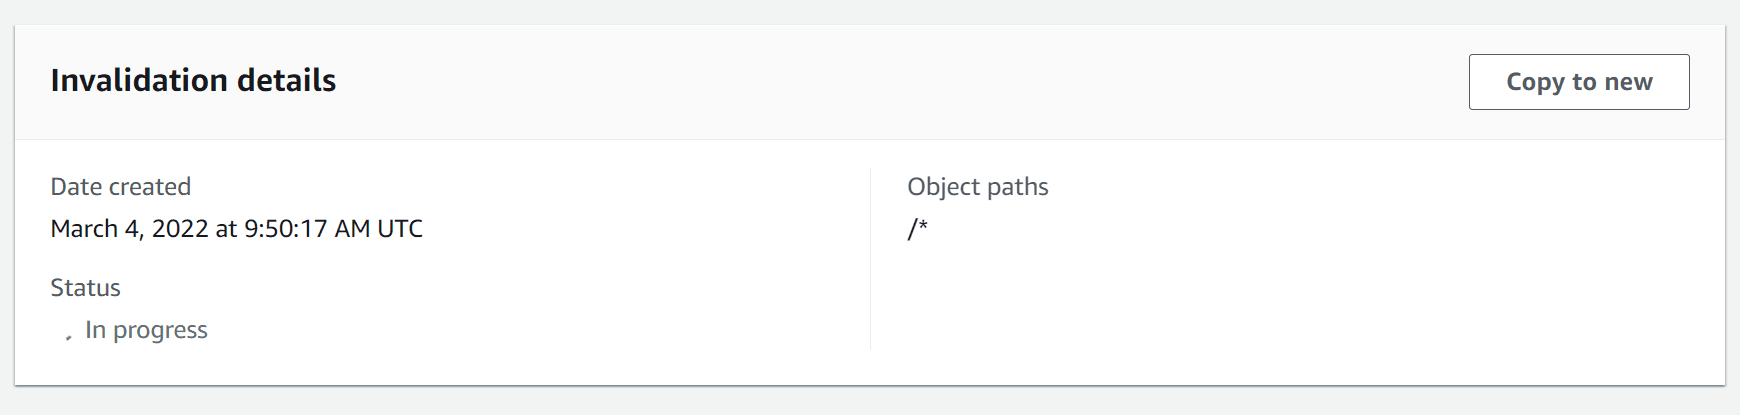
- Now you can select, which objects (in this case videos) you want to clear from the cache. We of course want to clear them all, so we can use the “*” wildcard. Therefore, just write “/*” – that specifies all the objects in the source bucket of your distribution. Afterwards click the Create Ivalidation button.

- The invalidation will take a only a minute or two. You will see that it’s finished when the status changes from “In progress” to “Completed“:

BunnyCDN
To enable CORS headers in BunnyCDN settings please follow these steps:
1. Log in to your BunnyCDN profile.
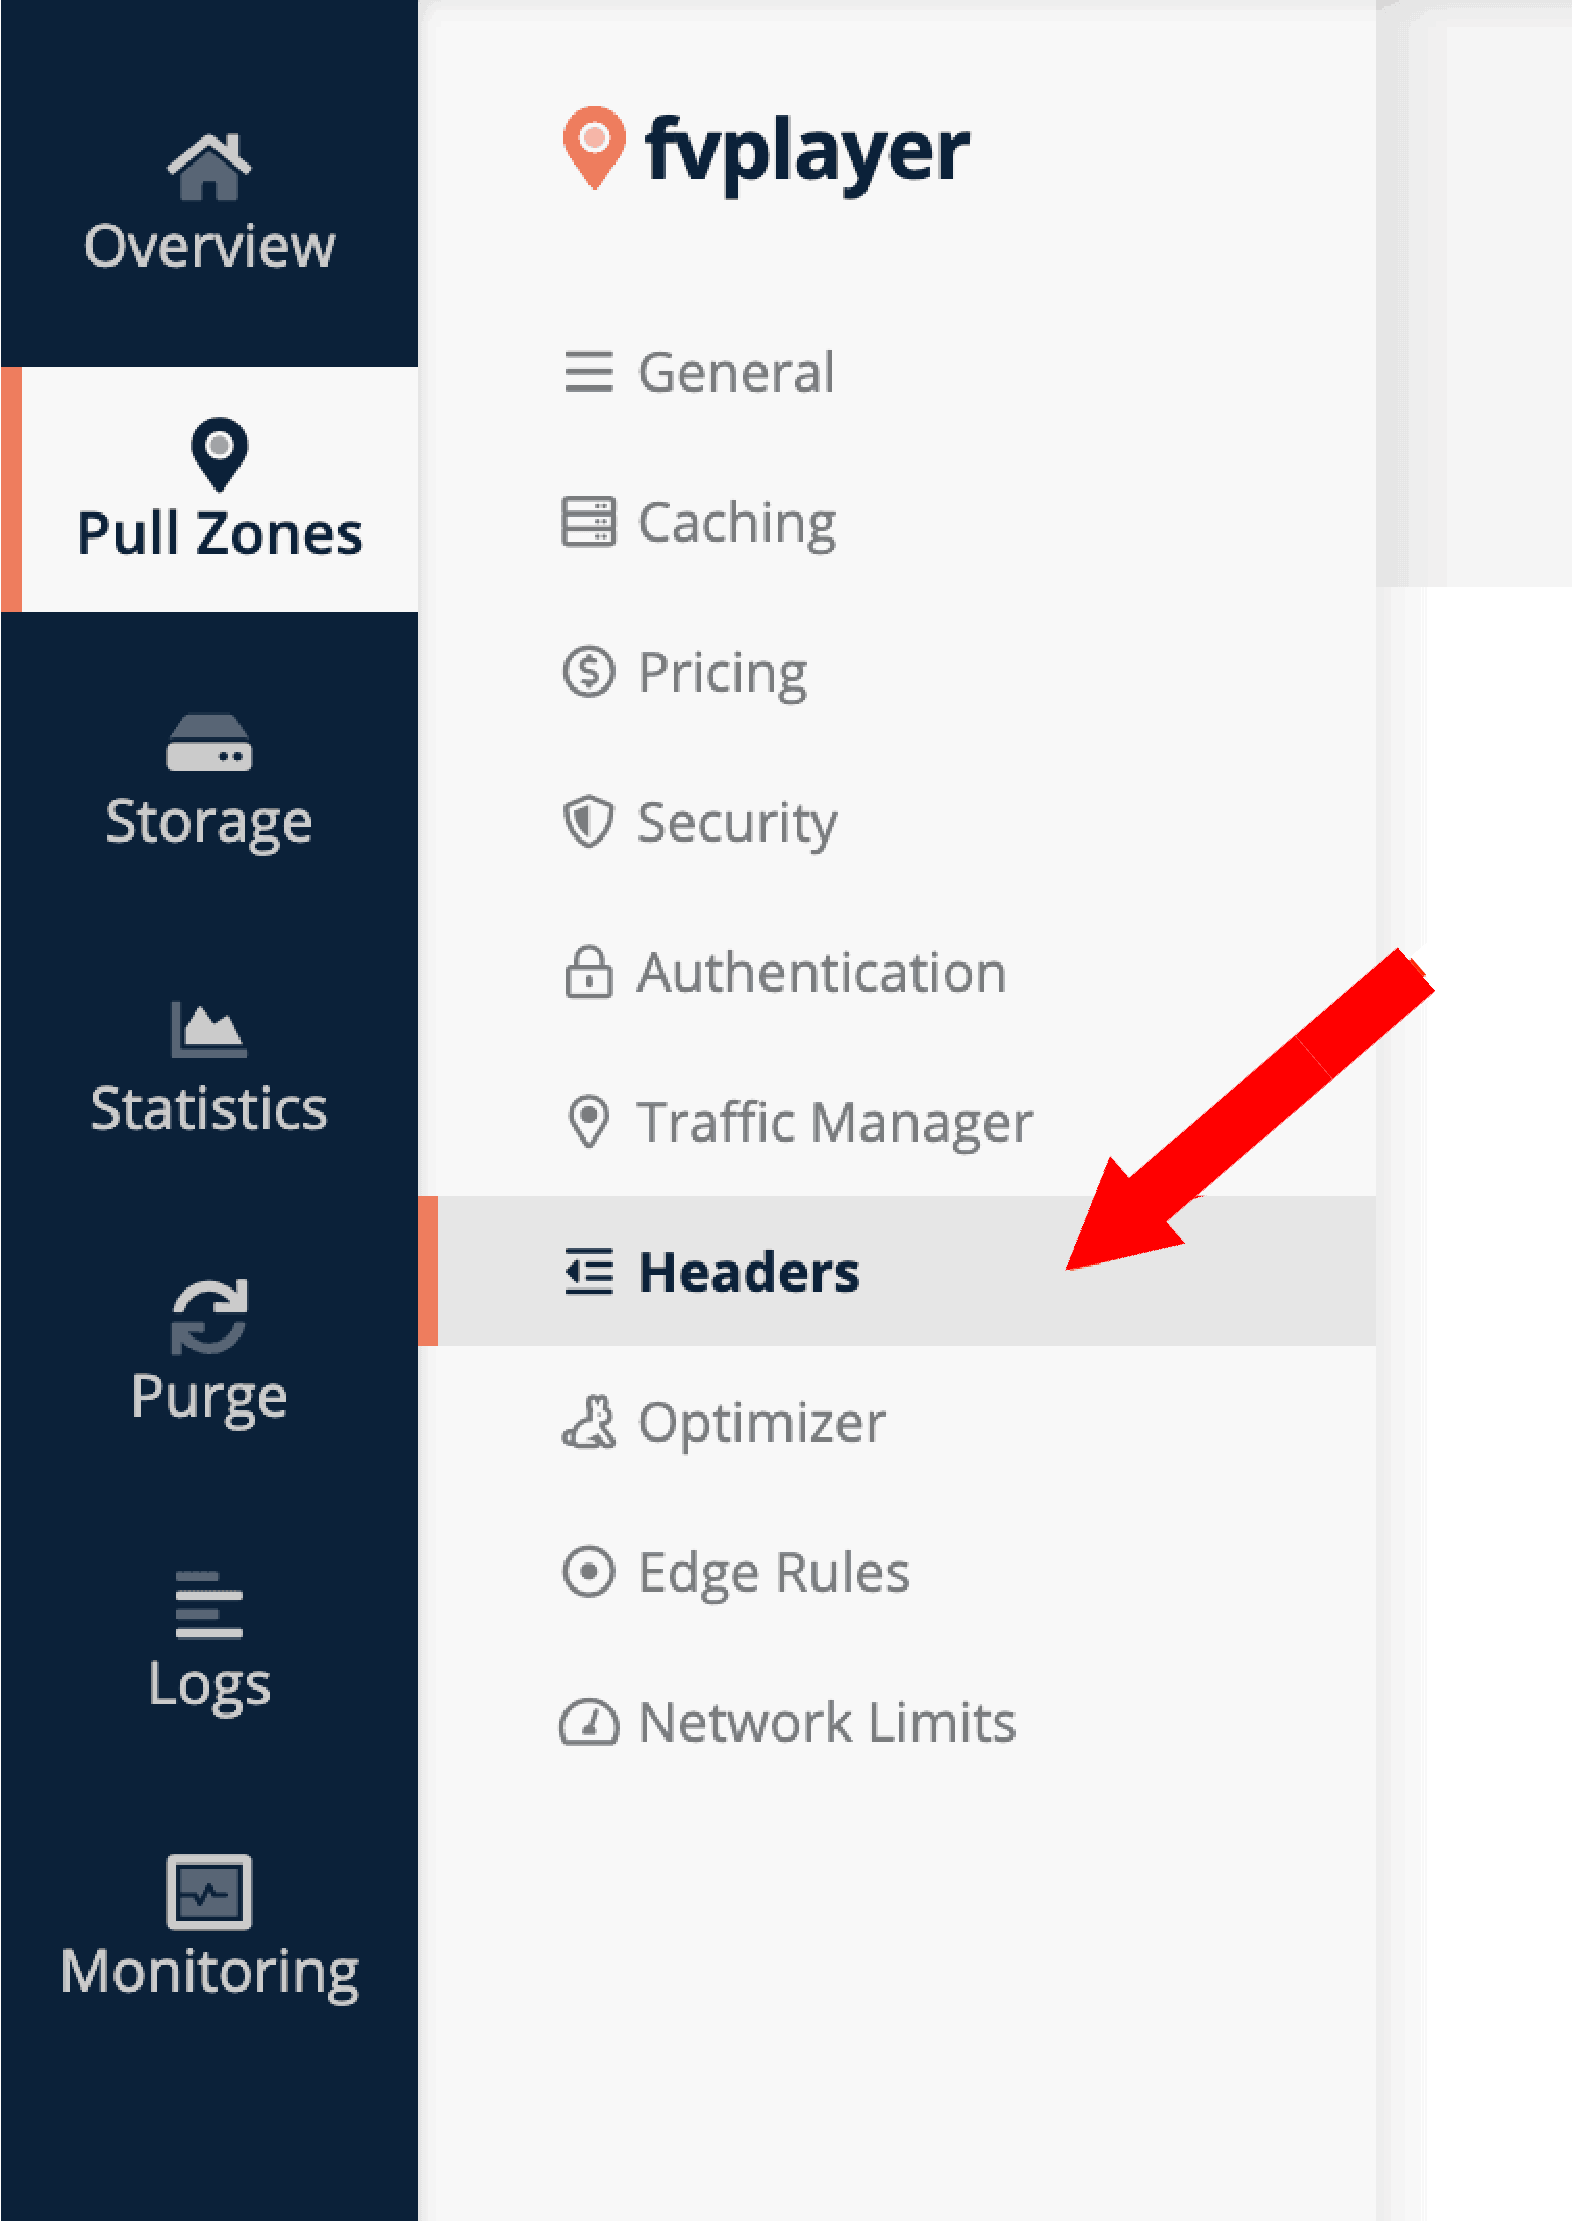
2. Go to Pull zones in the general menu and open designated pull zone

Bunny CDN Pull Zones menu

3. Go to Headers settings
4. Fill in designated file extensions that you want to allow. Add m3u8 and ts to cover needs to HLS stream playback. Also add mp4 if you are using it for video to allow the FV Player screenshot feature to work. Adding vtt will also allow you to serve subtitles.
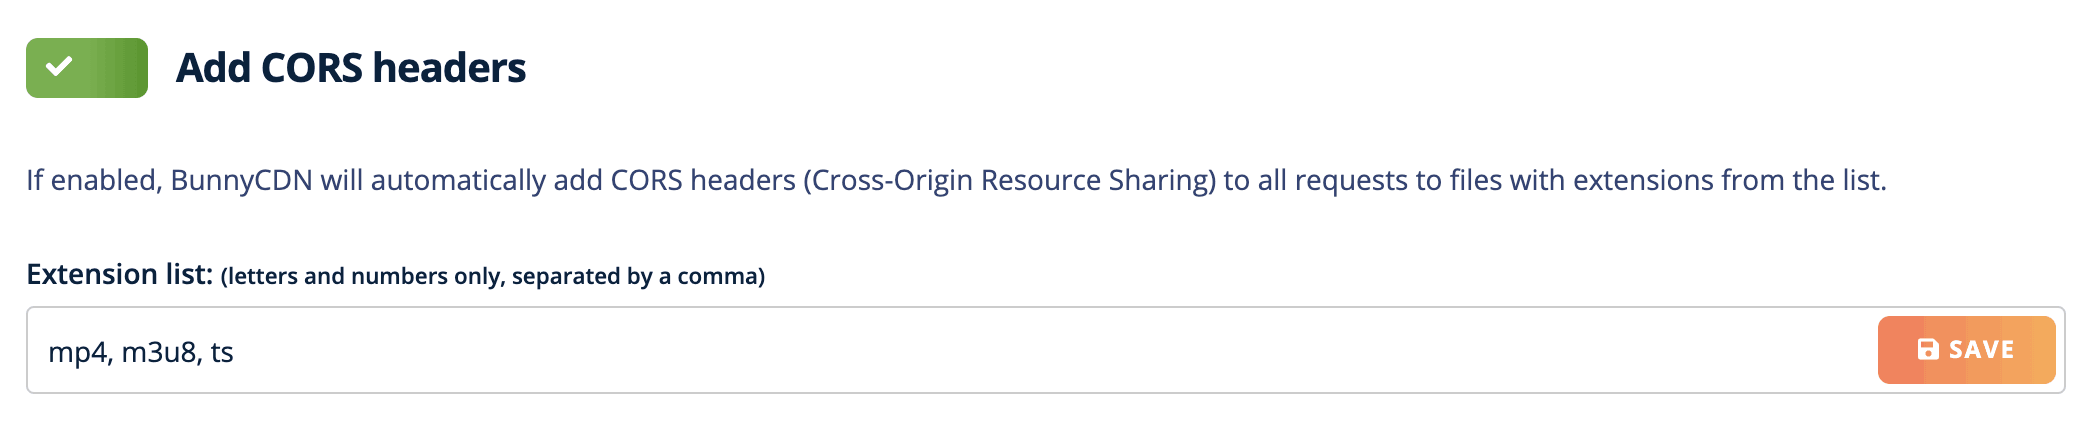
5. Save your settings
DigitalOcean Spaces
To enable CORS headers in DigitalOcean Spaces please follow these few steps:
1. Log into your DigitalOcean account, enter Spaces section, pick desired space and go to it’s Settings tab

Settings tab of DigitalOceanSpaces space
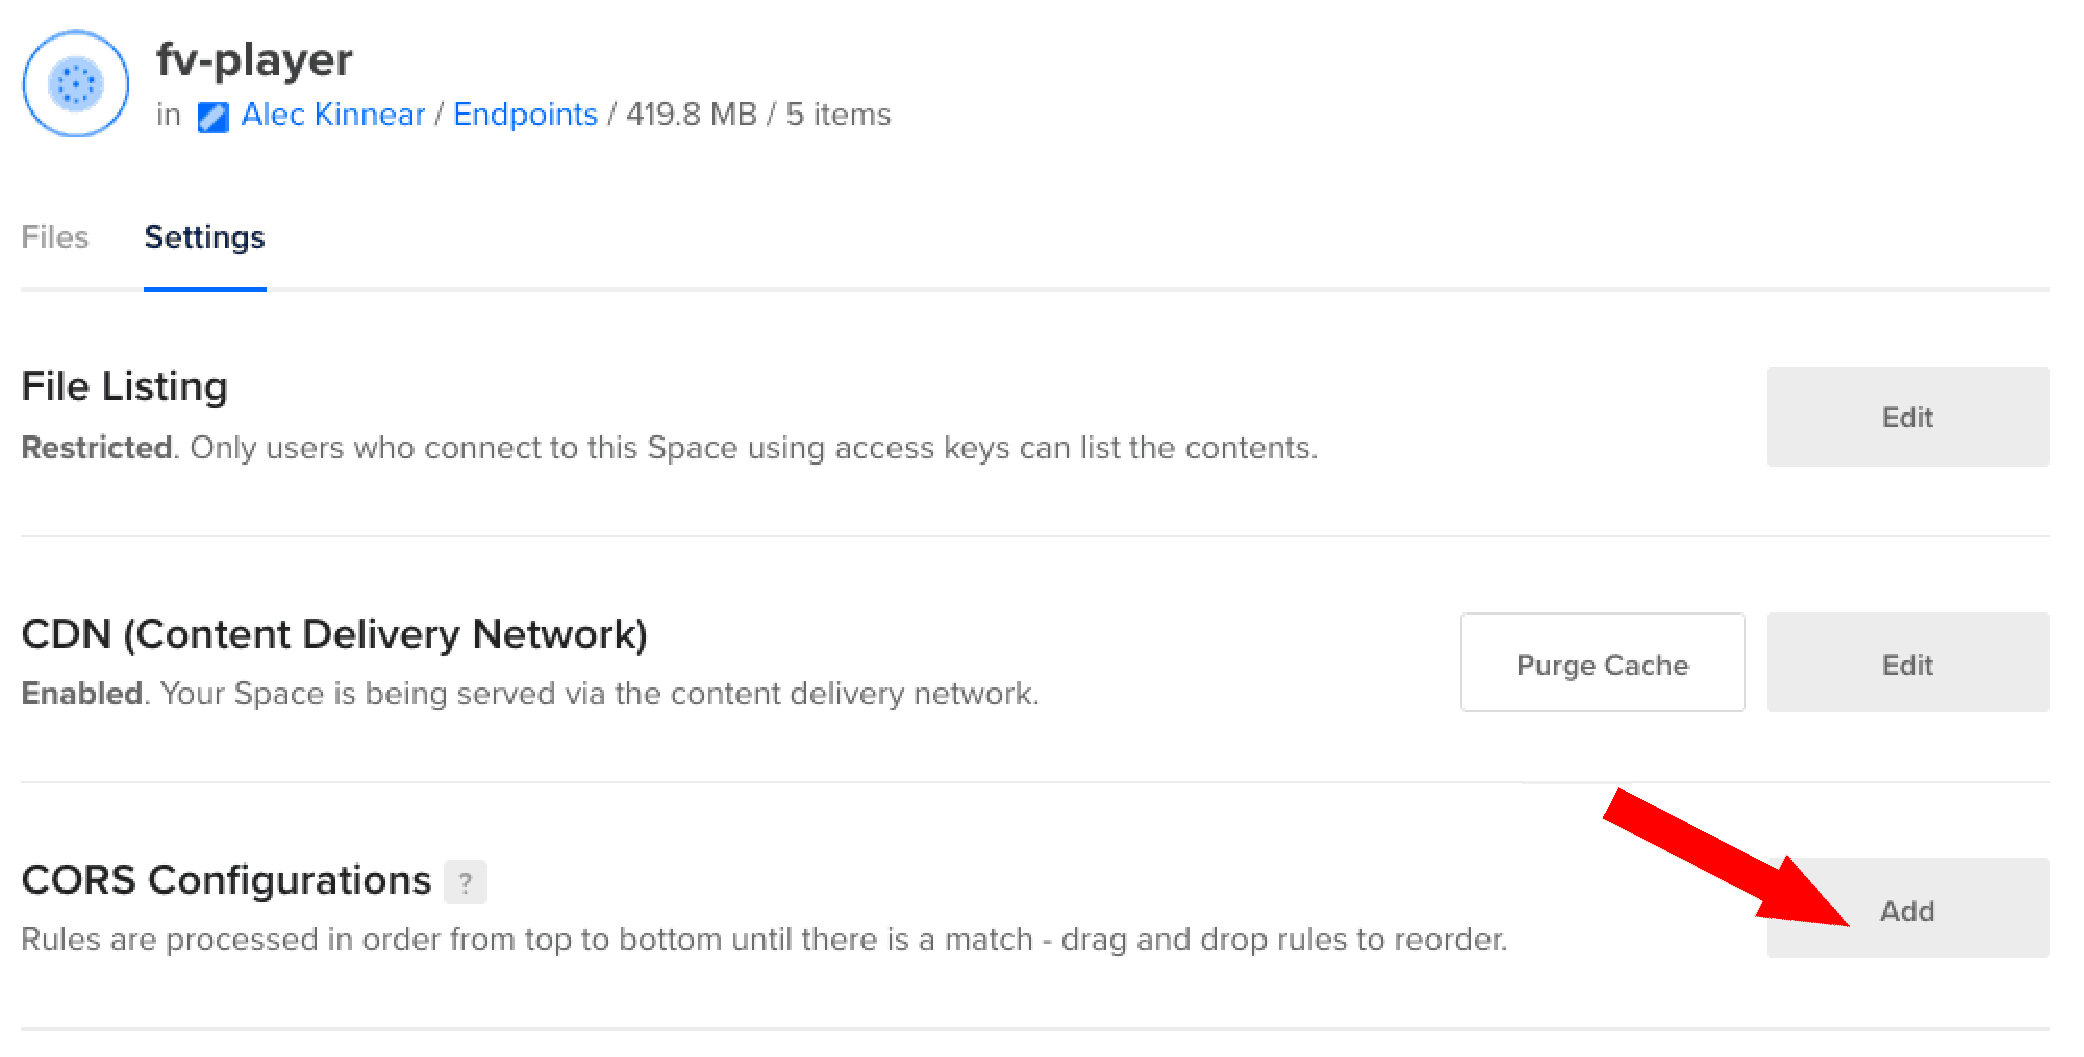
2. Open CORS Configuration settings and fill in following settings:
2.1 Origin: fill in your domain, if you’re using www. or https:// in your domain name, make sure to fill that too
2.2 Allowed Methods: pick GET and HEAD
2.3 Allowed Headers: (please allow following headers)
Access-Control-Allow-Methods
Access-Control-Allow-Origin
Origin
Range
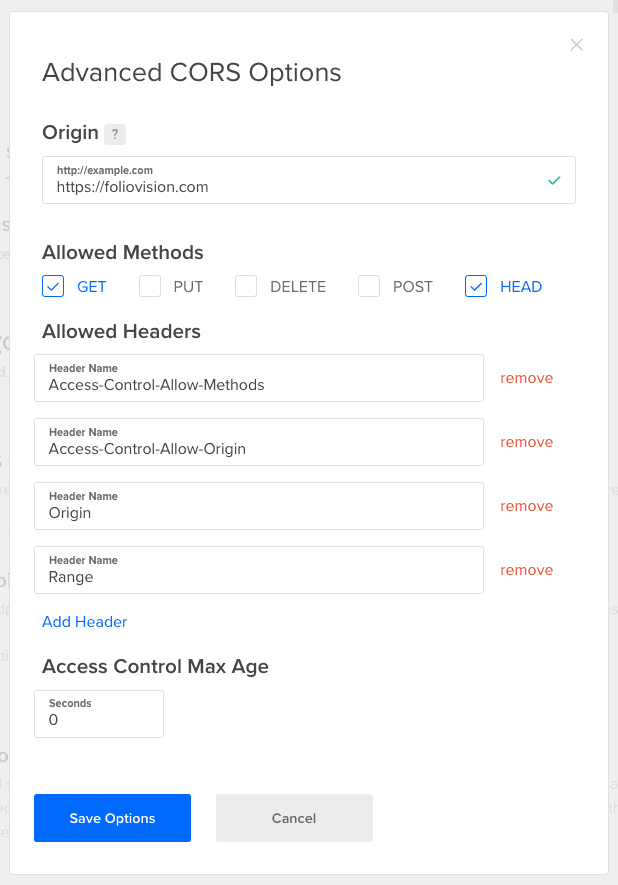
3. Hit Save Options
KeyCDN
1. Log into your account.
2. Go to Zones.
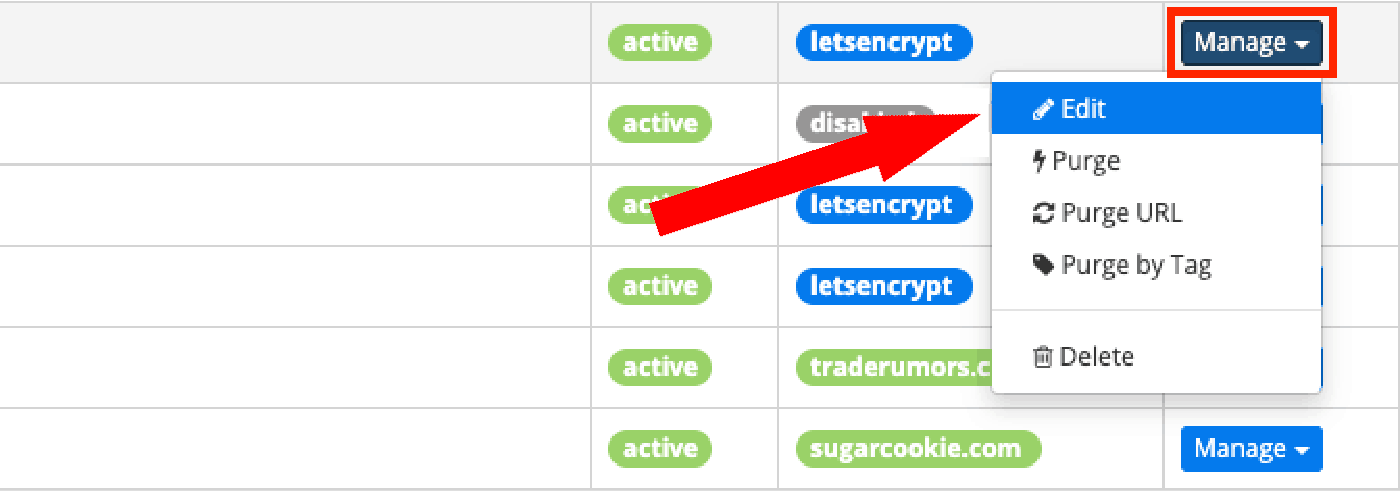
3. Select your desired zone and click on Manage and open Edit option.

Editing a KeyCDN zone
4. Then select Show advanced features and set CORS Headers to enabled.
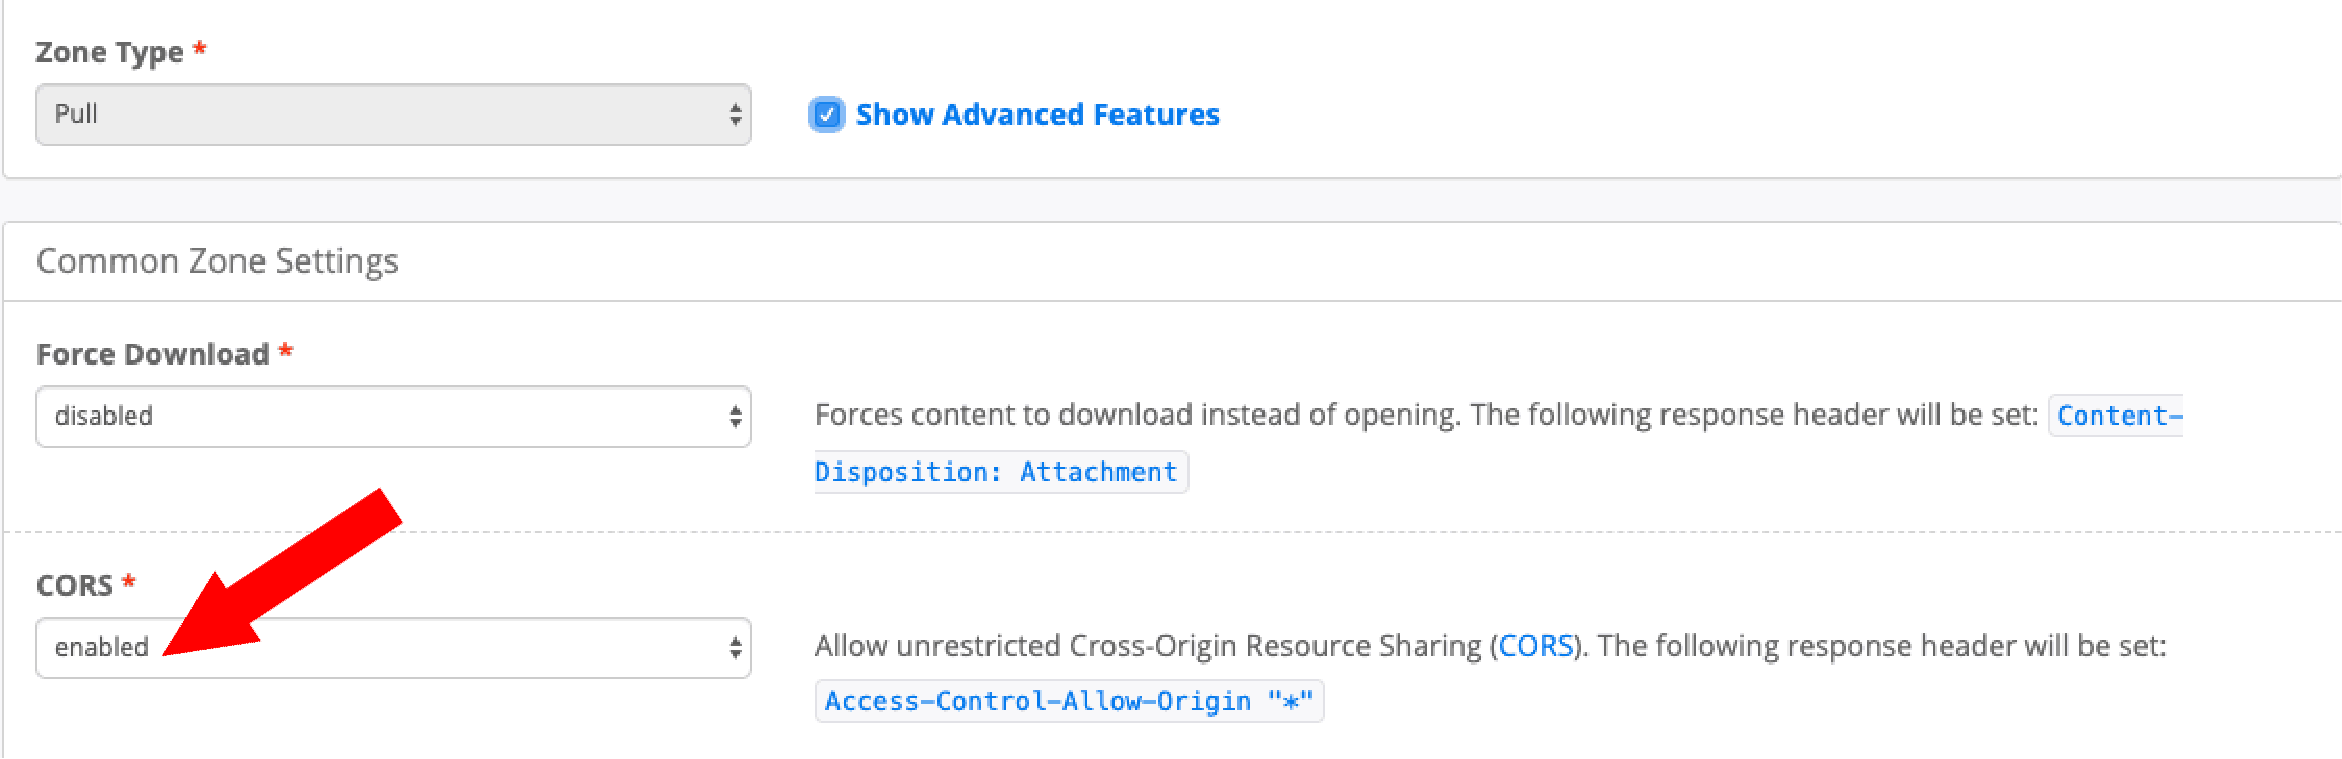
5. Save your settings.
Besides bringing new features into FV Player we also focus on explaining and helping our users with using those which are already part of our player. You can help us a lot with it by giving us valuable feedback.
So if you have any tips or questions, don’t hesitate and contact us via our Forums!