MediaConvert is the new Amazon Web Service for video encoding which replaces the old Elastic Transcoder. It has a better pricing model than Elastic Transcoder. You only pay for the encoding features which you are actually using, and it supports all the new standards, such as 4K video.
List of contents:
- Setting Up Buckets in Amazon S3
- Creating a New MediaConvert Video Encoding Job
- Signed URLs
- Posting the Video to Your Website
Before you begin
We assume that:
1. You know the basics of the FV Player usage. You can check it here: FV Player Start-up Guide
2. You have a working Amazon S3 + Cloudfront setup according to the Serving Private Videos via CloudFront guide (Note: please be aware of the fact that every step regarding download protection or privacy needs to be skipped)
Setting Up Buckets in Amazon S3
4. You already have a bucket for storing your source videos.
The best practice is to create another one for storing encoded videos. It’s best if both are in the same region for optimal transcoding speed.

Creating an Amazon S3 bucket
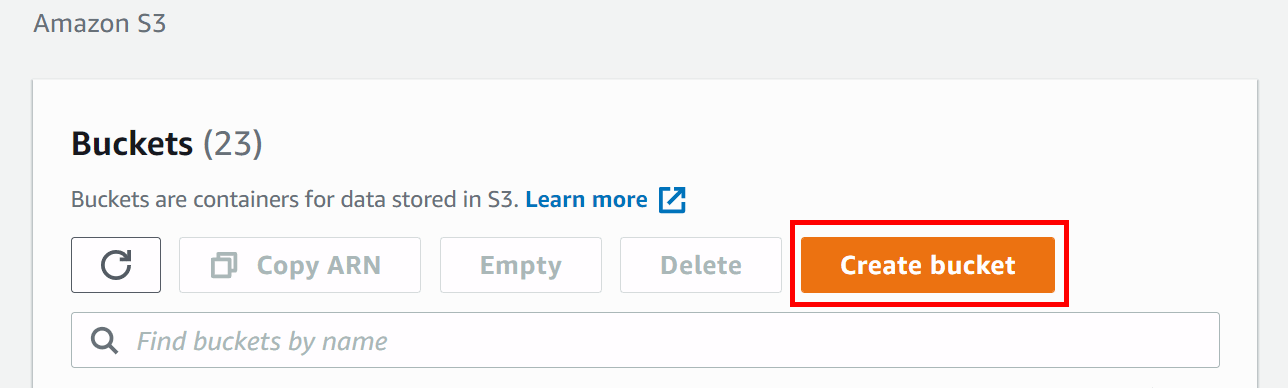
- First bucket will contain your source video files. Make sure you follow the Amazon S3 guide from step 12 to the end, and skip any steps regarding the file protection – that means no signed URLs.
- Second bucket will contain the resulting encoded HLS stream.
Note: Make sure you setup CORS headers for both according to our CORS guide for AWS.
Creating a New MediaConvert Video Encoding Job
We assume that you have already uploaded the video files to your S3 source bucket. Always use the highest quality version of your video, otherwise the video encoding process might degrade the quality too much.
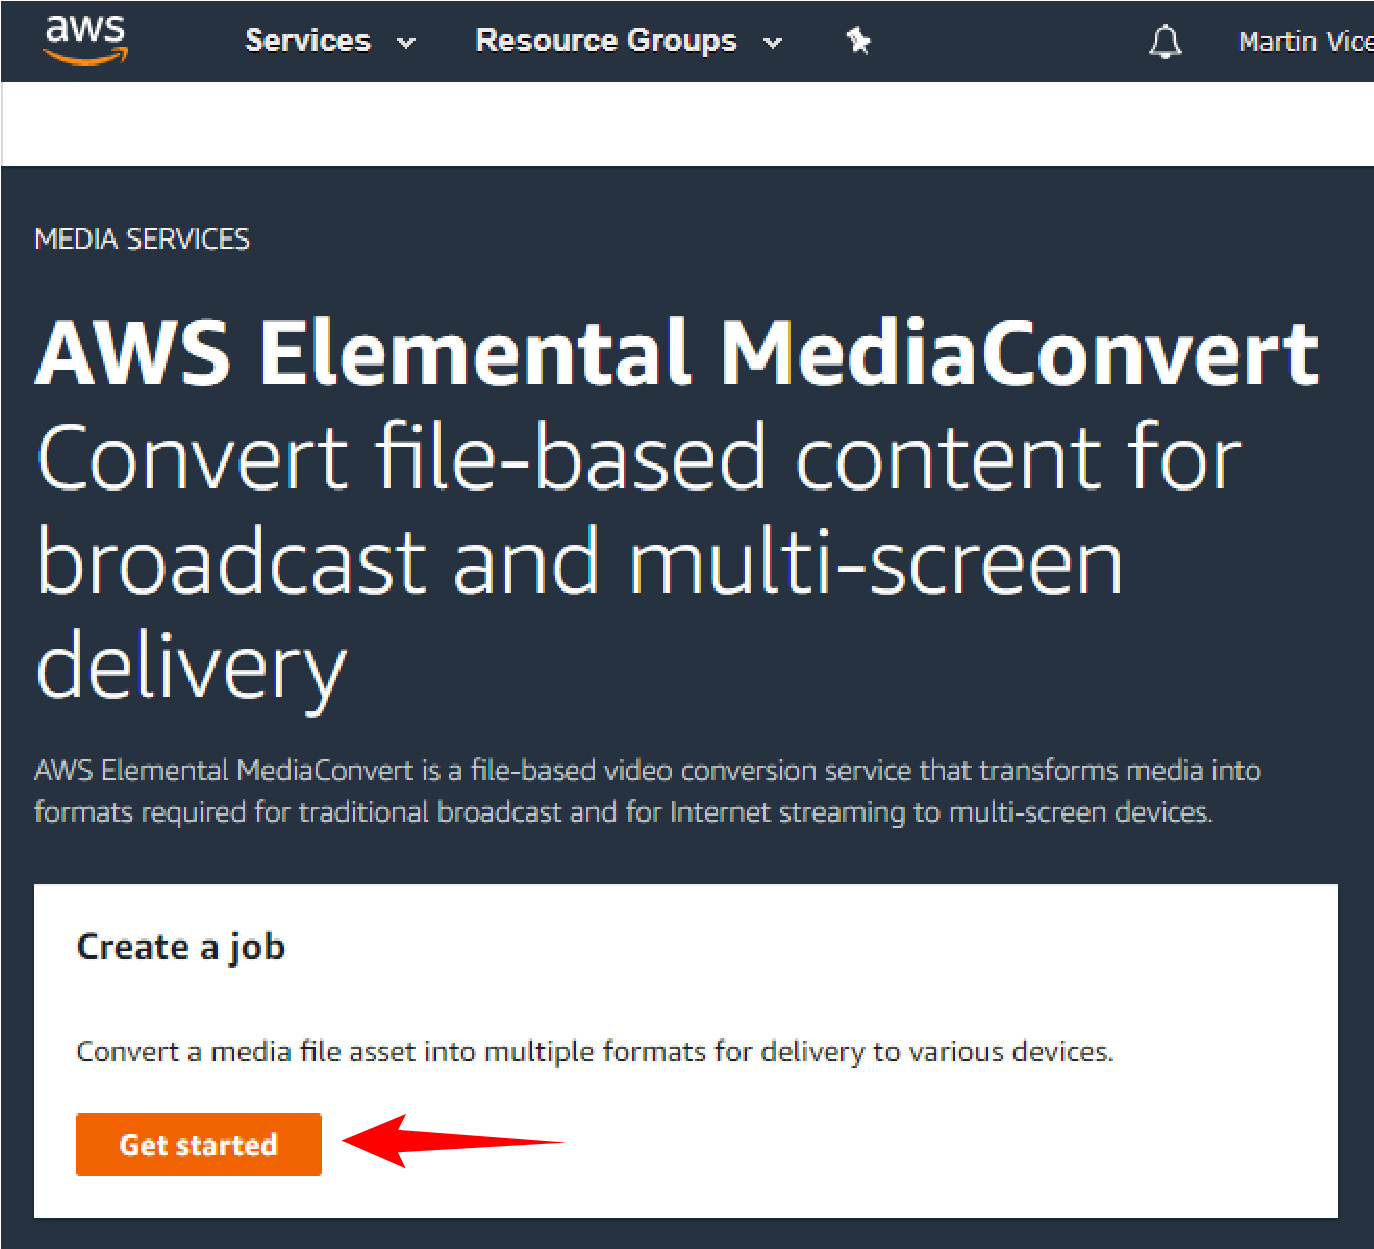
5. Open Services -> MediaConvert and click “Get started“.
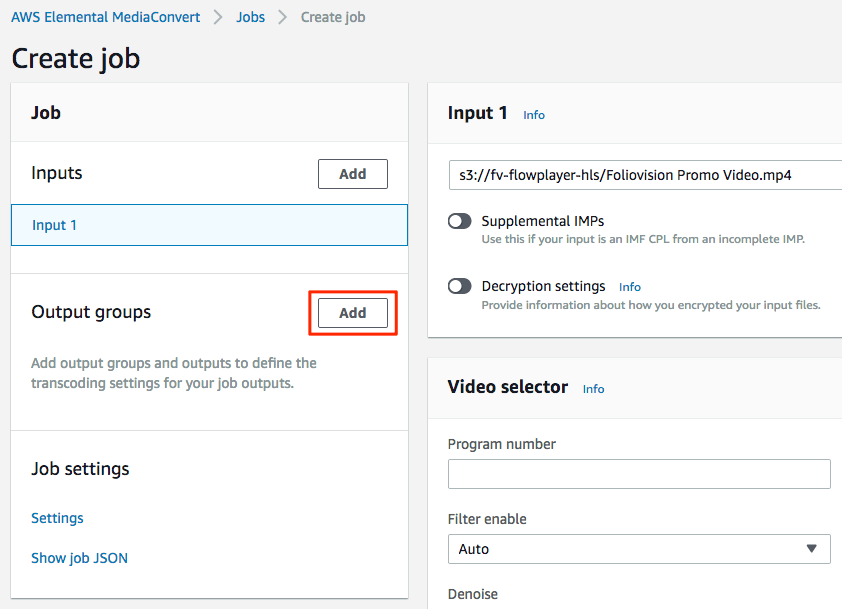
6. You will get to a screen which outlines the whole process on the left side, and lets you edit all the properties on the right side. Make sure you are in the “Input 1” tab and click the “Browse” button.
 Input section of Creating a job

7. Use the popup dialog to pick your S3 bucket and the input file. Once your file is selected click “Choose”.

8. Now you need to add the Output group, so click the “Add” button, next to it.
 Adding output group
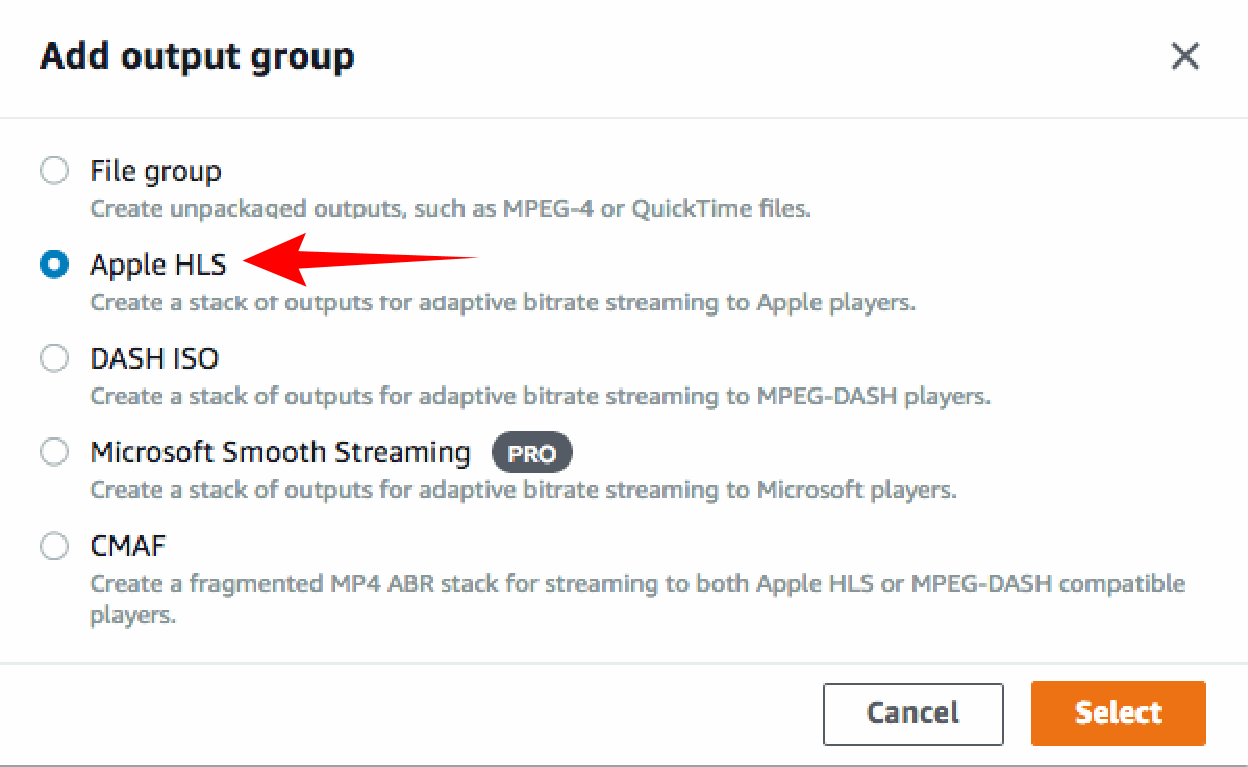
9. Use the popup to pick “Apple HLS”. Click “Select“.
If you are interested in H.265 video codec pick the “CMAF” output and then select “Segment Control -> Segmented Files” and you can disable “Write DASH manifest” too.
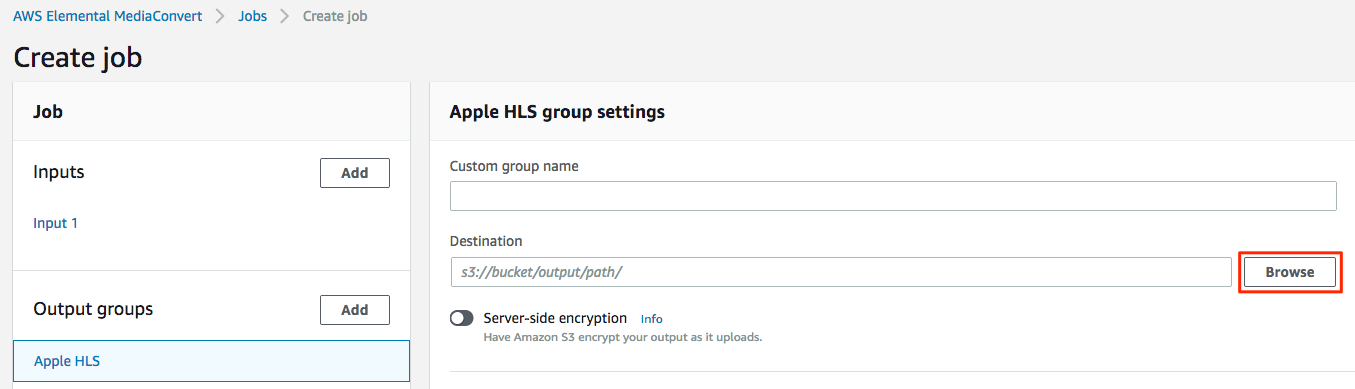
10. You will get to the “Apple HLS” section where you need to click “Browse” to specify the output location.
 Apple HLS group settings
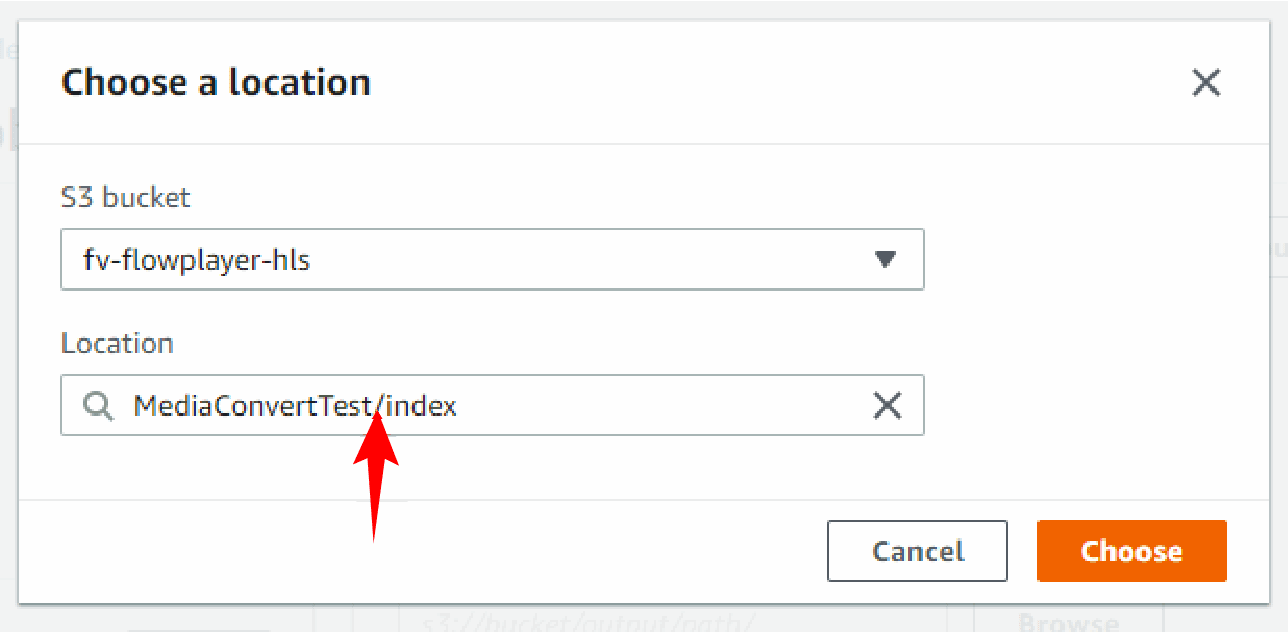
11. Use the popup dialog to pick your S3 bucket and enter the location path. You have to use the forward slash in order to put it all into a new folder, and then also enter a filename – without the extension. So if you have multiple courses where each course consists of multiple lessons you can works with a structure like this:
Course-01/Lessons-01/index
You can browse through your existing folders too. Once you are done click “Choose”.
12. Now that your destination is set, you need to add all the outputs. Click “Output 1” to enter information about the desired video output.

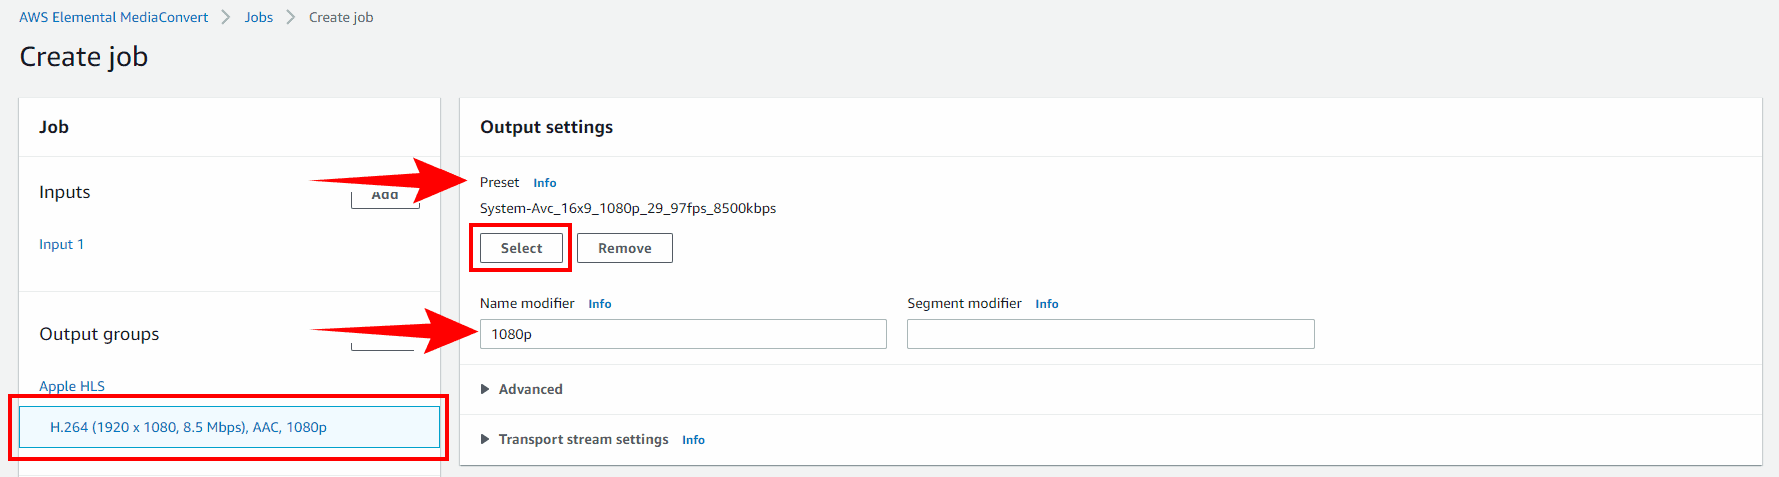
13. Pick the “Preset” and enter the “Name modifier“.
Just make sure what you pick matches your video aspect ratio, frame rate, and resolution. So, for a Full HD video start by picking the “System-Avc_16x9_1080p_29_97fps_8500kbps” preset and enter “-1080p” as the Name modifier.
14. Now, click on Output Groups -> “Apple HLS”, scroll down to the Outputs section and click “Add output” to add another quality.
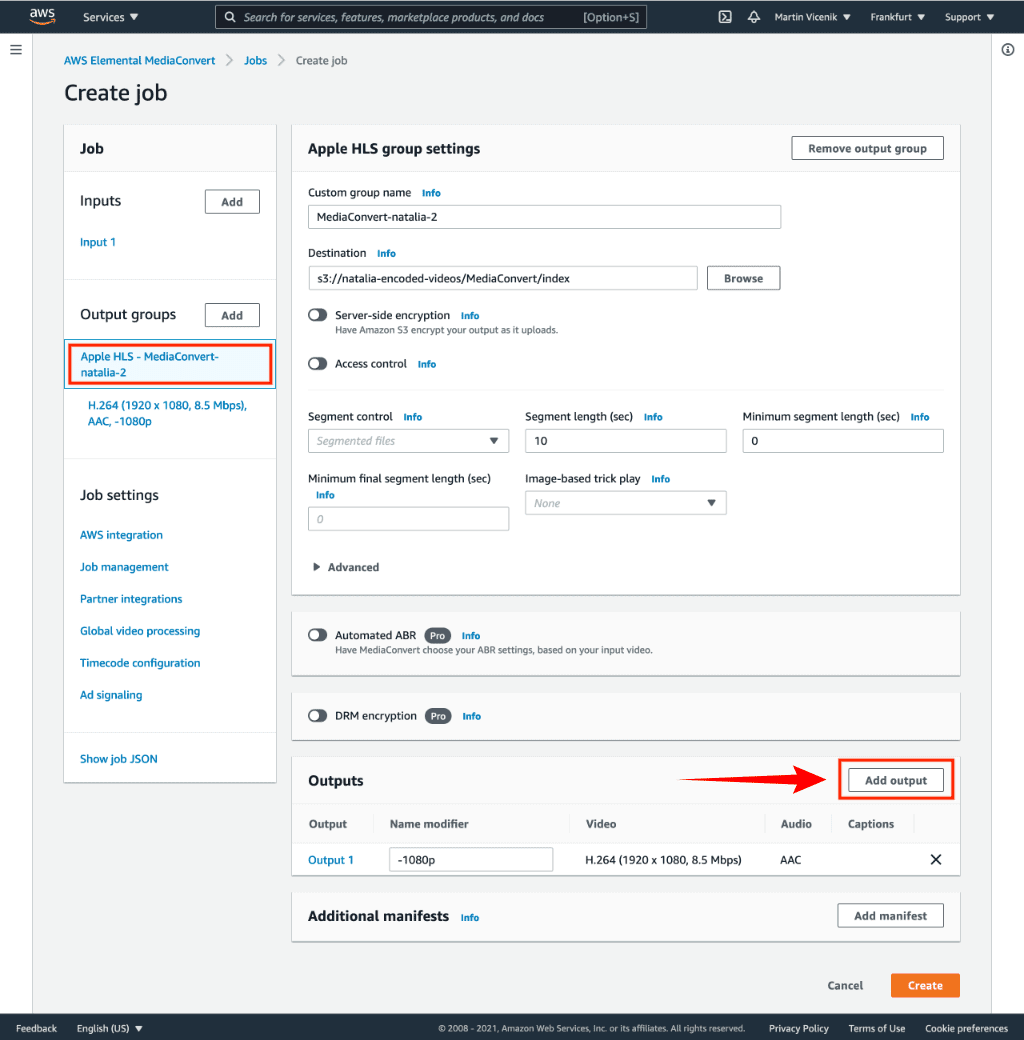
15. “Output 2” will be displayed. Click on it and repeat steps 12. and 13. until you have set all the qualities you need. We recommend using the following setup:
- Output 1:
System-Avc_16x9_1080p_29_97fps_8500kbpswith Name modifier -1080p - Output 2:
System-Avc_16x9_720p_29_97fps_5000kbpswith Name modifier -720p - Output 3:
System-Avc_16x9_540p_29_97fps_3500kbpswith Name modifier -540p - Output 4:
System-Avc_16x9_360p_29_97fps_1200kbpswith Name modifier -360p - Output 5:
System-Avc_16x9_270p_14_99fps_400kbpswith Name modifier -270p
Note: Make sure what you pick matches your video aspect ratio, frame rate, and resolution.
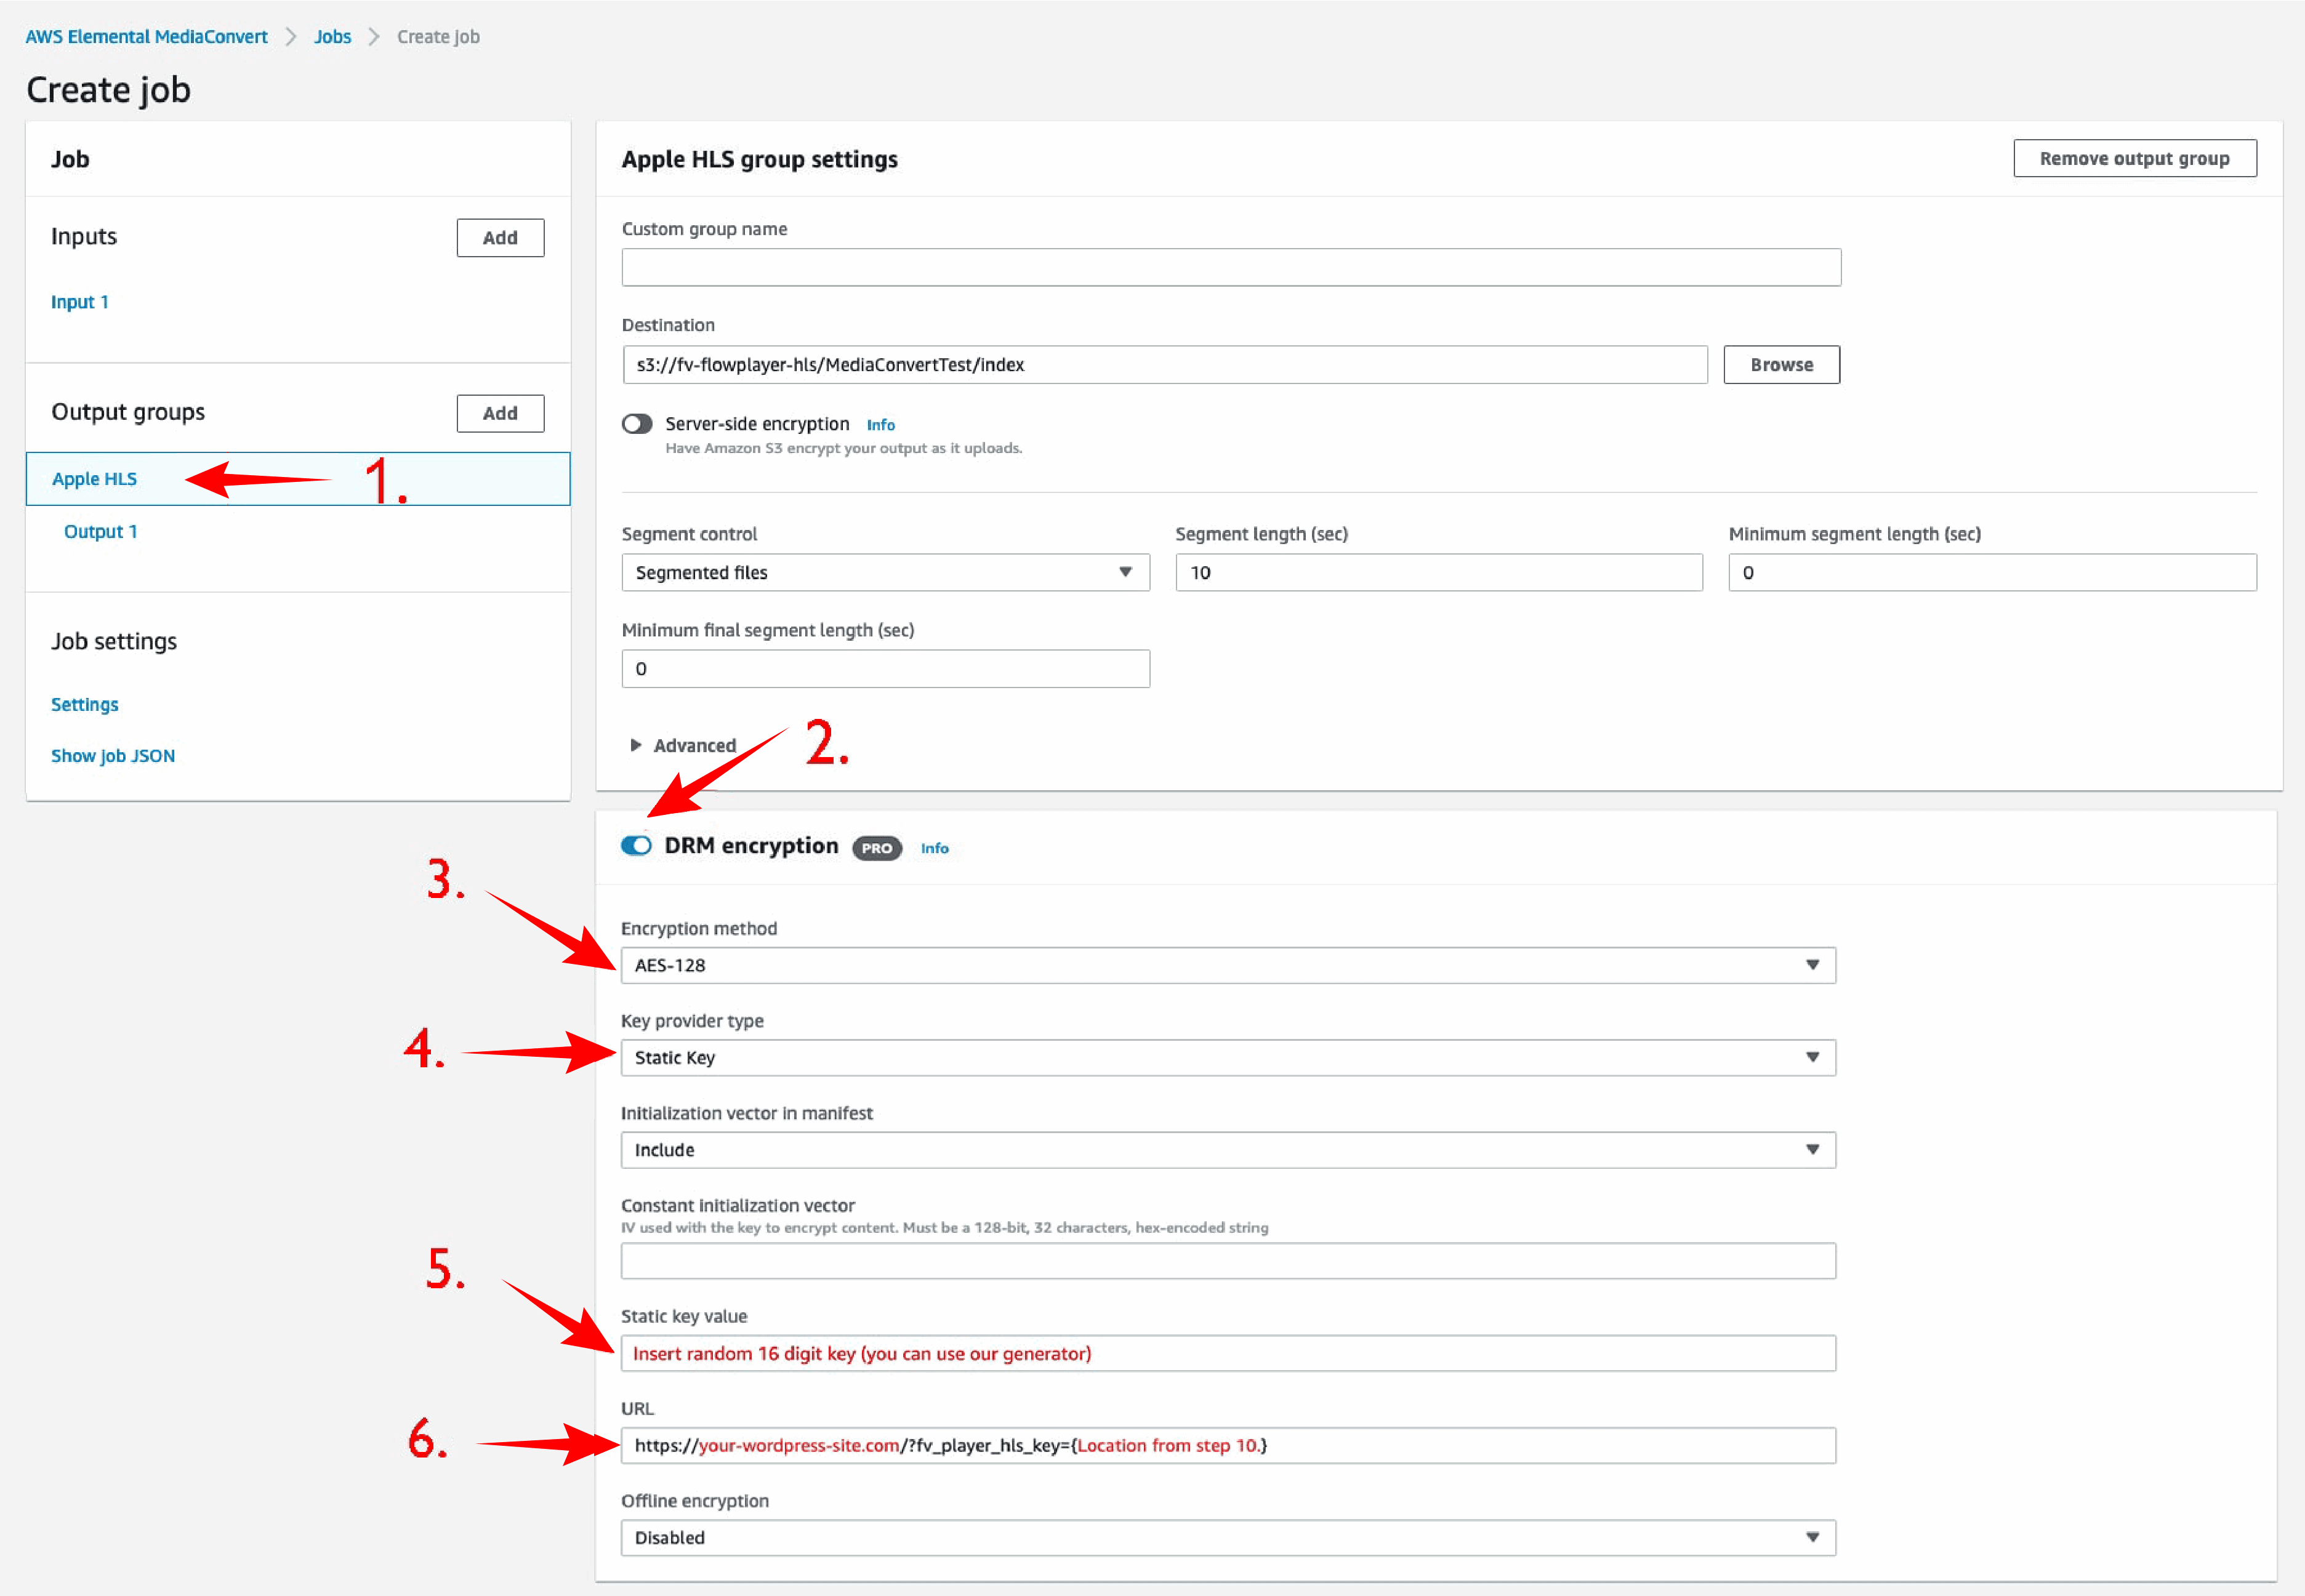
16. To really protect your video from downloading, you also need to encrypt the HLS stream. 1. Click “Apple HLS”, then 2. click “DRM encryption”.
If you don’t need to encrypt your video, you can skip to step 18.
(Please fill your own info into parts of the text marked with red)
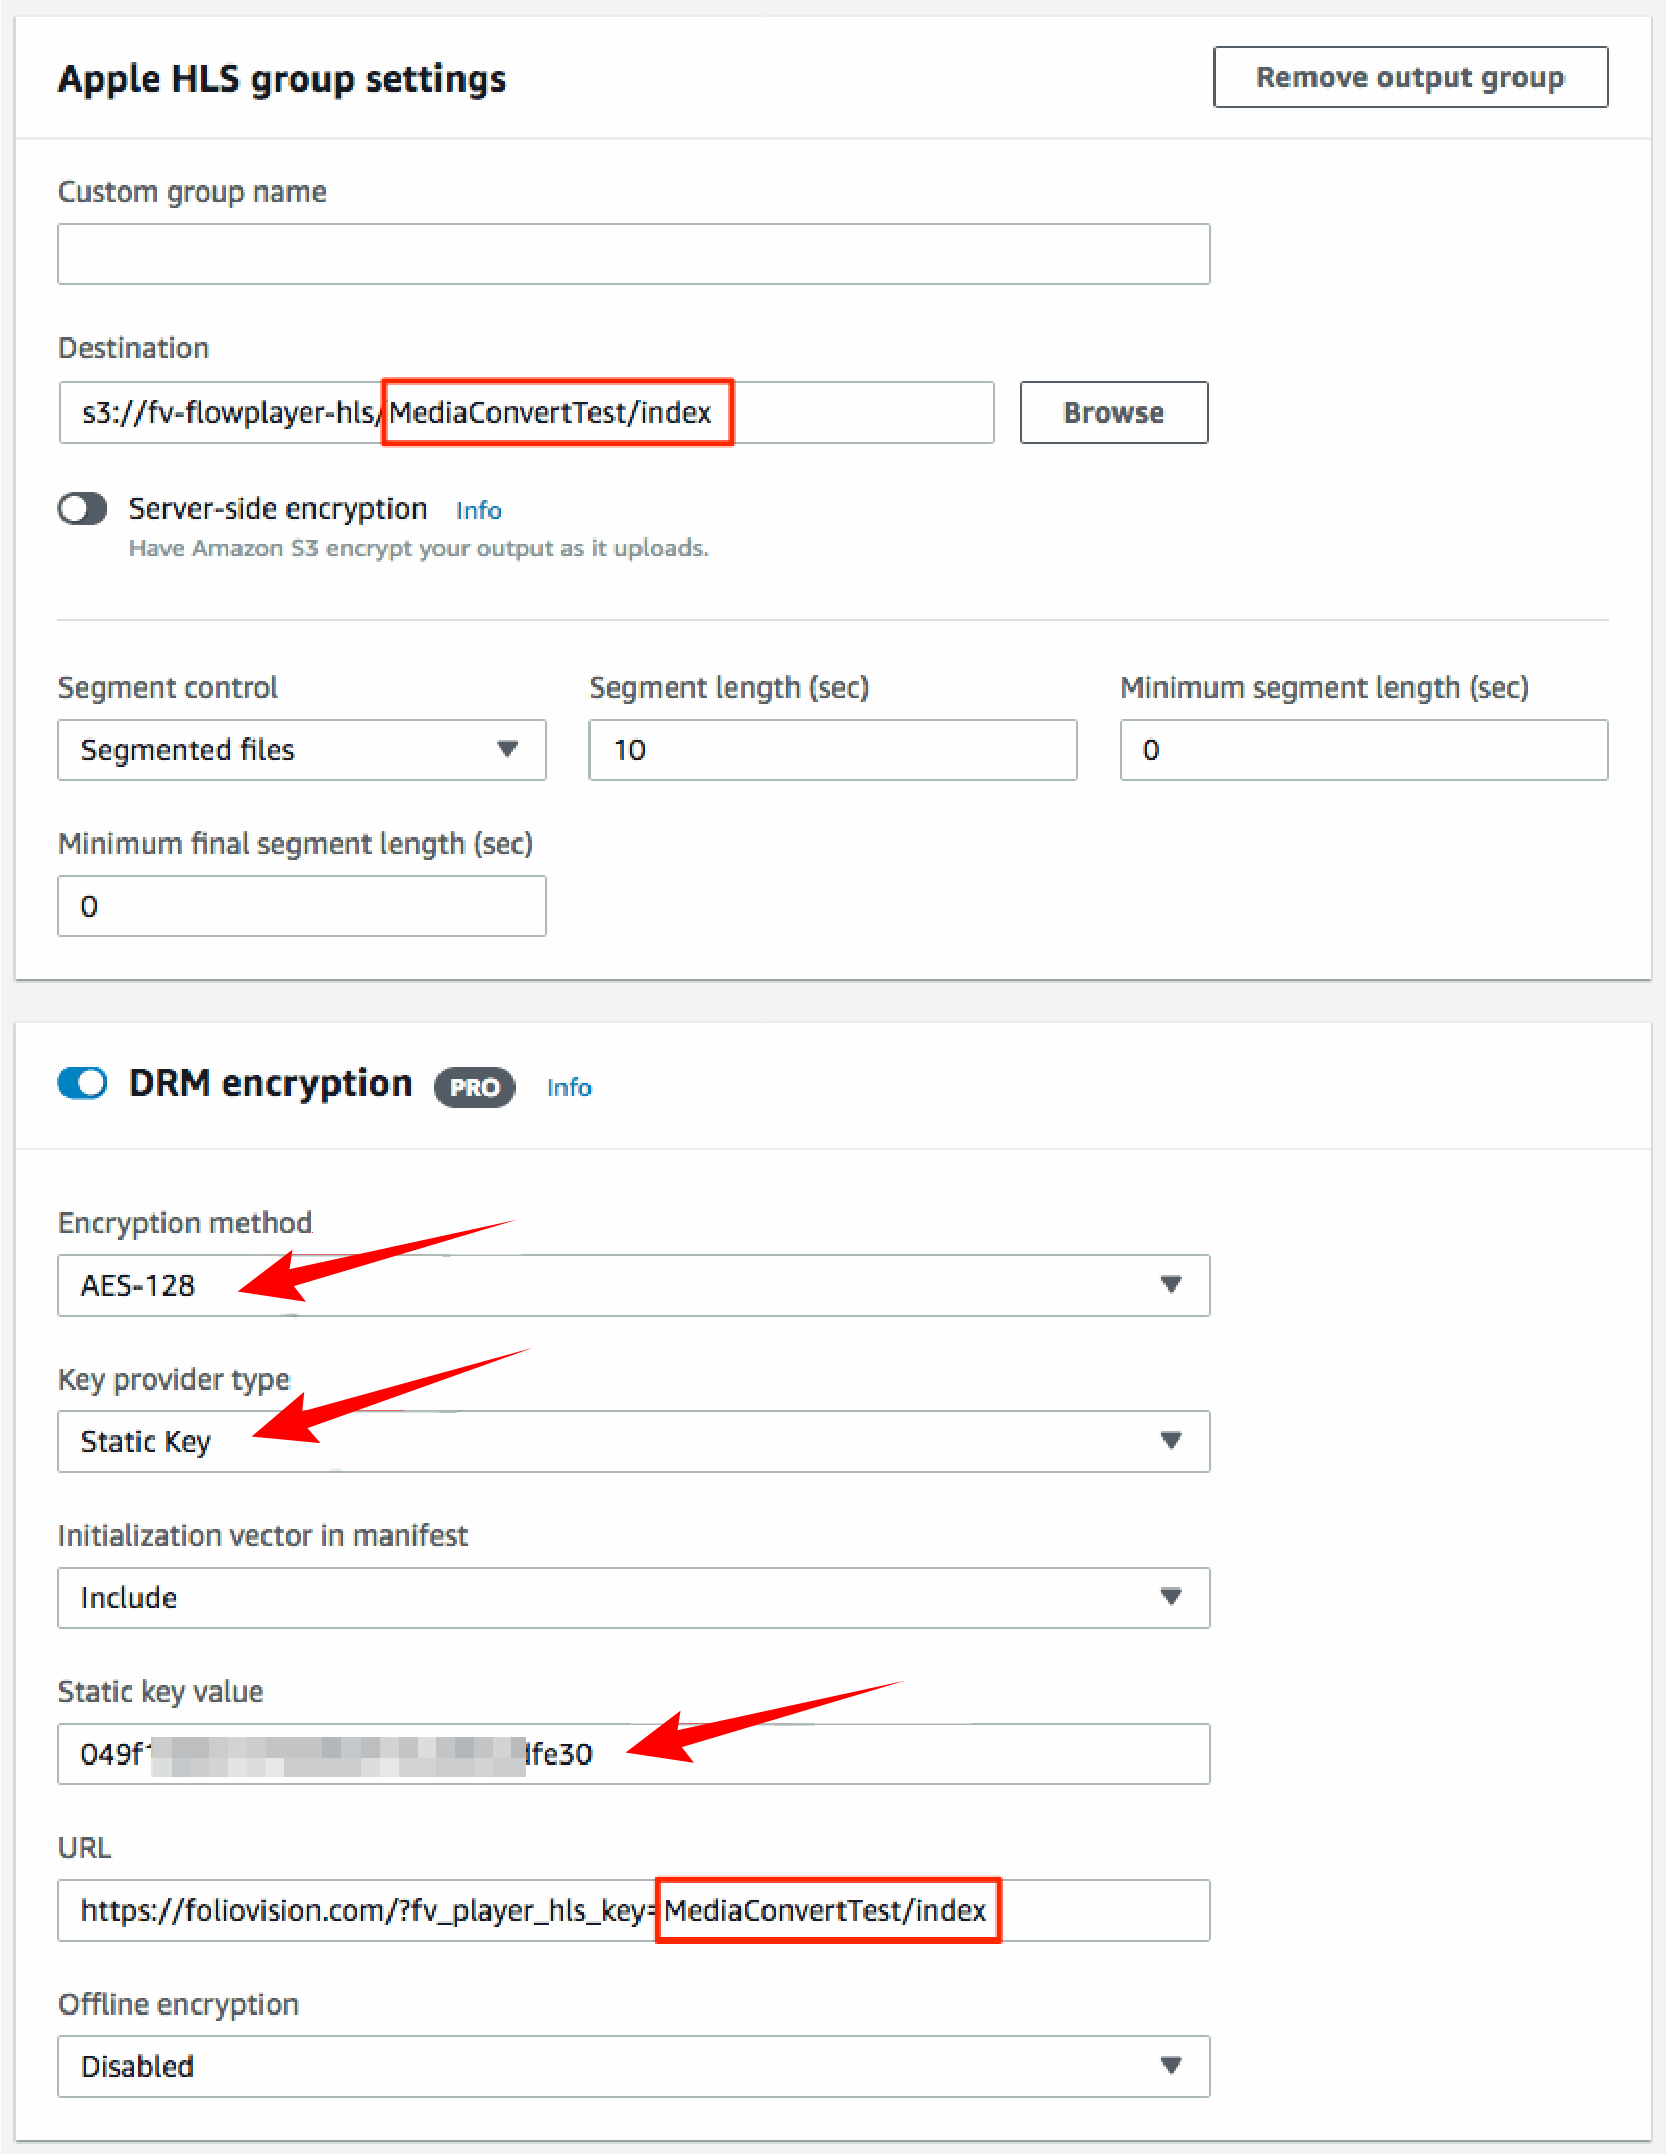
17. In the DRM box, select the following properties:
- 3. Encryption method: AES-128
- 4. Key provider type: Static Key
- 5. Static key value: enter a random hex encoded 16 byte string (You can always find this key after creating the job, but it’s a good idea to be mindful of it, as you will need to insert it into FV Player editor later), you can use this tool to get it:
-
6. URL: It’s important to get this one right otherwise the video won’t play. The format of that URL is:
https://your-wordpress-site.com/?fv_player_hls_key={Location from step 10.}If your website is using https:// then this URL needs to use https:// as well. If your website is using a domain with www. in front of it, make sure it’s included as well.
Example:
In this guide, our location was set to MediaConvertTest/index and our WordPress site is https://foliovision.com so the URL for the Static key will be:
https://foliovision.com/?fv_player_hls_key=MediaConvertTest/index
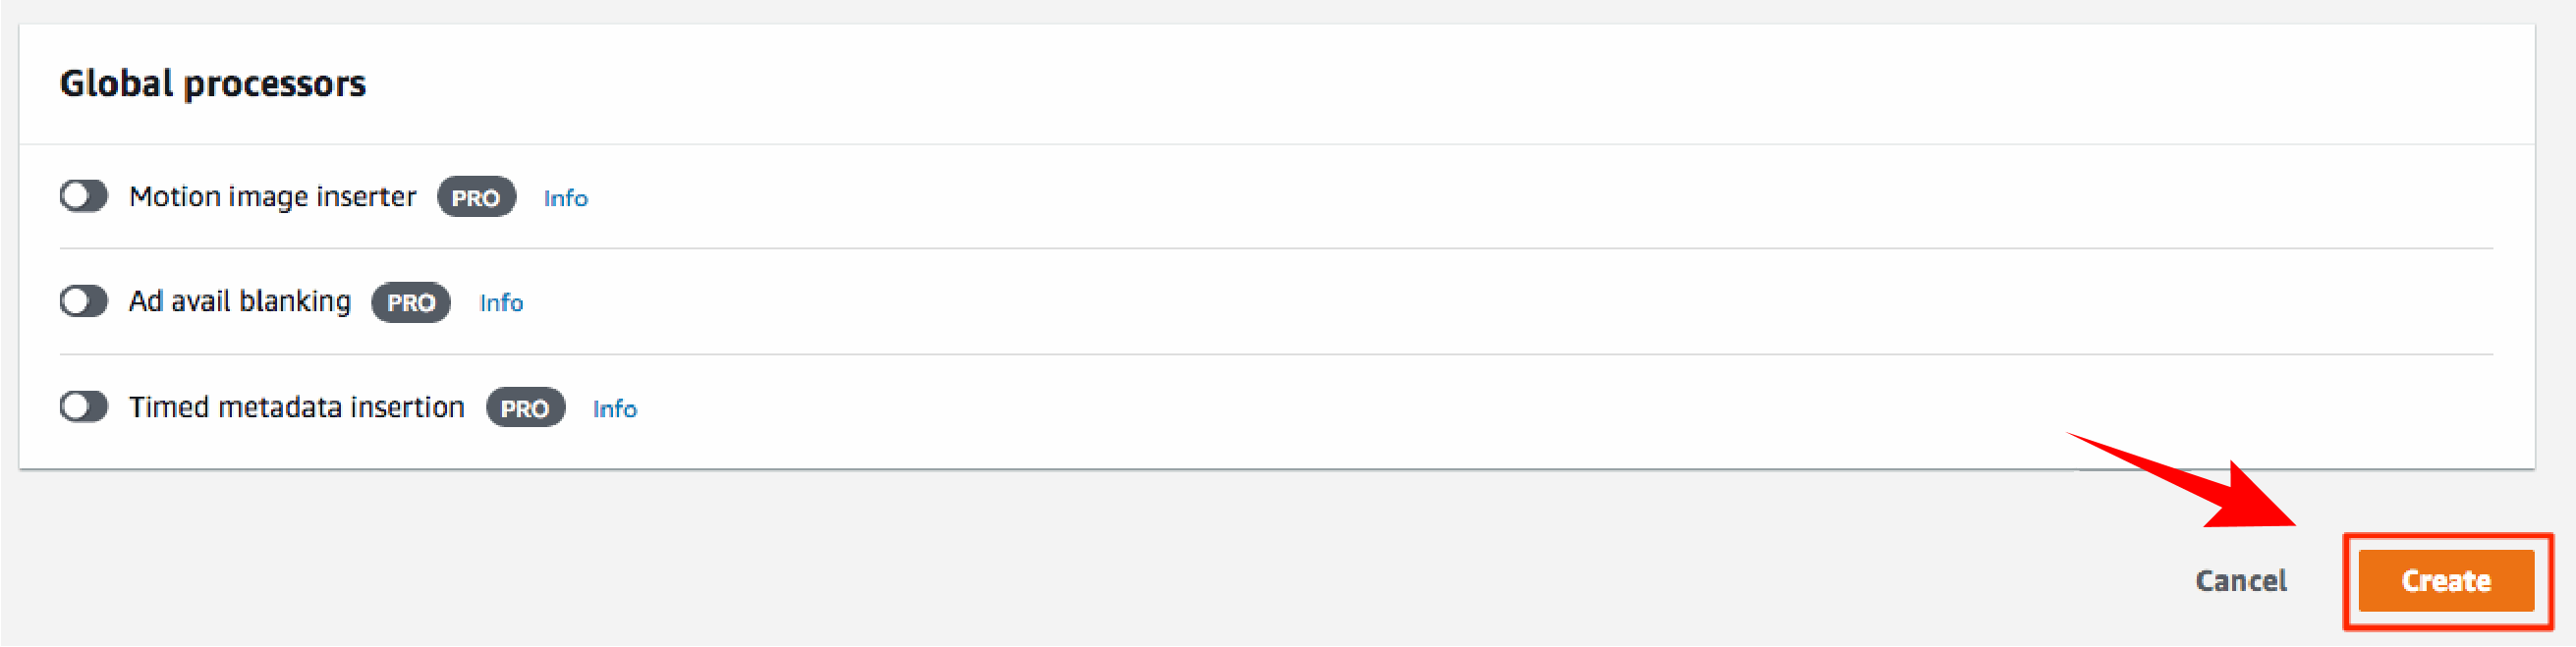
18. Now it is time to give permissions to MediaConvert by setting the IAM role. Go to Job Settings->AWS integration->Service access. Go ahead and pick Create a new service role, full permissions and give a name to your IAM role.

19. Finally, scroll down to the very bottom and click “Create”.
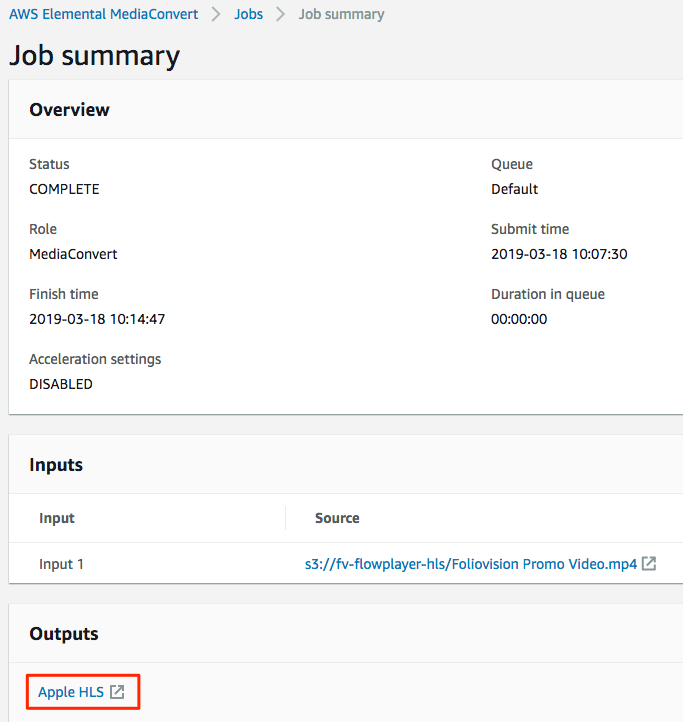
20. You will see that your job has been submitted. You can click the “Refresh” button to see if it’s done yet.

21. Once it’s done, you can access the folder with the encoded stream using the link in the “Outputs” section.
Signed URLs
An m3u8 HLS file is static and cannot always include the most up-to-date URL signatures as these are time sensitive. The Stream Loader feature allows you to get past these limitations.
If you want to use signed URLs, you will have to enable the Stream Loader feature.
If you do not want or cannot use signed URLs, you will have to disable the “Restrict Viewer Access” option in your CloudFront distribution behavior settings.
Posting The Video To Your Website
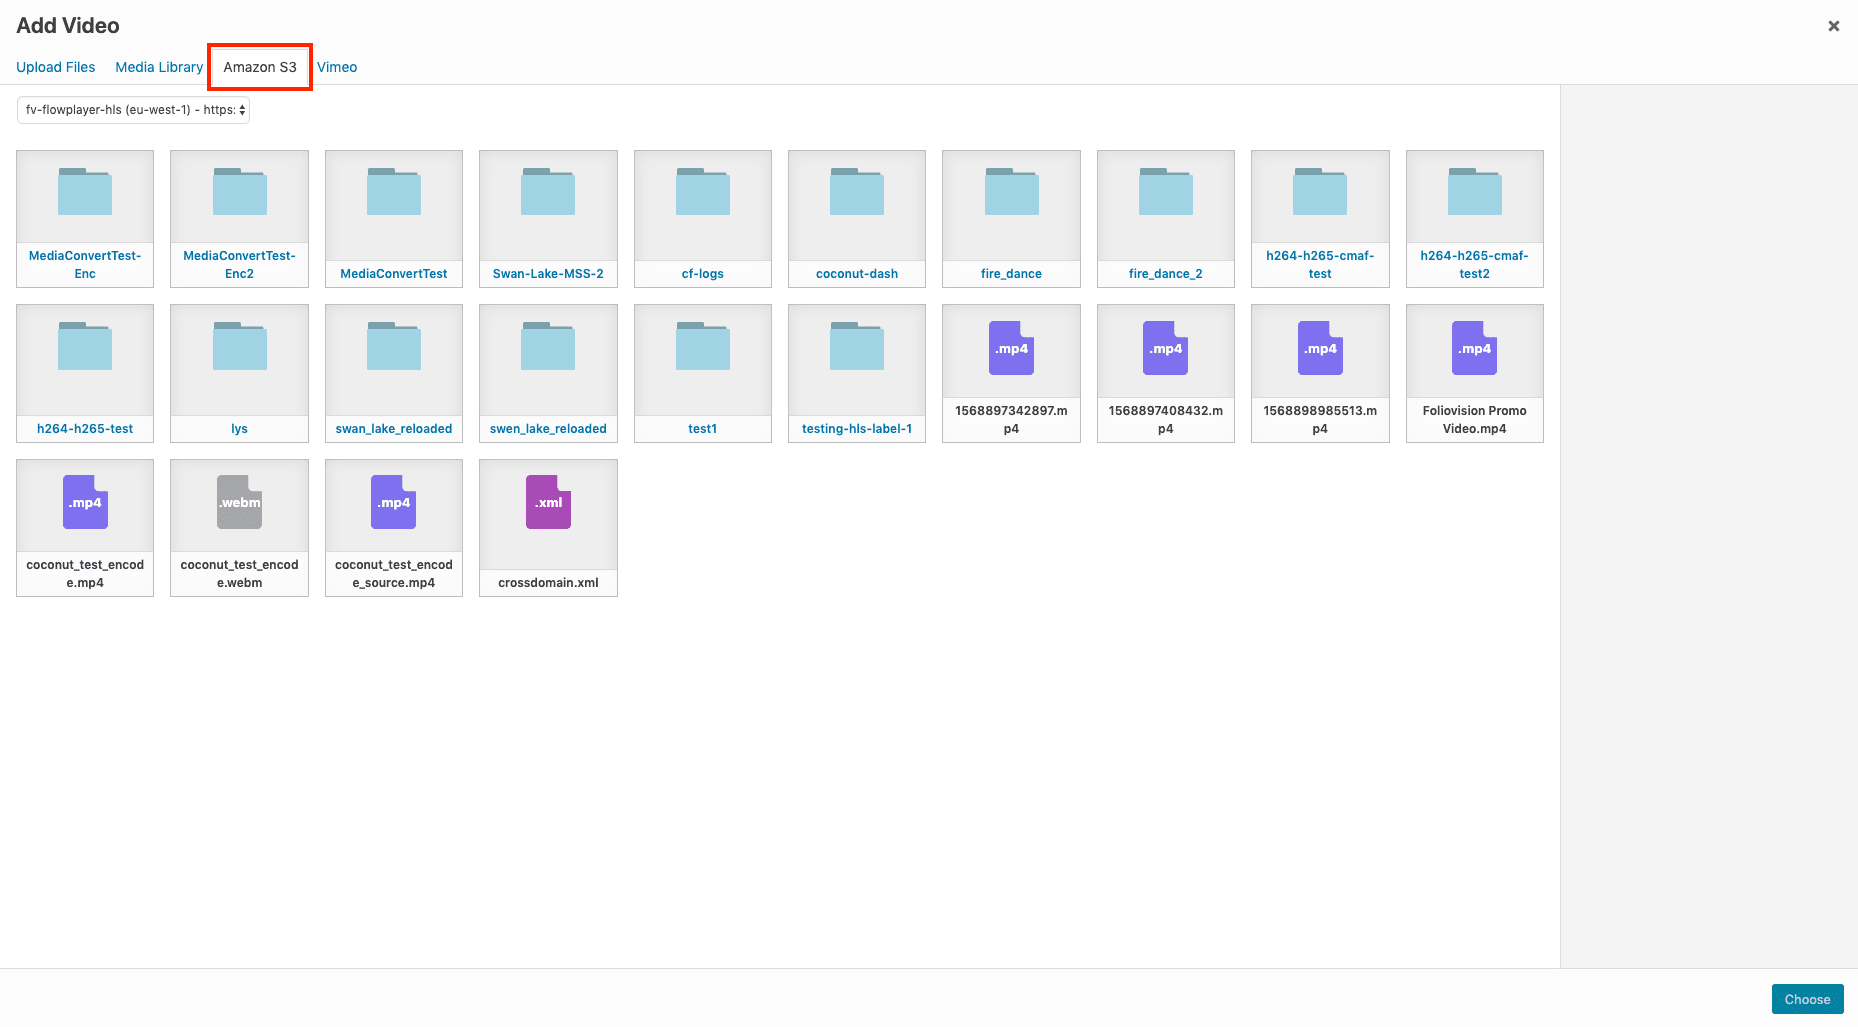
24/a.You should enable S3 browser It makes posting much easier and ensures automatic use of the proper CloudFront URL. Here’s how to enable FV Player S3 browser.
Then click add video in the FV Player Editor and go to the Amazon S3 tab:
24/b.Alternatively, you can enter the URL into the shortcode editor manually.You can get the file path from the S3 bucket which gives you something like:
https://s3-eu-west-1.amazonaws.com/{bucket name}/MediaConvertTest/index.m3u8
If you use CloudFront, you will need to replace the bucket path with your CloudFront URL, so it ends up being like this:
https://{CloudFront domain ID}.cloudfront.net/MediaConvertTest/index.m3u8
25. Paste in the “Static key value” from Step 16. into the Encryption HLS field. You can also get it from the “Job summary” screen, just go to Details -> Apple HLS -> “DRM encryption“
26. Click “Insert” to save the player
27. Save your post and test the video
