Adding subtitles to your videos is always a great idea. They can let the viewers watch it without sound (which is important for the silent autoplay, that is making it’s way to the new versions of iOS and Android), make it easier to understand what has been said if the audio is too noisy or lower quality, and help non-native speakers better understand the spoken word. It’s also necessary for people with hearing impairment.
YouTube understands that and they encourage the content creators to add subtitles to their videos. They offer a great way to easily create transcripts, which is usually a time-consuming process, or requires a specific and expensive software. It offers two options: creating an automatic transcript and putting in your own text and have it synced automatically with the video.
Auto-failtitles
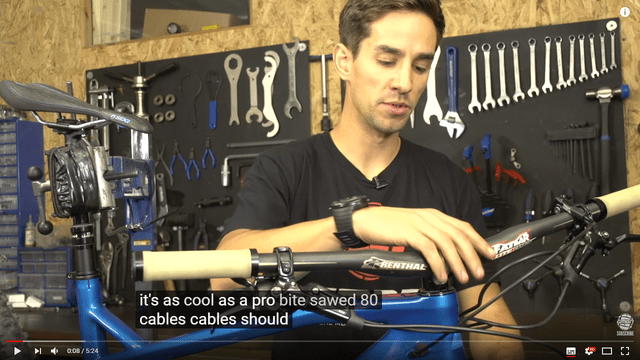
The first option is the one you probably know very well. YouTube can generate the text of the subtitles from the audio track of a video. The service is far from perfect, but it’s free, fast and easy to use. The best way to describe it is “better than nothing”. Take a look at these two extracts from subtitles from this YouTube video – Top 10 Ways To Take Your Mountain Bike To The Next Level:
- This is part of the manually entered subtitles
1
00:00:00,010 --> 00:00:04,168
- [Neil] So here's our Top 10 ways of
really taking your bike to the next level

2
00:00:04,168 --> 00:00:06,878
so it's as cool as a pro bike.

3
00:00:06,878 --> 00:00:09,813
Sort out your cables.
Cables should be just
- This is the same part, only from the auto-generated subtitles
1
00:00:00,120 --> 00:00:02,520
so here's our top ten ways of really

2
00:00:02,520 --> 00:00:04,440
taking your bite to the next level so

3
00:00:04,440 --> 00:00:07,109
it's as cool as a pro bite sawed 80

4
00:00:07,109 --> 00:00:09,840
cables cables should be just
As you can see, the software recognized the word “bike” as “bite” and “sort out your” came out as “sawed 80”. This is partially given by Neil’s cool British accent, but the longer the video is, the more fails like this you will encounter.
Fixing the damaged captions
As you can see in the example above, the auto-generated transcript is usually just a good placeholder. The best way is of course creating the subtitles manually.
There are plenty of ways of doing this, including using another YouTube’s tool, that is described in detail in our article How to create video subtitles using Youtube. That can, however, be only used when you uploaded the video yourself.
But what if you want to use a video uploaded by another user and still want to create quality subtitles?
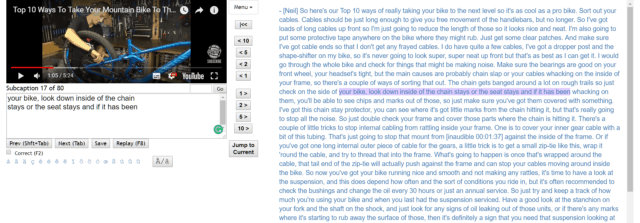
There are couple of tools that can help you to download the auto-generated subtitle track. Our favourite is DIYCaptions. It’s a free online tool in which you put the URL of the video and the software will immediately load the auto-generated track (if available) into it’s editing interface and let you edit the text line-by-line, thus allowing you to correct all the inevitable errors.

DIYCaptions editing interface
The interface works in a similar way as our Interactive Transcript – the text is shown in full and clicking on a single line will make the video playback jump to the point where the line starts, so you can check with audio if the transcription is correct and fix it if necessary.
The software can then export the files in .txt and .srt formats, which is great, as FV Player supports .srt. The only downside is, that when a YouTube video has other subtitles, the software will load those, like in the example above.
How to use it with FV Player
As said, FV Player supports the SRT format along with WebVTT, so the workflow you could possibly use and we recommend is to not rely on the auto-generated transcript and instead edit it to a usable text with DIYCaptions. The text then can be exported and used as regular subtitles. Using subtitles in FV Player is explained in more detail in this guide - How to Create Subtitles.


Leave a Reply