Before you begin
We assume that:
1. You know the basics of the FV Player usage. You can check it here: FV Player Start-up Guide
2. You have a working encrypted HLS setup according to the steps in How to setup encrypted HLS stream with Amazon Elastic Transcoder.
3. You uploaded your high quality original video into your S3 bucket already. We also assume that you know which S3 bucket is used as the input and output for your AWS Elastic Transcoder Pipeline.
Video posting Steps
1. First, you need to find the previous video encoding job. In this guide we just clone that – saving you a lot of time.
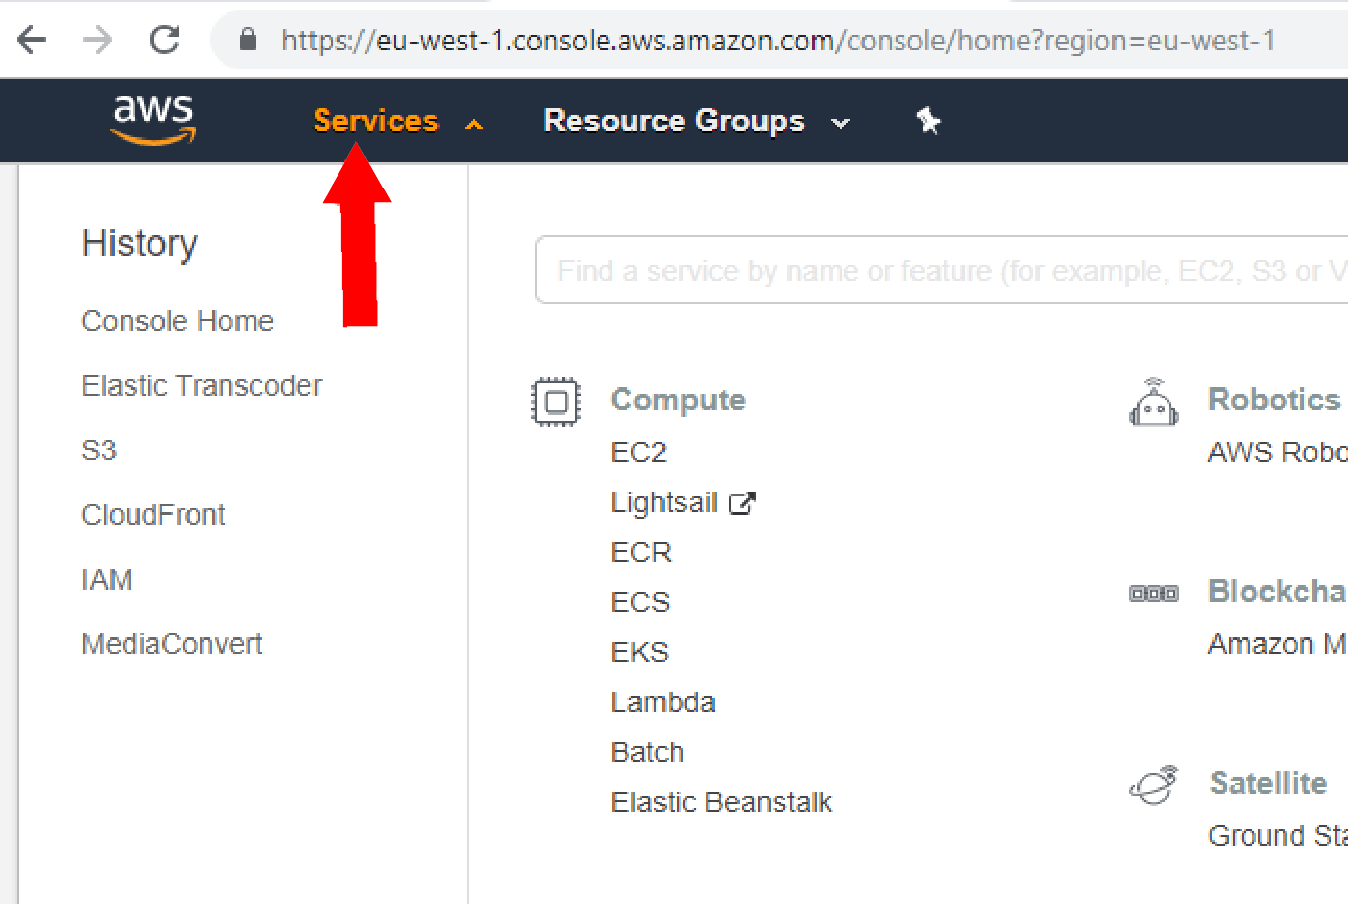
1.1. In the AWS Services menu, navigate to Elastic Transcoder. Since there is a lot of services, you can use the search field which is present. Or you might find it in the History section, if you have accessed it recently.
1.2. Next, go to the Jobs section of Elastic Transcoder.

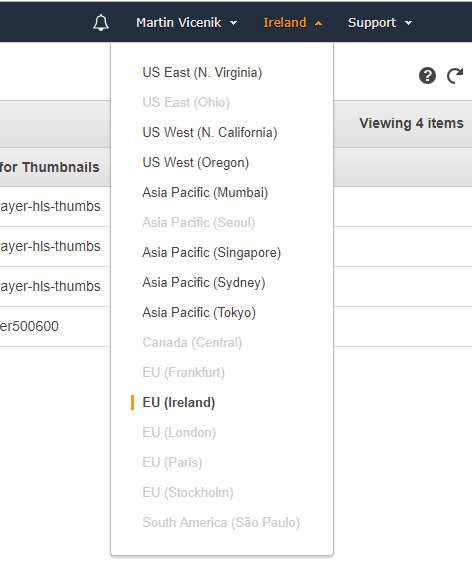
1.3. Remember that you have to be in the right AWS Region. If you encoded your video in, for example Ireland, you will not find them in any other region, so make sure you set that properly in the top right corner.
 Setting the AWS Region
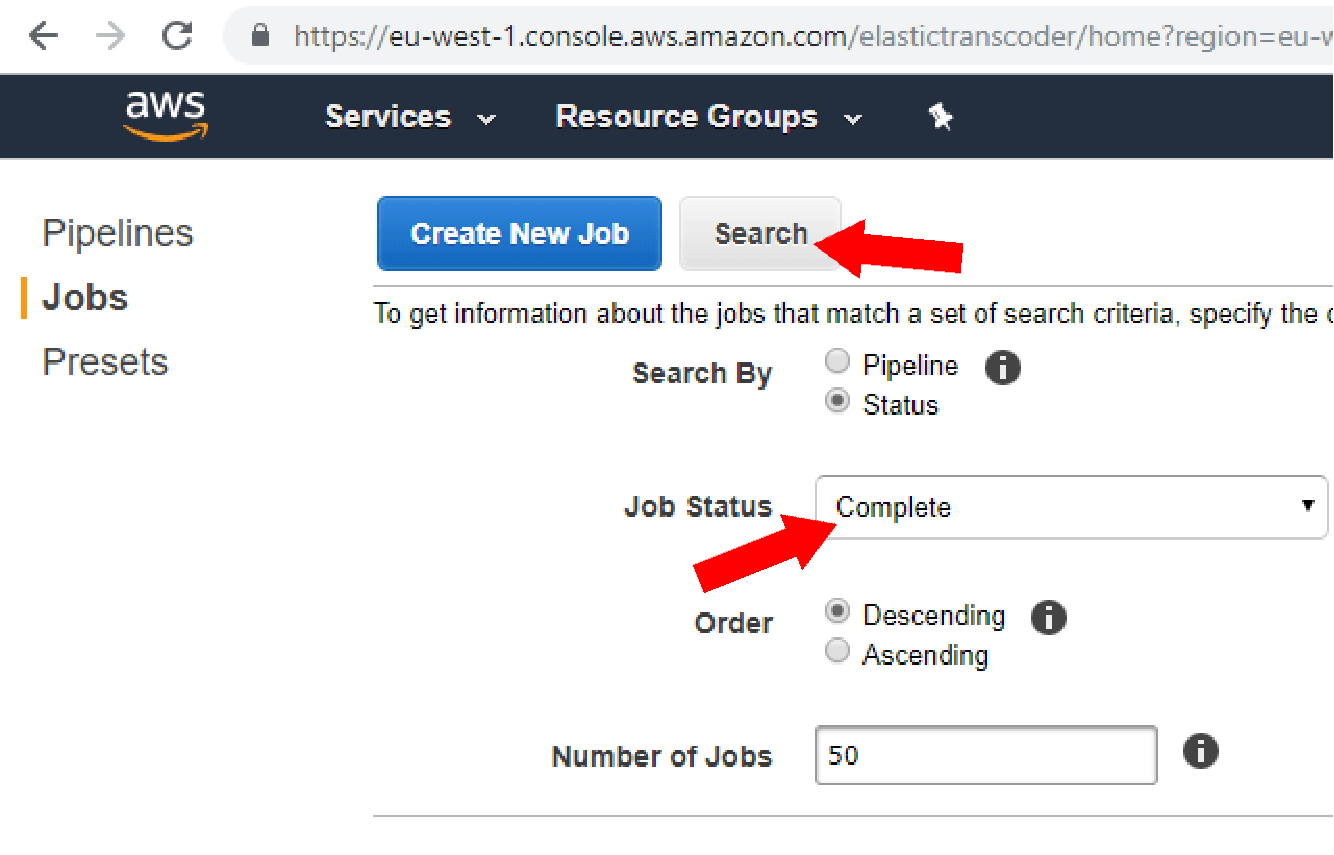
1.4. In the Jobs section, you can filter either by the Pipeline it used, or the Status. In the first case pick the Pipeline, and in the later case pick “Complete”.

Filtering jobs
1.5. You will get a list of encoding jobs, pick the one which you used to encode your previous video. If you did a bunch of tests, make sure you pick the right one.
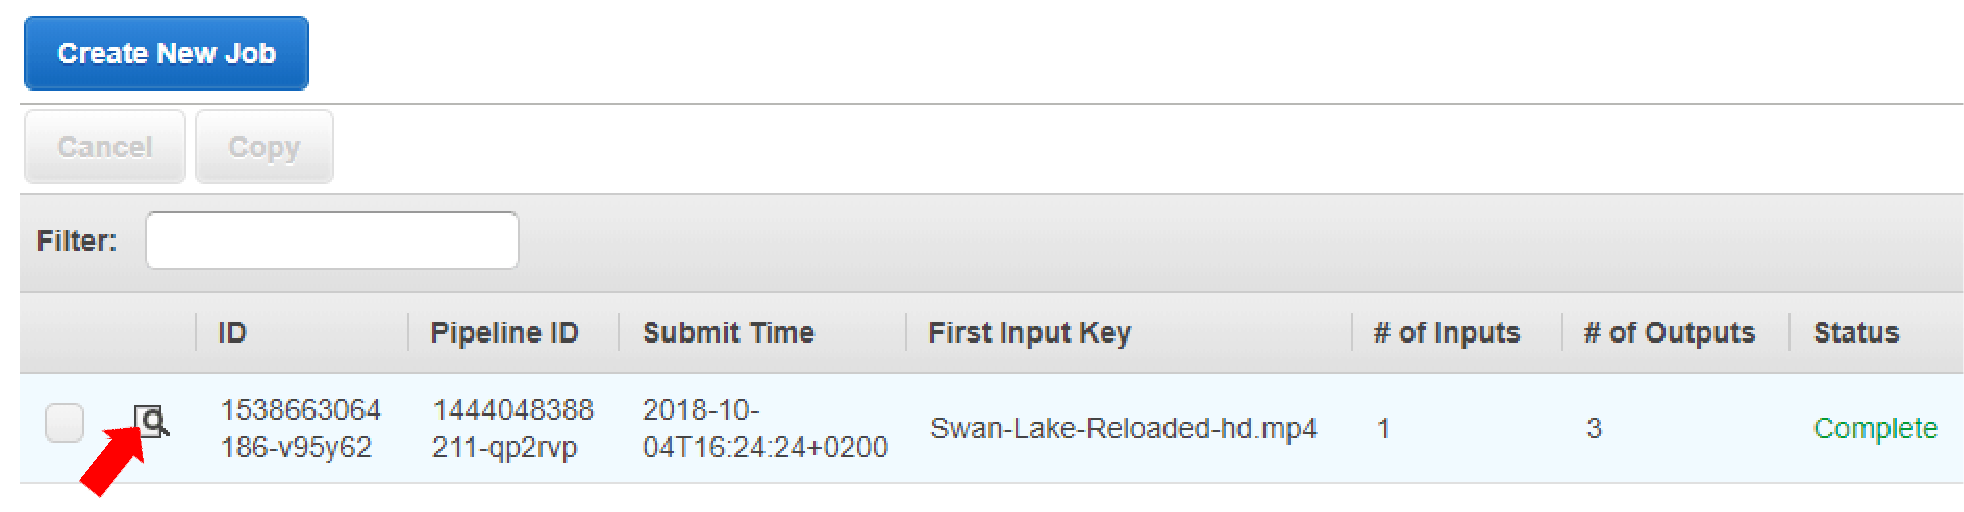
If you are not seeing it, then double check your Region (see step 1.3.). Or perhaps you encoding job has failed and didn’t finish properly.
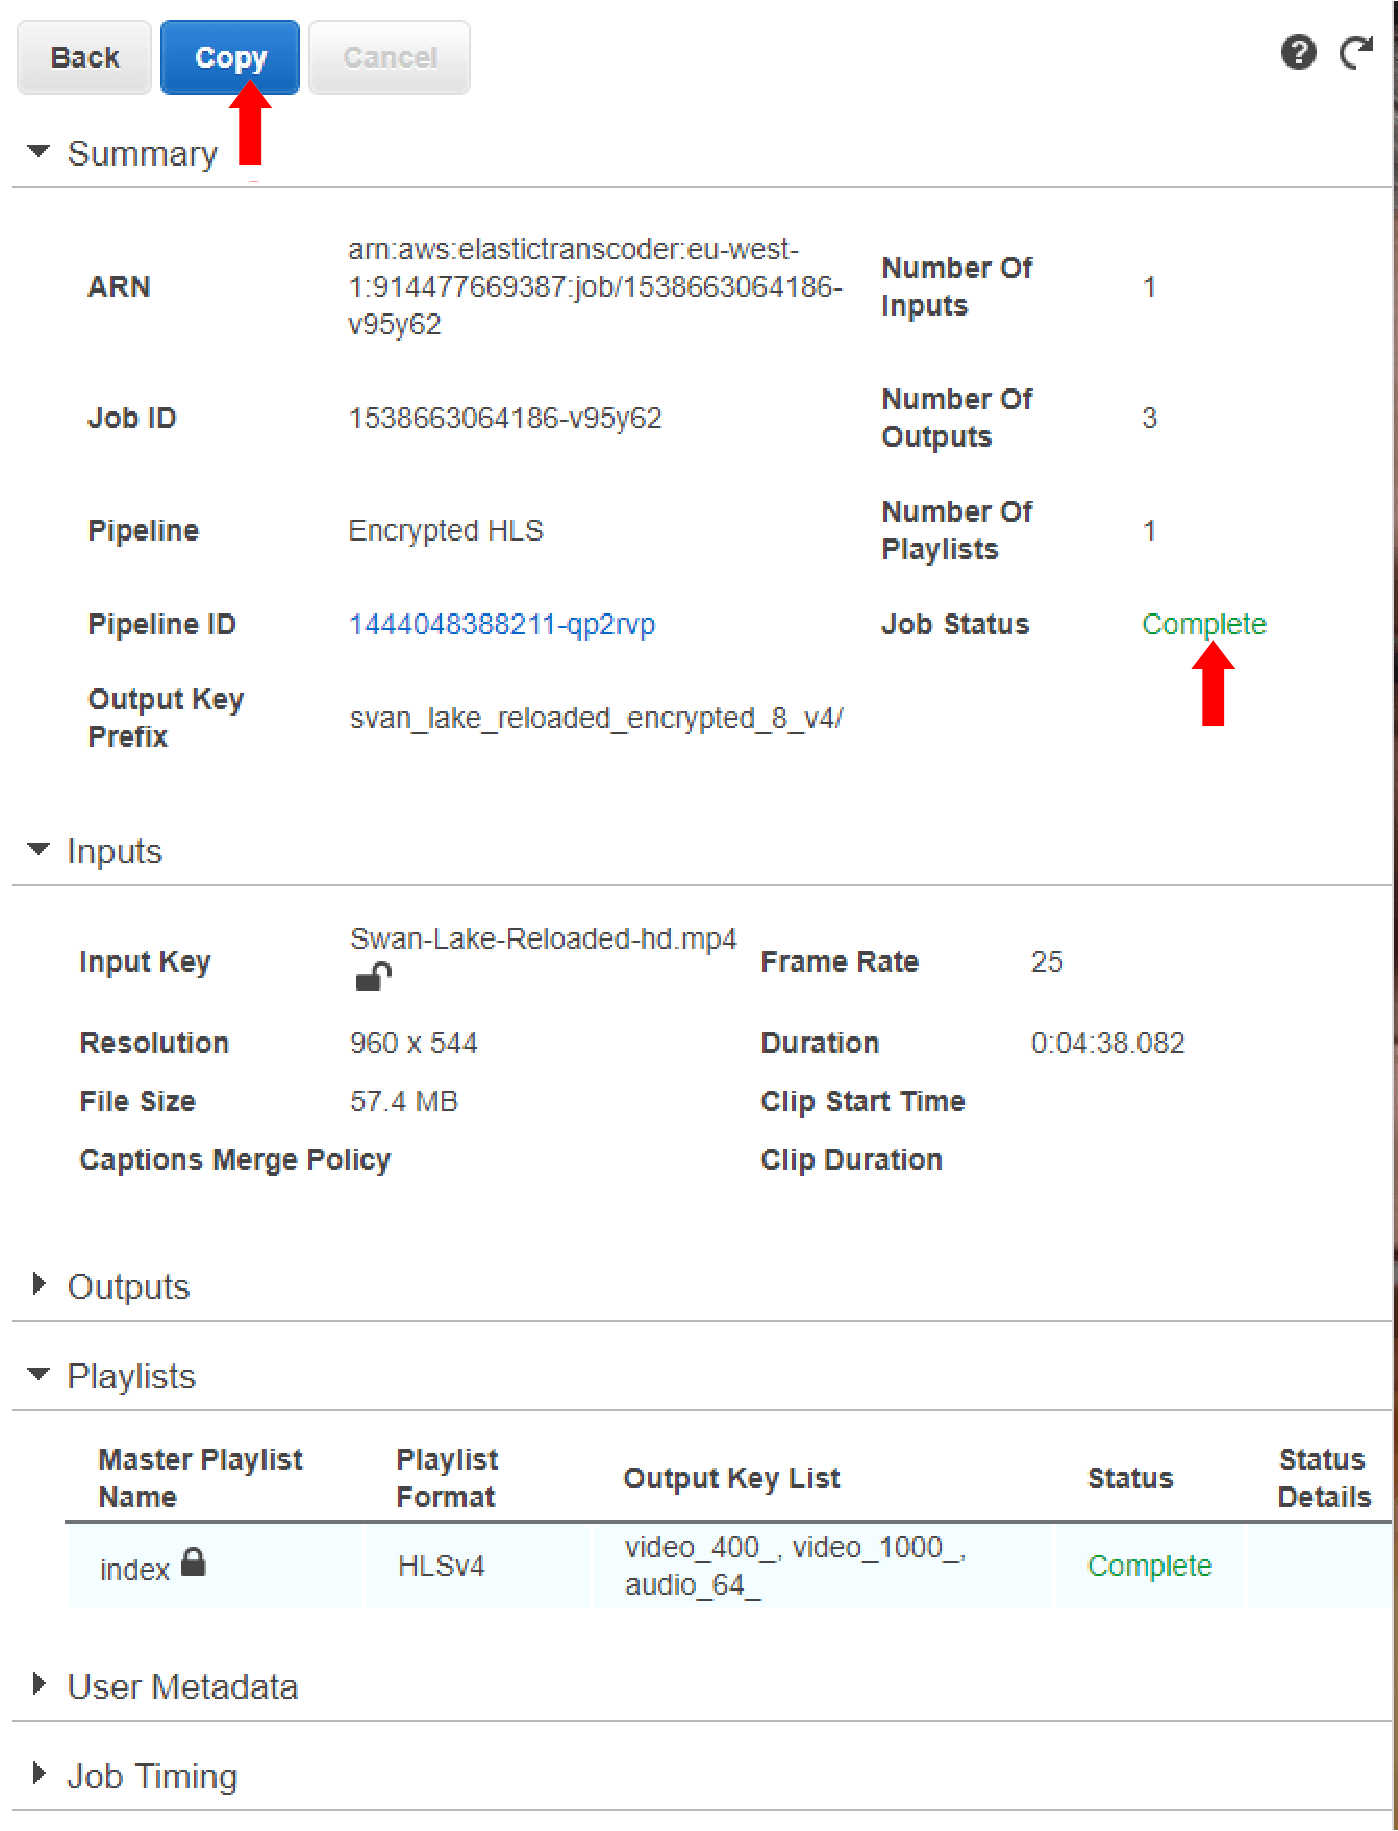
2. Now that you have found the right encoding job, it’s a good idea to bookmark the URL. The URL looks like this:
https://eu-west-1.console.aws.amazon.com/elastictranscoder/home?region=eu-west-1#job-details:1538663064186-v95y62
2.1. You need to hit the Copy button to create a new encoding job.

Creating a new encoding job
Now that you are creating a new encoding job, there is couple of things you need to adjust. Starting at the top of the screen:
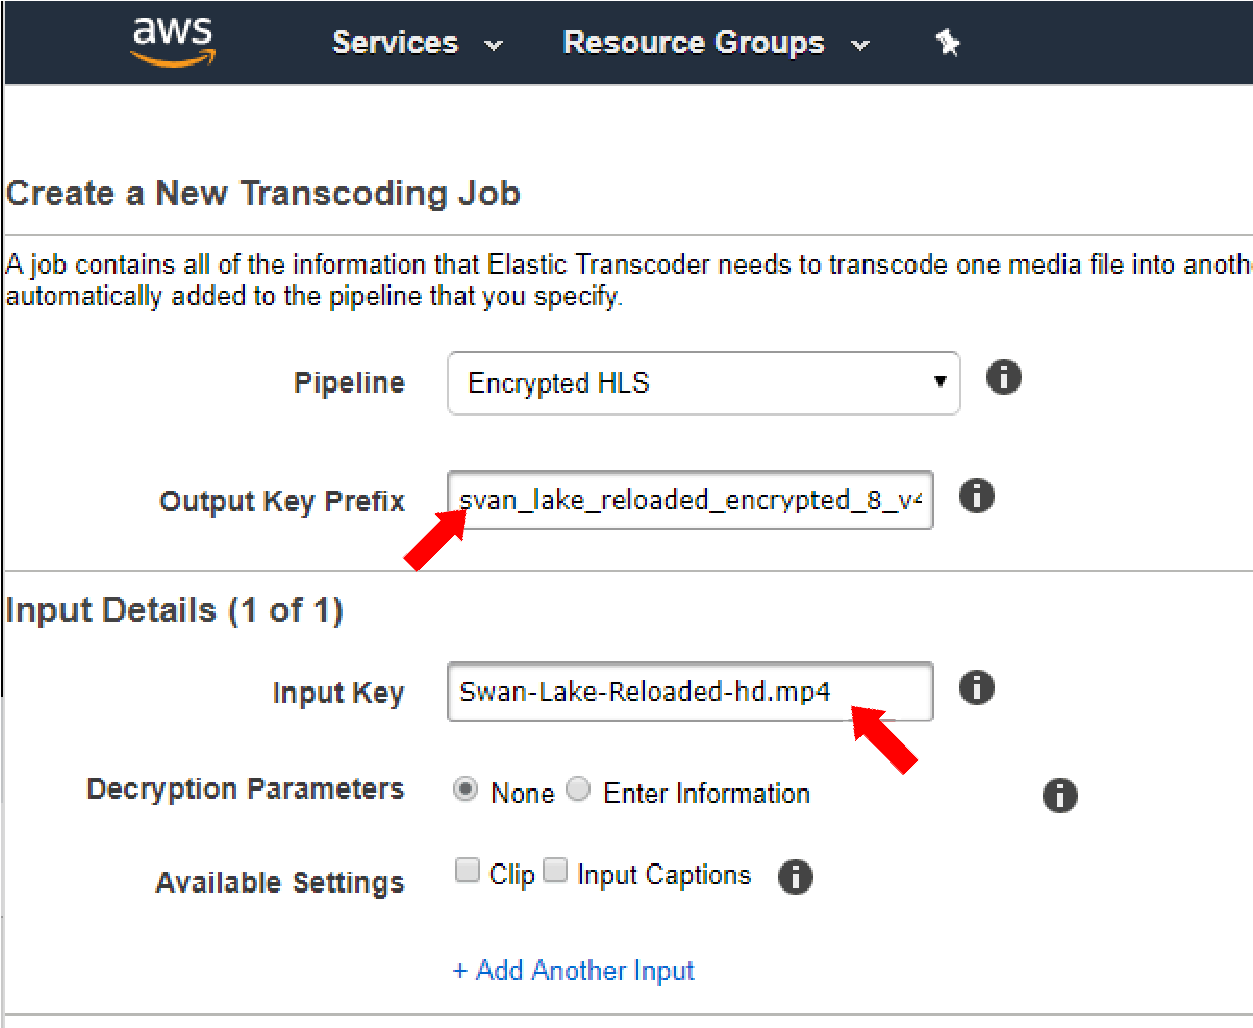
2.2. Enter new Output Key Prefix (you can replicate the Input folder structure there).
Important: Note that it has to end with the / symbol, as it needs to be a directory.
Important: It has to be unique, no other HLS video on your website can use the same Output Key Prefix. Otherwise, the encrypted video might not play. Using something generic, such as “lesson-1/” or “video-1/” is not a good idea. Fortunately, clicking the Output Key Prefix field gives you a quick listing of the output bucket content, so you can check.
Example: hls-encoding-tutorial/
2.3. Pick the video file you want to encode using Input Key. You can only pick from the S3 bucket for which the Elastic Transcoder Pipeline was setup up.

Output key prefix and Input key
2.4. Going further down, enter the new License Acquisition URL.
This URL consists of your homepage URL, the query argument name and the value of Output Key Prefix and Master Playlist Name.
Important: It has to be unique, no other HLS video on your website can use the same combination of Output Key Prefix and Master Playlist Name. Otherwise, the encrypted video might not play. Using generic Output Key Prefix, such as “lesson-1/” or “video-1/” is not a good idea.
Example: https://your-site.com/?fv_player_hls_key=hls-encoding-tutorial/index
2.5. Also check Auto generate encryption key.

Now you can hit the Create New Job button.
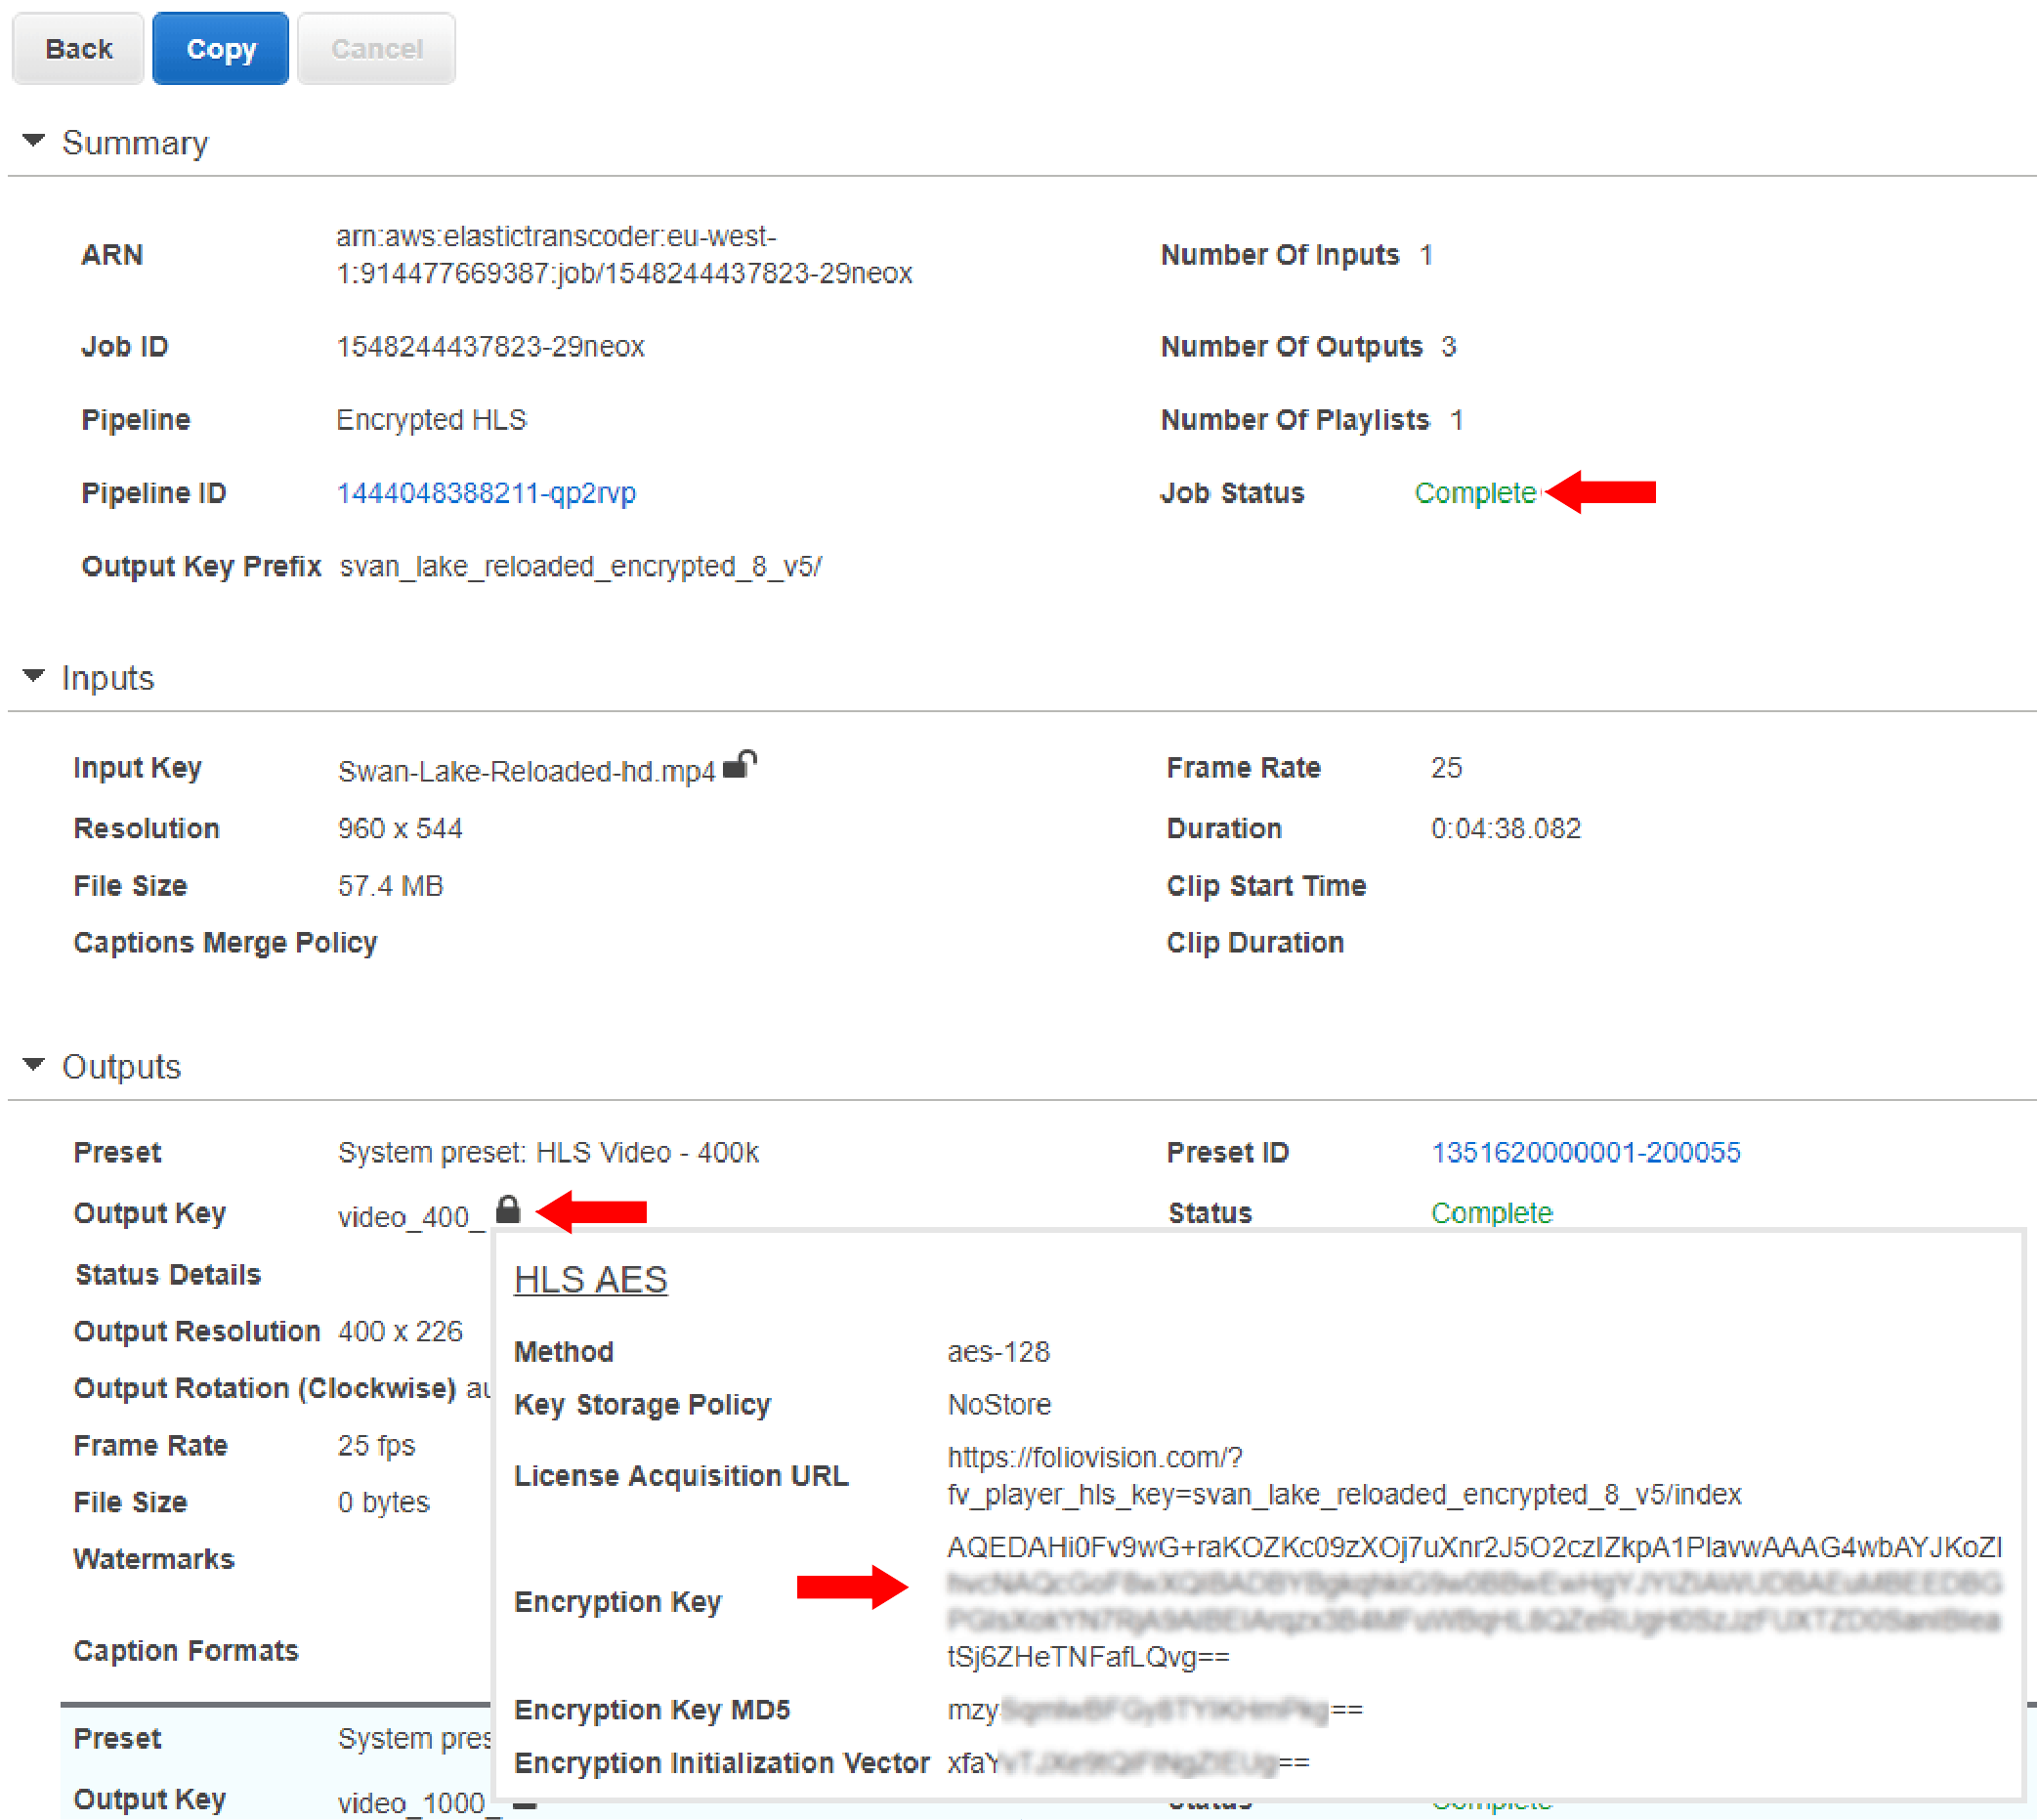
3. Now you can see a screen with the Job Status which will say Submitted. You can reload this screen until it says Complete.
4. Once the job is complete, point your mouse at the closed lock icon next to any of the Output Key items and you will see a popup with Encryption Key.
You need to copy that Encryption Key and keep it ready for the next steps.

Obtaining the encryption key
5. Now is the time to finally insert the video on your website. Bring up the FV Player editor and either paste in the HLS URL or use the Add Video button to bring up the WordPress Media Library.
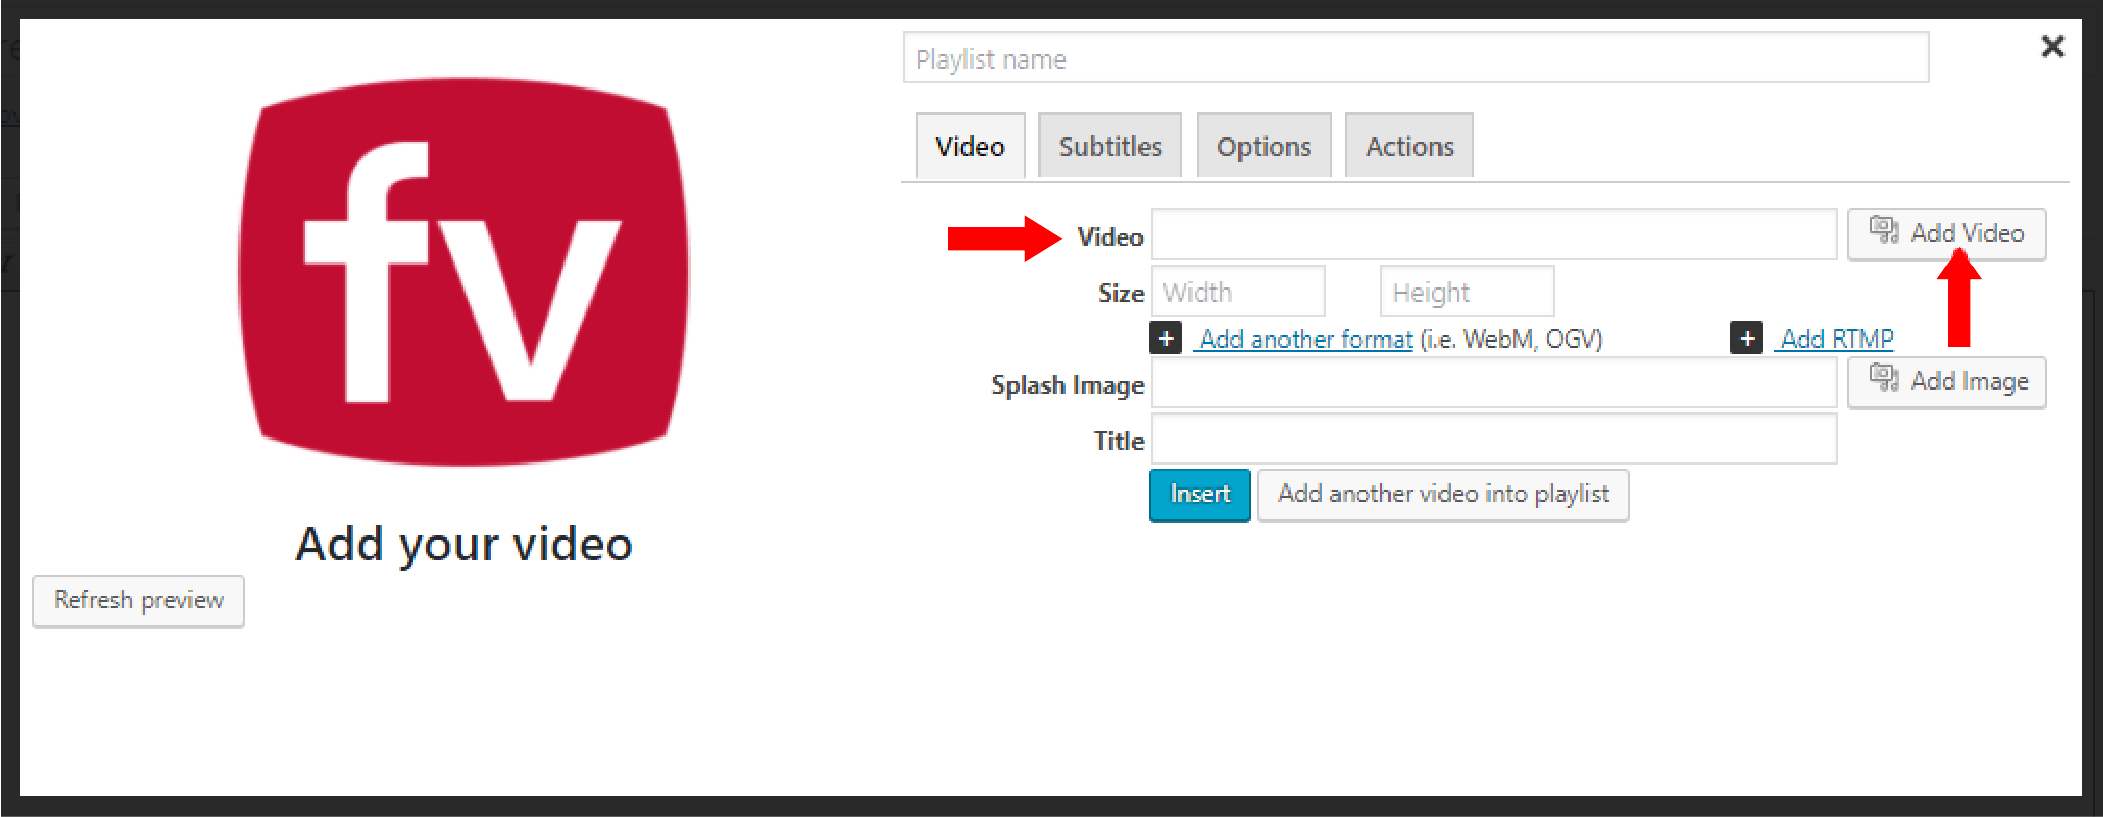
In the Media Library, you can click the Amazon S3 tab and pick the index.m3u8 file of your newly created file there. Just make sure you pick the right S3 bucket and navigate to the right folder – matching the Output Key Prefix from before.
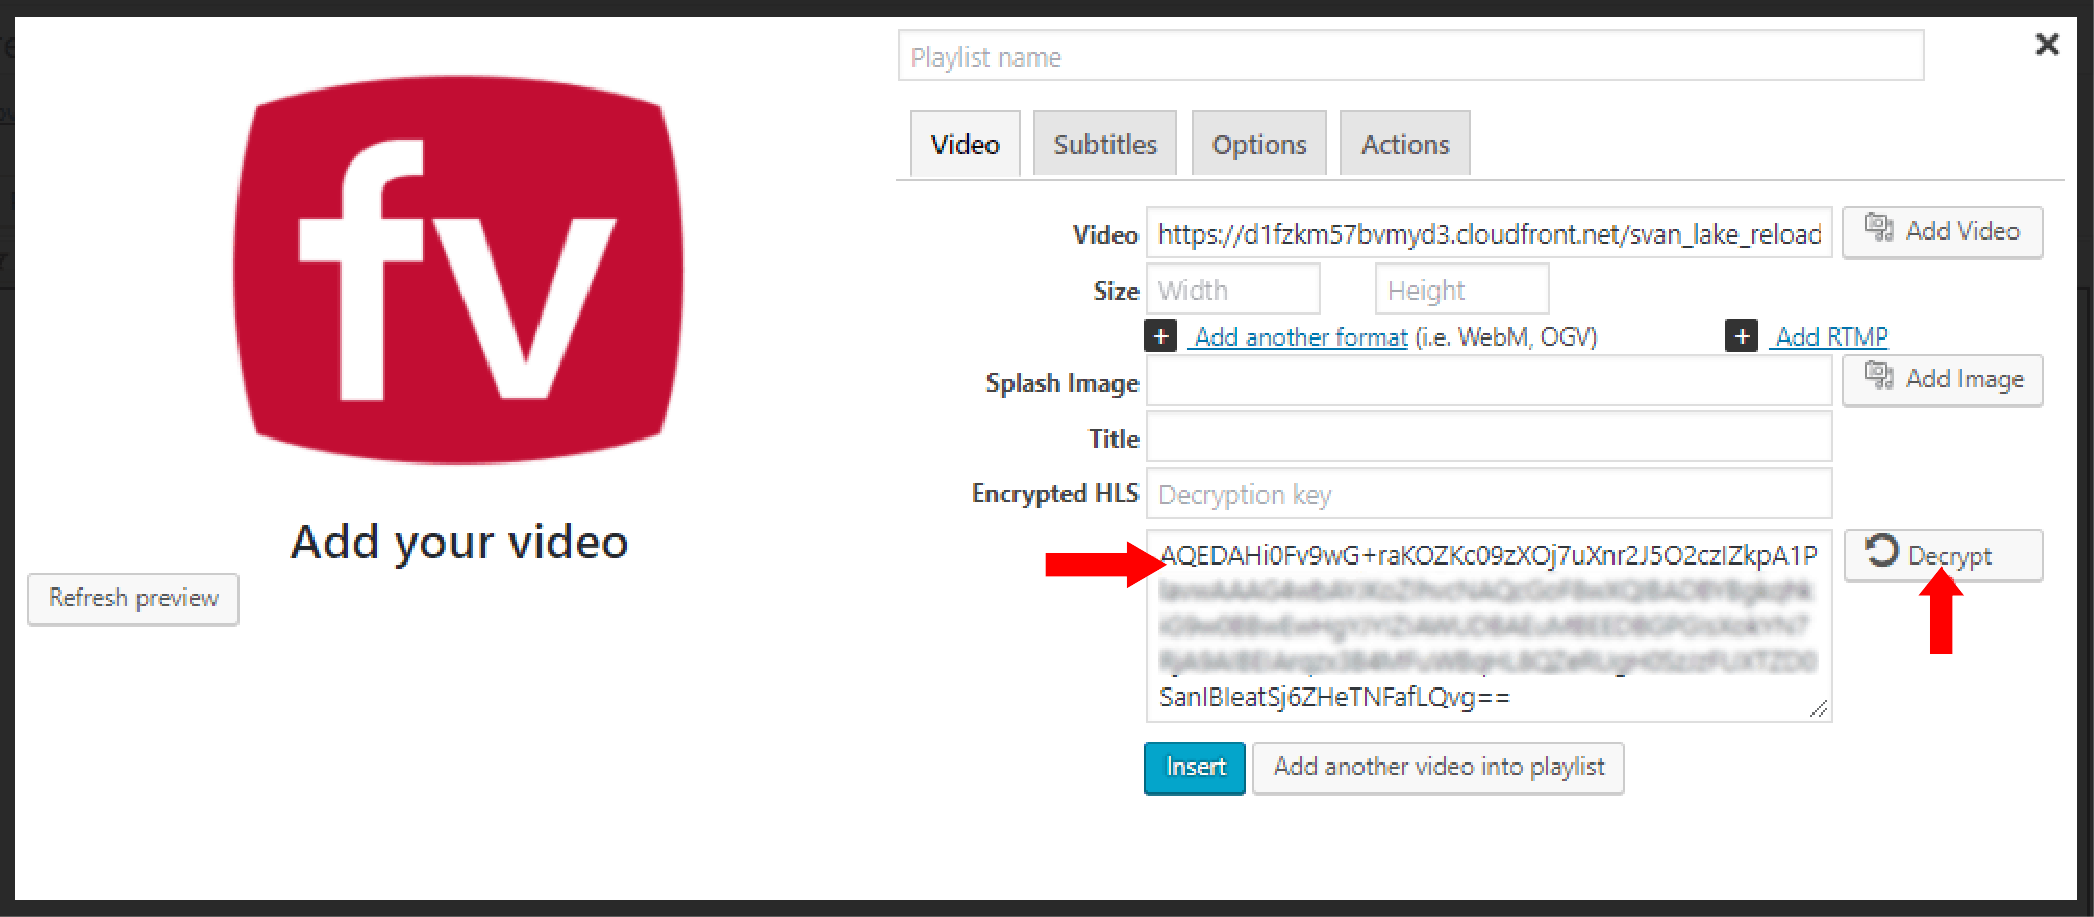
6. Now you need to paste the Encryption Key from step 4. into the “Encryption key” field and hit the Decrypt button.

The encryption key inserted into the shortcode editor
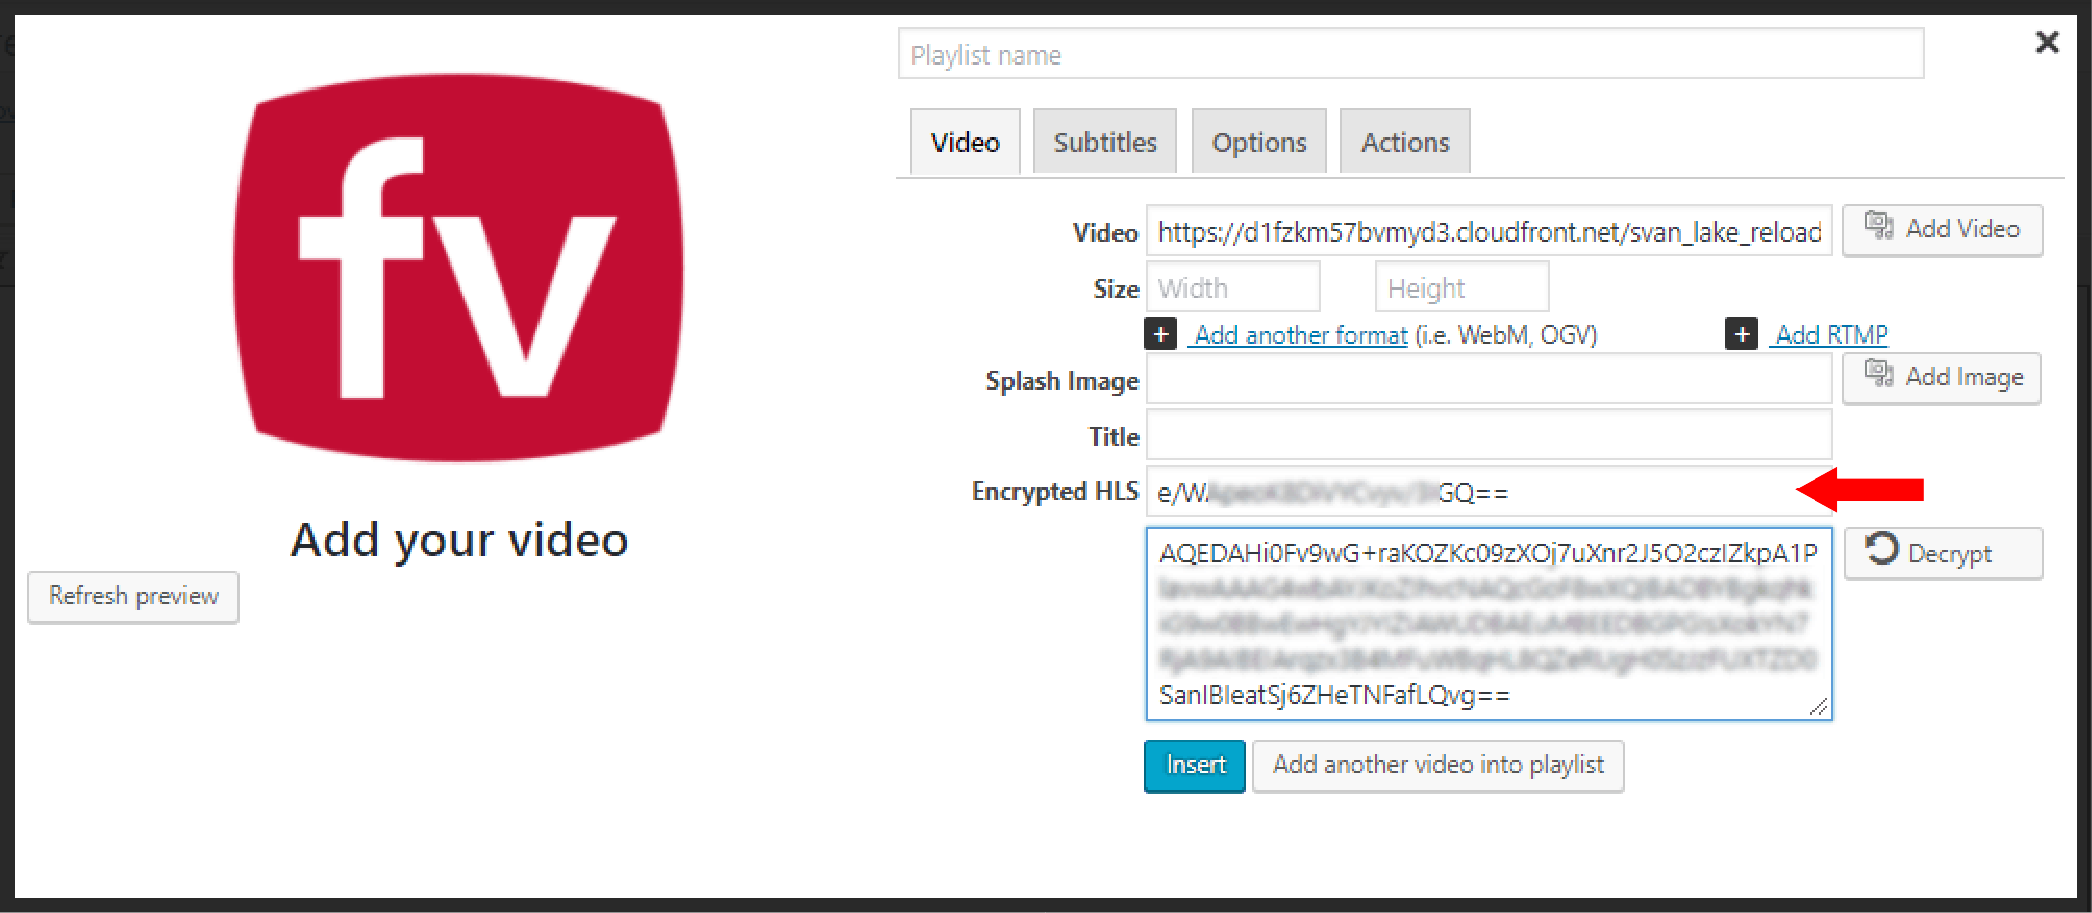
7. Then the “Decryption key” field will be filled with the actual Decryption Key.

Decryption key in sshortcode editor
8. Finally! That’s it, you can just insert your video to a page and watch it play.
Note: the actual preview in the FV Player editor will not work until you save your video.