• Skip to main content
  • Skip to primary sidebar
  • Skip to footer

Foliovision

  • Weblog
    • FV Player
    • WordPress
    • Video of the Week
    • Case Studies
    • Business
  • About
    • Testimonials
    • Meet the Team
    • We Support
    • Careers
    • Contact
    • Pricing
  • Products
  • Support
    • FV Player Docs
    • Pro Support
  • Login
  • Basket is empty
Affordable VAST/VPAID for Wordpress has arrived. Serve ads with your videos starting today!

How to Create Burned-In Subtitles Using YouTube and HandBrake

8 March 2019 / Lia Rusnakova / Leave a Comment

We wrote before about why you should always have captions for your videos, but there are two ways of doing it. You can upload the .srt file you created using our guide. Or if you want to have complete control of the font, color of the text and size of it on the screen and you want your videos to always have subtitles, you might want to consider burned-in subtitles.

The disadvantage here is that you’re not leaving any choice to the viewers, because they won’t be able to turn the subtitles off. But in most cases, they wouldn’t want to turn them off anyway. These days, people like to watch videos without any sound and that’s when having subtitles turned on all the time makes a big difference. Especially if you want to post a video to Instagram, for example, where there is no option to turn the subtitles on/off.  

We do this for some of our clients videos and we’ve decided to post a guide on how to do it.

The easiest way to create a subtitles file is getting the advantage of YouTube’s automatic transcribing and syncing. Read our How to create video subtitles using Youtube for the step-by-step guide.

1 – Download HandBrake. It’s free and easy to use, the only downside is that you cannot change how the subtitles look or their position.

2 – Upload your video. Use one of the presets or play with the video and audio settings for the best results.

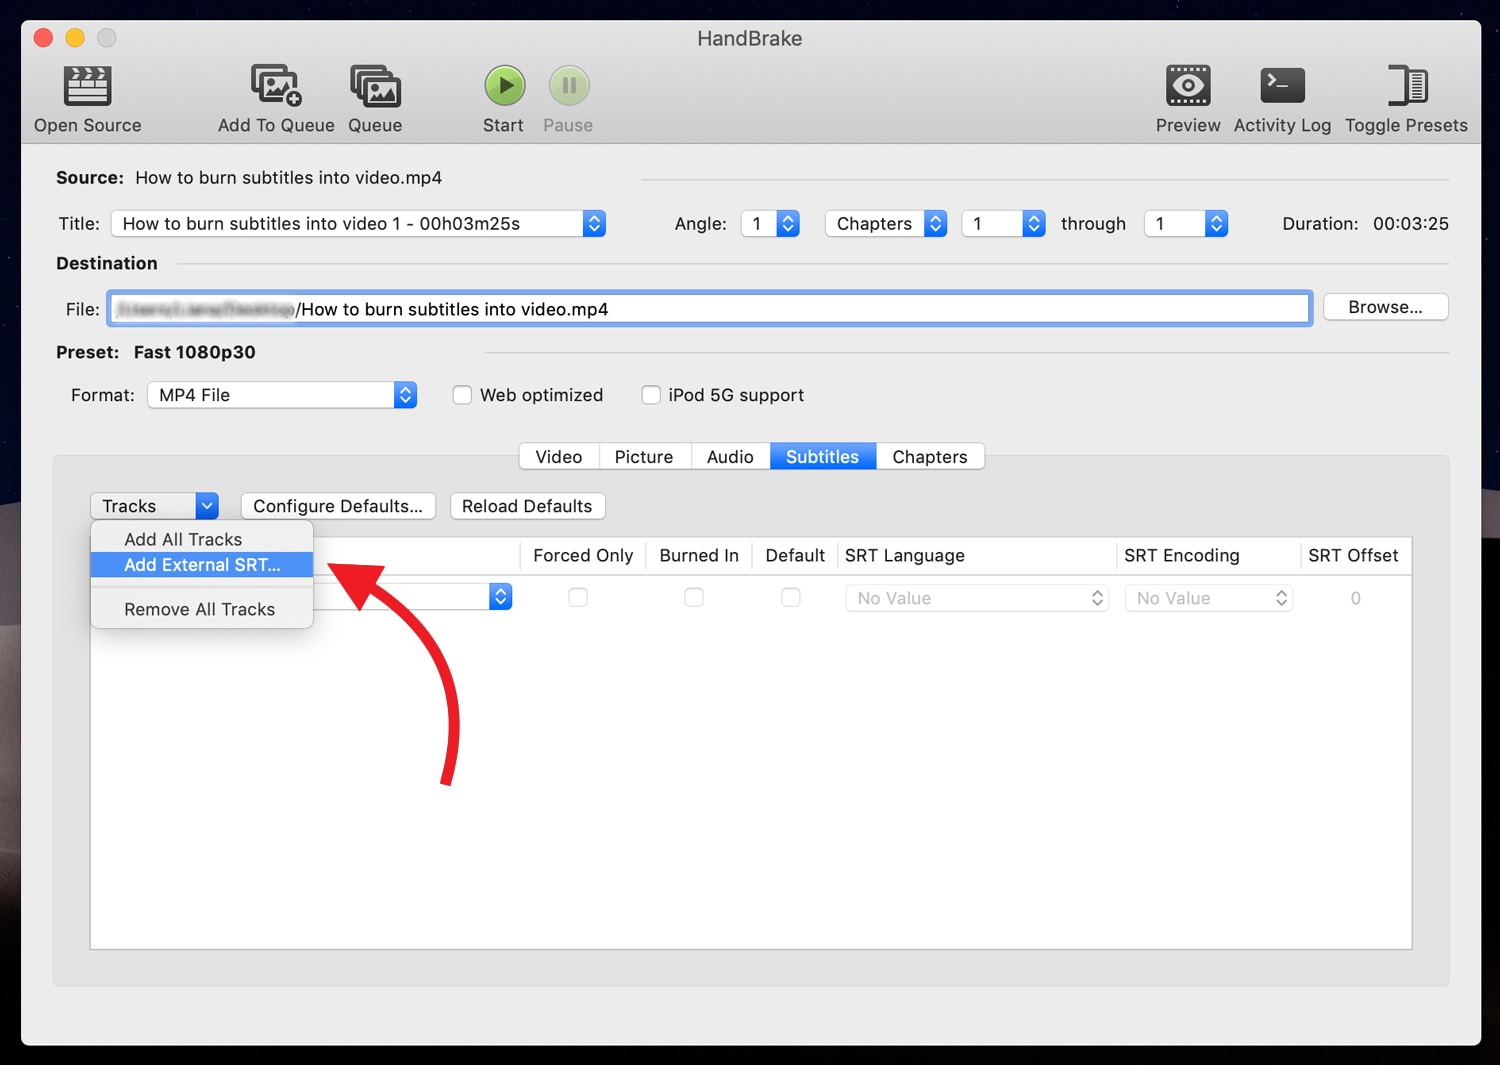
3 – Go to Subtitles.

4 – Under Tracks select Add External SRT…

5 – Check the Burned In box. 

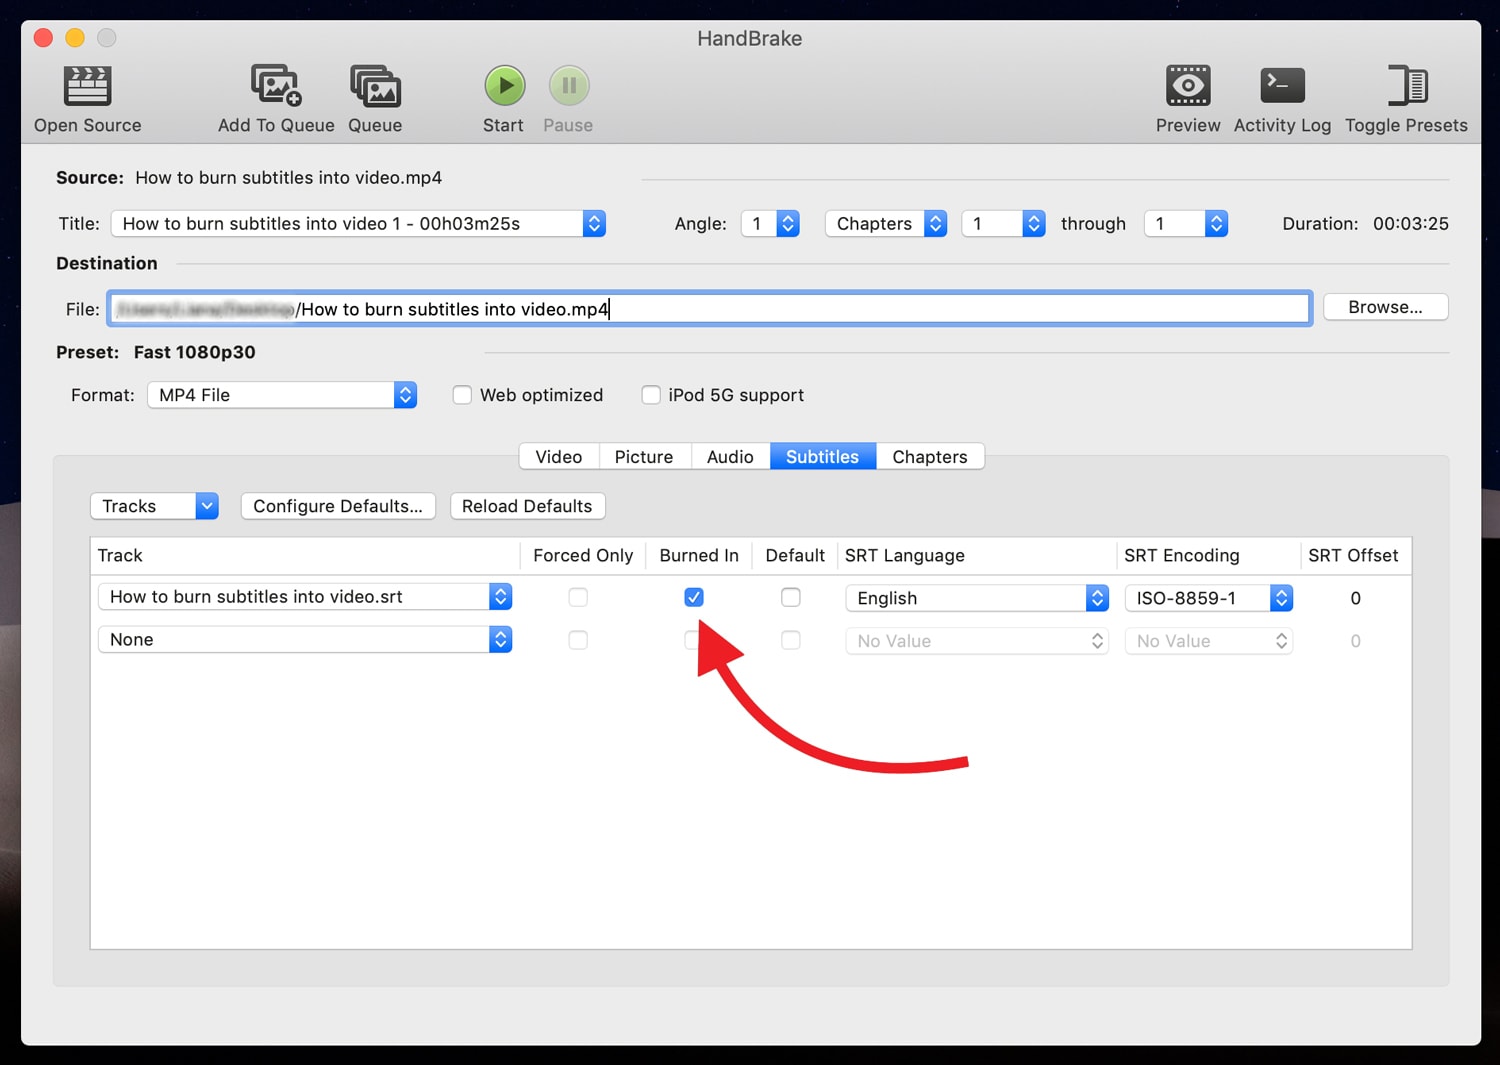
6 – Select your SRT Language.

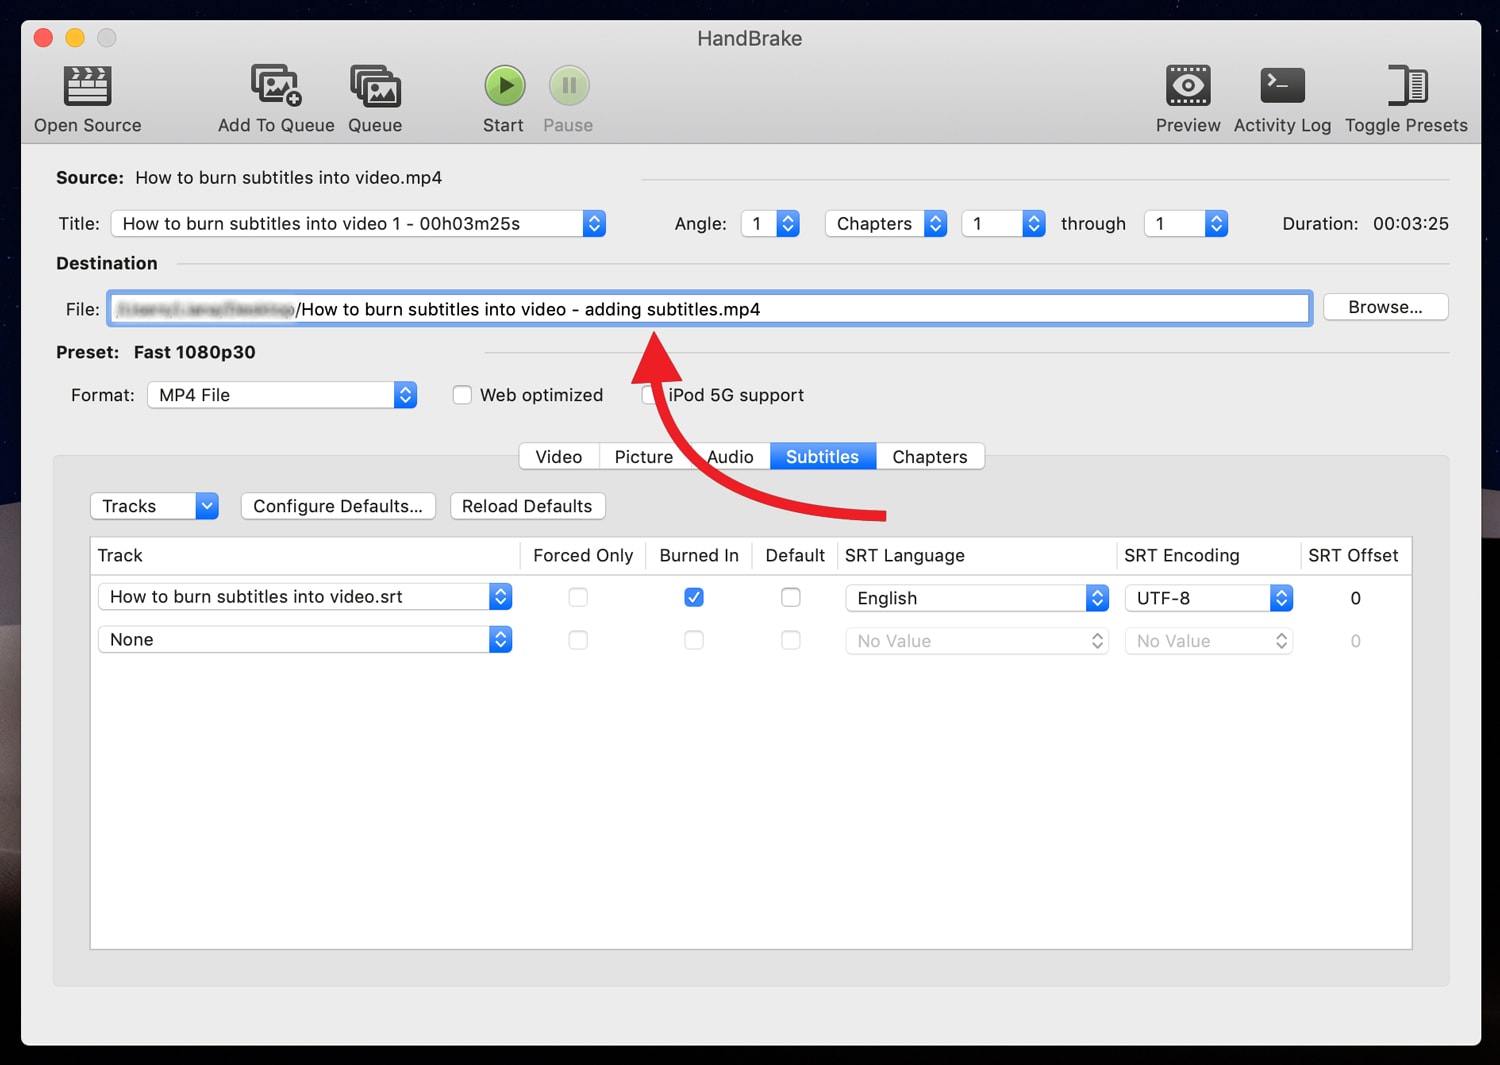
7 – Under SRT Encoding select UTF-8 so you won’t get any unwanted symbols to exported video. 

8 – If you don’t want to overwrite your original file be sure to rename the file before exporting it.

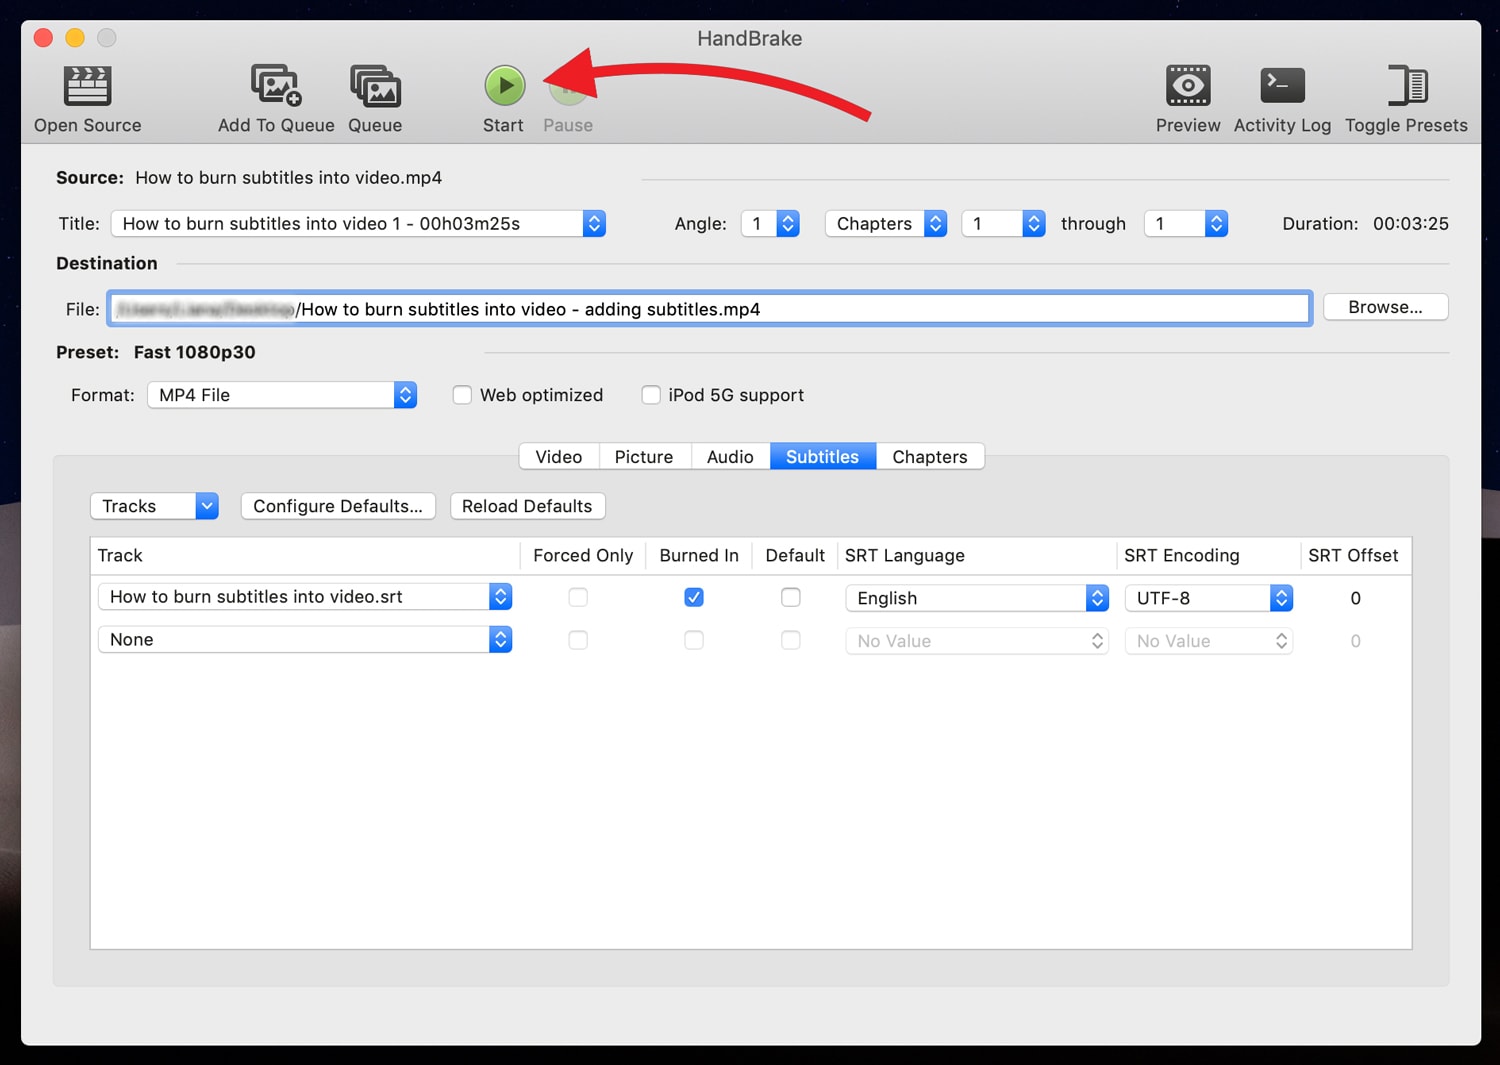
9 – Click Start at the top, wait, and you are finished!

And here is how the finished video will look like.

Result-How to burn subtitles into video
play-sharp-fill

Result-How to burn subtitles into video

Categories: Internet Marketing, IT, WordPress

Related Posts

  1. How to create video subtitles using Youtube

  2. How to Use Subtitles

  3. FV Player’s New Features: YouTube Subtitles and Fixed Error Reporting in Chrome

Reader Interactions

Leave a Reply Cancel reply

Your email address will not be published. Required fields are marked *

Click here to Subscribe without commenting

Primary Sidebar

Categories

  • Business
  • Camera Reviews
  • Case Studies
  • Design
  • FV Player
  • Internet Marketing
  • IT
  • Life
  • SEO
  • Slovak
  • Video of the Week
  • WordPress

Footer

Our Plugins

  • FV WordPress Flowplayer
  • FV Thoughtful Comments
  • FV Simpler SEO
  • FV Antispam
  • FV Gravatar Cache
  • FV Testimonials

Free Tools

  • Pandoc Online
  • Article spinner
  • WordPress Password Finder
  • Delete LinkedIn Account
  • Responsive Design Calculator
Foliovision logo
All materials © 2026 Foliovision s.r.o. | Panská 12 - 81101 Bratislava - Slovakia | info@foliovision.com
  • This Site Uses Cookies
  • Privacy Policy
  • Terms of Service
  • Site Map
  • Contact
  • Tel. ‭+421 2/5292 0086‬