Today’s challenge is how to quickly turn this finished 5760 x 3840 10 MB photograph into a a high quality and compact web version:

This is the target image in PhotoBatcher’s 1600×1066 version
For years I output my photos for web and email with Adobe Lightroom or Photoshop. Since Adobe went cloud only and non-purchase, I’ve been working hard to put together workflows which don’t include any Adobe and work on 10.6 forward. Adobe Lightroom 4 (last version which runs on 10.6) already forces one to convert originals to DNG (data loss) to be able to use the latest cameras.
Plus, Lightroom is dog slow when quickly going through photos for culling (both creating full size previews and browsing them afterwards). The bad taste of rental only software makes even DNG a path that one would want to stay off. Adobe is as customer-hostile company as Microsoft and not to be trusted.
Unfortunately Apple is as unreliable as Adobe here, albeit more customer-friendly than Adobe. Aperture 3 was force-retired and replaced by Photos (I own a copy and am not thrilled). Both Aperture and Photos are occasionally cross-compatible with iPhotos which is not compatible between versions. Good luck keeping your libraries working between versions. Plus it’s difficult to work on photos on multiple computers. And no I don’t want to keep all my photos in the cloud, thank you.
So at this point, there is no all-in-one solution for photo management and processing. Nor based on Apple and Adobe’s inconsistent support and changing conditions does it seem such a good idea to depend on a single application with a closed format library.
The goal is to find simple and quality alternatives which stay close to the OS and open source formats. The criteria are ease of use and high quality. There are three stages to preparing photos for the web.
- initial cull: creating selects for processing. A photographer saves a lot of time if s/he only touches photographs which are going to press.
- RAW processing and creation of the JPEG masters. These should be at full quality.
- Output. One needs a tool to create versions for email and website quickly and reliably. Some people like to watermark at this stage (please don’t watermark your masters!).
My main path now is FastRawViewer (works from 10.6 through 10.11) to cull followed by Iridient Digital for RAW development. The best alternates to cull would be Lyn with PhotoNinja as a strong RAW processor with full camera support and excellent noise reduction. I’ll post more details on culling and raw development in a future article.
Once you have your finished masters in your hand from your RAW program of choice one needs to be able attractive versions for web. When resizing and compressing for internet there are two variables to be traded off: quality vs size. There’s lots of programs with either weak resizing or compression algorithms.
Here’s an older article from our archives which shows the difference between good and bad compressions. It used to be that only Photoshop had really good resizing and jpeg reduction. Fortunately in the last five years open source solutions have caught up on a lot of the core image processing tasks so any image processing program developer has many solid libraries from which to choose.
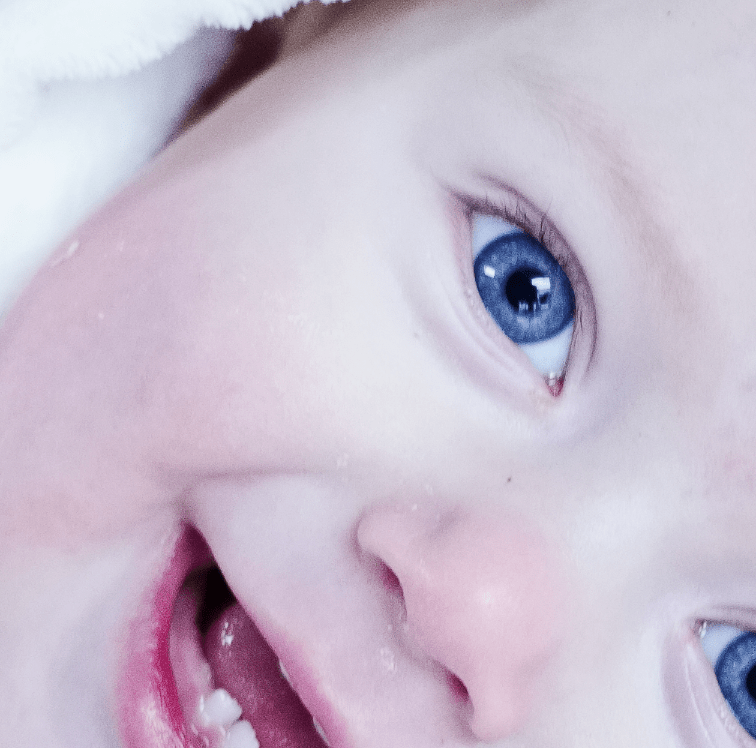
Here’s a copy of the original at the same size as the 300% blowups to establish detail:

This is the original before resizing for comparison.
The function in Adobe Photoshop is a bit hidden. It’s called Image Processor and is under the File Menu in the Scripts submenu. The interface works but is a bit clumsy and heavy-handed in comparison to the shareware alternatives. Amazingly enough with a jpeg setting of 8, Photoshop CS6 placed last in our quality tests albeit coming second in terms of size (168 KB). Here’s a 300% blow up of Photoshop’s 1600×1066 version of the 5740×3840 master photo. Note the jpeg jaggies on the freckle on the baby’s nose. There are also nasty jpeg noise around the nostril.

300% blowup of detail from output of Adobe Photoshop Image Processor
Something unique which Photoshop’s Image Processor does have going for it is explicit and reasonably reliable conversion to sRGB from other colour profiles. I used to put a lot of value on the sRGB conversion on output feature (and for dealing with other people’s legacy archives it’s still invaluabe). In the meantime, both for print and web, I’ve found the right time to convert images to sRGB is during output of 100% quality JPEG archives before resizing. Like simple text files, future generations will be able to open these 100% jpegs with sRGB colour profiles reliably for hundreds of years (well unless humanity really do manage nuclear armageddon and bomb ourselves back to the stone age).
PSD’s or tiffs are now for me large work files which can use alternative colour profiles (even then alternative colour profiles are rarely worth it, without a very tight calibration and monitoring system: the difference is unlikely to show up in the web or in prints and you are radically increasing your chances of getting something completely different in print or on the web than you imagined whenn working).
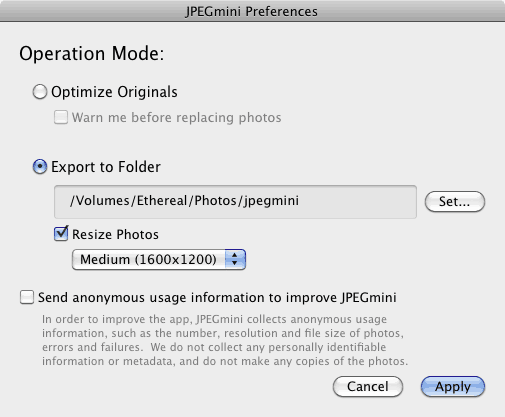
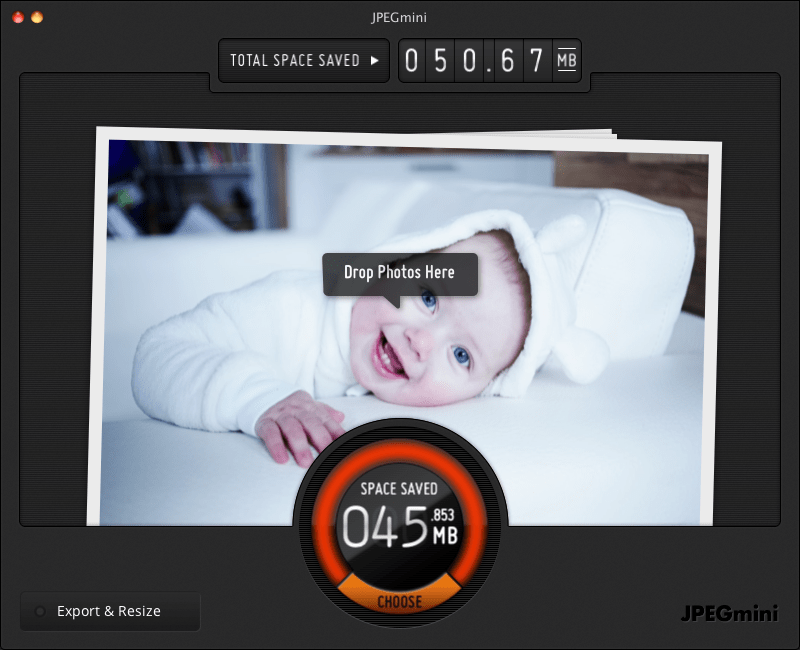
JPEGmini is the simplest to use (see the easy preferences here) and is supposed to use patent pending algorithms to reduce file size without losing any quality. Unfortunately JPEGmini (v 1.8.7) faced many of the same issues as Photoshop. Check again the freckle on the baby’s nose as well as some discolouration (green) above the baby’s right eye. That discolouration is not present in the original. JPEGmini won the size stakes with a 1600 x 1066 web version at 164 KB with no option for more or less compression.

300% blowup of detail from output of JPEGmini
The simplicity of use here is fantastic though and JPEGmini wins the interface stakes. I wish its output was just a bit cleaner.

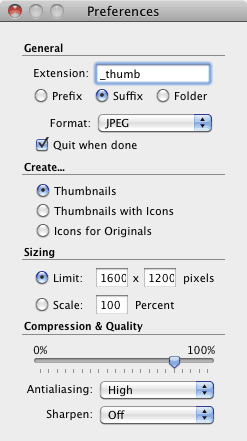
Very simple preferences. After this it’s just drag and drop.

The most attractive and fun interface. Drag and drop with a counter.
Next comes Apple’s own Preview (v5.03) While Apple doesn’t offer straightforward batching (you really need to set up an Automator workflow to match the ease of use of our other contenders who are mainly drag and drop once set up), quality is pretty good. Finally the freckle looks good and there is only the tiniest hint of discolouration above the baby’s eye. This is with the second smallest file size of 199 KB. If you are up for the struggle with Apple Preview to get batch conversions out of it, here’s a good guide. Here’s an alternative resizing approach with Automator (powerful but clunky with the constant risk of Apple updates breaking existing routines). I prefer a stable app whose interface remains the same on any recent version of OS X, like those below.

300% blowup of detail from output of Apple Preview. It’s pretty good.
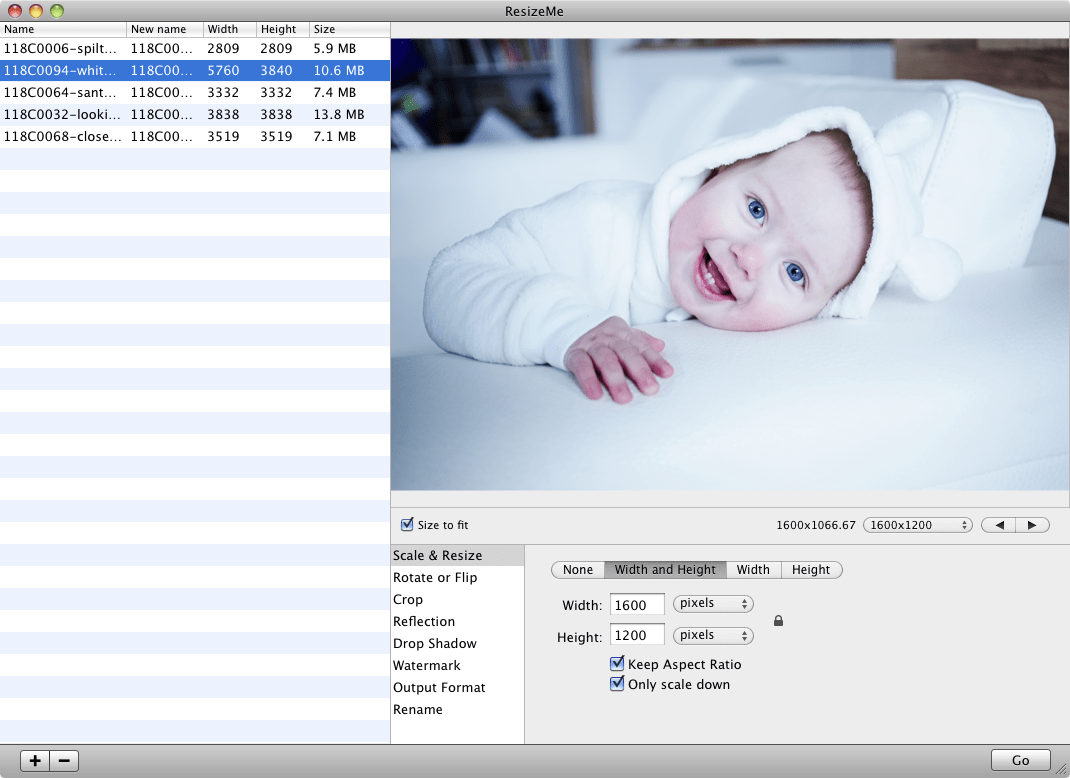
ResizeMe has the most straightforward and powerful interface with absolutely all the data available at a glance with all options and commands laid out in a nice vertical list. Finally we get a fully clean freckle, albeit with some jpeg jaggies noise just above the nostrils. There’s no discolouration above the eye but the image is just a bit softer than preview when looked at in 300% magnification so you are missing a hint of detail. Given how close the final result is to Preview’s own version it would not surprise me to see ResizeMe simple leveraging Apple’s own code.

300% blowup of detail from output of ResizeMe (hard to find alas)
The high quality version came in at 201 KB, about the same as Apple Preview.

An informative and easy to use interface with no space wasted. Bravo!
ResizeMe (download v2.20) is also the hardest of these applications to find. Coded by the very interesting Mac development house CreativeBe (now IncredibleBee) whose Renamer I also like for its simplicity, ResizeMe has disappeared off both their website and Apple’s app store. ResizeMe does run on Snow Leopard and forward though and has no obvious bugs. It would be nice to see ResizeMe at least offered as a legacy download on their own site. V2.20 is free.
For output quality, OSXBytes’s PhotoBatcher (v1.1.3) was a clear winner. The freckle has no jpeg noise around it at all. There’s no noise above the nostril. There’s no discolouration above the eye. There’s no softness like ResizeMe. Still, PhotoBatcher took more space for its 80% quality outputting a file which is 229 KB. The difference in quality may be partially attributable to the larger file size. Why OSXbytes decided to use a different compression ratio as all the other programs for 80% quality is a mystery.

300% blowup of detail from output of OSXbyte’s PhotoBatcher
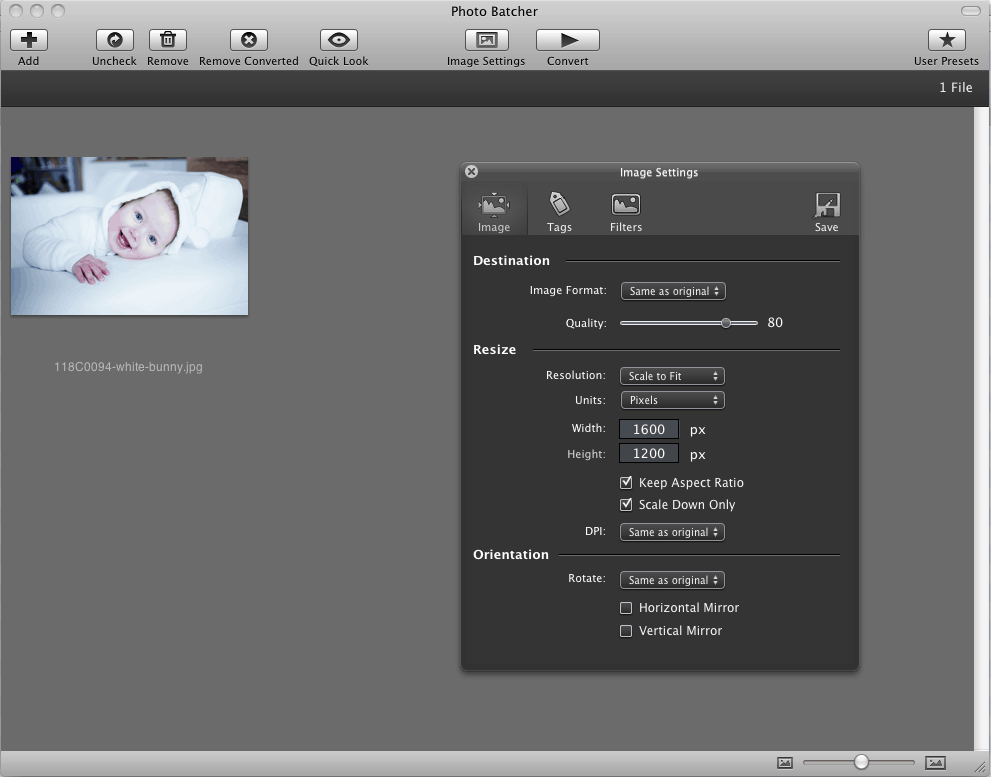
On the downside, I don’t like the interface and workflow as well as ResizeMe’ simplicity and clarity (although the icon is far more elegant than ResizeMe’s rustic). I could get very used to the workflow though. PhotoBatcher is missing one essential feature for me which Image Processor from Adobe Photoshop has always offered: one can force resizing based on two parameters (not just height or width). I was unable to get all of my photos output with the sizes I wanted in a single batch as either height or width was accepted as the limit (I had put in values of 1600 width x 1200 height). Either landscape orientation pictures were too narrow or portrait pictures were too tall.

The PhotoBatcher interface isn’t bad but no resizing on both width and height unfortunately.
PhotoBatcher’s Snow Leopard version is not openly available on the OSXbytes website. If you can’t get a copy from OSXbytes (email them first), let me know.
I don’t want to have to process my photos in two groups so in the end I’m using ResizeMe for its clear interface and workflow and better resizing preferences. If I could get a version of PhotoBatcher which would resize on both width and height limitations in a single pass, I’d probably switch.
Bonus late addition: ThumbsUp (freeware).
ThumbsUp quality when downsizing jpegs for web without sharpening is just a bit worse than Preview or ResizeMe and significantly worse than PhotoBatcher at the same sizes.

300% blowup of detail from output of ThumbsUp. Some jpeg noise but no discolouration.
Sharpening makes matters worse. ThumbsUp does beat Adobe Photoshop CS6 and match JPEGmini respectively, both of which are significantly more expensive.
ThumbsUp offers a very simple utilitarian preferences interface. After that it’s just drag and drop. A huge lacuna is the lack of opportunity to save presets though forcing you to hand configure your options each time. No fun and not nearly as efficient as ResizeMe or PhotoBatcher with their handy libraries of user created presets.
The options are simple and the price is right. ThumbsUp is coded by DevonTechnologies so one can be sure the core is rock solid. It is very kind of them to release such excellent freeware. ResizeMe remains the better option (also free).
Who did I not include in this face-off?
EasyBatchPhoto. While I love YellowMug’s software (my screenshots here were created with SnapNDrag), EasyBatchPhoto failed a head to head with Adobe Photoshop Image Processor many years ago. Jay Teo wrote to me then:
With Scaling Quality set to high, bi-cubic interpolation is used. This gives a smoother but softer result. Low and Medium setting often give a sharper, albeit more jagged, output. These scaling algorithms are OS X built-in ones. As mentioned before, I will experiment with unsharp mask and see if we can get better results that way. If we do add that, we will make sure we do it without increasing complexity for the end-user.
As far as I know, image quality has not really improved and the interface while simple lacks the polish of PhotoBatcher and ResizeMe.
GraphicConverter. I own and treasured Lemkesoft’s old version. But it’s just too ugly, clumsy and powerful (ironically for prepping images for web and email, one doesn’t want too many buttons). The new version is too expensive ($40) to recommend when there are such attractive alternatives for about $10. Moreover, even the new modern interface is fairly dated. Still if I have to delve into or convert very weird image formats, it’s comforting to have available as a last resort.
Sizerox. Ugly. Clunky. Slow. What’s worse is the developer 1. cheats on MacUpdate (sockpuppeting alternative apps on both his page and on the competition). 2. He appears to have personal support from a MacUpdate editor: Jess for his bad behaviour. I probably shouldn’t be surprised at what looks like a clear case of corruption: MacUpdate openly spams users. Try gifting an app to someone and see what happens to that email address without permission.
PhotoBulk. No Snow Leopard version. App store only. Eltima Software are not known for quality single apps but rather for lots of cross-platform opportunistic utility knockoffs. Ironically, while Eltima’s Android phone sync is somewhat problematic, it’s much the best of a bad lot.
ResizeSense. No Snow Leopard version. Less intuitive interface. Comparatively expensive ($20). Watermarking an additional purchase! Horrid website. Hideous orange icon (would never want to see that in my dock). This is photo software. Aesthetics do count.

Alec Kinnear
Alec has been helping businesses succeed online since 2000. Alec is an SEM expert with a background in advertising, as a former Head of Television for Grey Moscow and Senior Television Producer for Bates, Saatchi and Saatchi Russia.






Hard to believe that you overlooked Pixelmator. I find its JPEGs to be significantly smaller than Photoshop’s.
It’s a text-book Mac program.
Hi Ian,
Thanks for stopping by and for your suggestion. Pixelmator is:
So no, I’m none too keen on Pixelmator. At the very least I’d like my money back as I mentioned we were stranded and abandoned with no upgrade path (holding a fairly weak version one product which could not replace Photoshop for our needs).
Although not a resizing tool per se, you may want to look at jpeg-archive for jpeg size optimization, which I find much better quality-wise than JPEGmini. github.com/danielgtaylor/jpeg-archive You will want to settle on the following switches: -c -q high –accurate I even created a script to re-compress a whole folder of images in parallel, using all available cores. Contact me if you want a copy.
Thanks for this tip Cédric! Jpeg-Archive looks very promising. Free and FOSS too. Does your script work on OS X?
Hi Alec,
Sorry for the late reply, I did not receive any email notification. :-)
Yes, my script work on all platforms save Windows (i.e. Linux, *BSD, Mac OS X). There’s a pull request on GitHub, which leads to gist.github.com/javabean for the actual CLI script.
Hi Cédric,
Any chance you could make a simple Mac OS X binary so I don’t have to install and configure this across my five machines (desktops and laptops)? I’d be happy to donate to make such a mini-application available to the world.
Hi Alec Good work, thanks. Your article is “photo” oriented. Do you have any advise for replacing Photoshop for exporting images for website? I am looking for a macos tool that allows the preview the image it will generate, displaying its file size, and depending on the JPG compression rate/quality and its new size (input). Thank you in advance, Eric
Hi Eric,
ImageOptim has a Mac version (open source, donationware – I’ve donated). There’s no live preview but you can configure ImagOptim very precisely to your tastes. ImageOptim outperforms JPEGmini (commercial) and even Photoshop (commercial) for jpeg and png conversion for web.
My own tests bear this out. I’m halfway through a long article on optimisation of images for web. Wish me luck and you’ll have it tomorrow or Wednesday.
Hi Alec,
Really interesting comparison between image resizers. If I may, I would also recommend checking out BatchPhoto Espresso for resizing images in bulk. It’s free, it’s online and works quite well.
BatchPhoto Espresso was not working when I tried it, Linda. The product should work before you do a launch promotion.