List of contents:
- What is FV Player Pay Per View
- How Does Pay Per View Work?
- Installation
- Payment Settings
- Payment Process
- Setting Up the Default Rental Duration
- Using Pay Per View With FV Player’s Shortcode Editor
- How the Pay Per View Looks
What is FV Player Pay Per View
FV Player Pay Per View is an additional plugin, that works with FV Player and allows users to restrict their content to be accessible only to those, who will pay for watching it. It’s specifically designed to automatically integrate with the popular Easy Digital Downloads (EDD) plugin and use it for easily selling the access to your video content. Therefore, EDD gets automatically installed.
Pay Per View is not only available for Easy Digital Downloads, but also for WooCommerce.
How Does Pay Per View Work?
The main function of the Pay Per View plugin is to conceal your source video (the content you want to sell) and to only show a pre-set preview video for those viewers, who have not paid a fee of your choosing. The payment is handled by Easy Digital Downloads and will grant the user a 48 hour access to your source video. This means, that unless the viewer pays the fee, he will only be able to see the short preview of your video.
For example, if you want to sell access to a movie, you will need two video files: the full movie itself and another video file to use as the preview (for instance, the movie trailer).
Note: PPV can also be used with playlists.
Installation
Pay Per View is a paid plugin and you can purchase it here. After the purchase, you should be able to download it from your account on Foliovision.com. Then, just manually install it in your WP Admin > Plugins > Add new > Upload Plugin. Then just click Choose File and select the zip file you have downloaded.
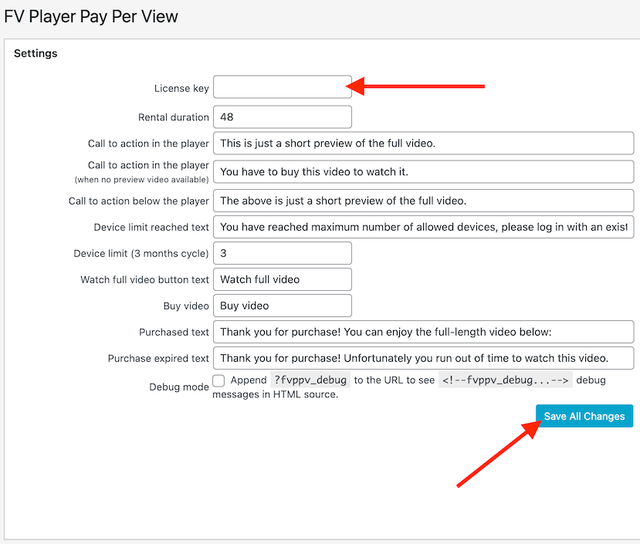
When the installation is complete, go to Settings > FV Player PPV and activate your license key that you can also find in your account.
Integrated Installation of Easy Digital Downloads
As said earlier, EDD is required if you want to use Pay Per View. If you don’t have it installed in your WP admin, the Pay Per View plugin will automatically detect it and offer to install it for you with one click. Therefore, if EDD is not detected, the FV Player PPV settings will look like this:

FV Player PPV settings when EDD is not installed
Just click the “Install Now” button and the installation process of the latest version of EDD will be done automatically. After the installation is complete, just click “Activate Plugin“.

The installation process of EDD is fully automated
Payment Settings
The basic setting available right now is to link FV Player Pay Per View with your PayPal account. Just add the email you have linked with your PayPal account to the box in Settings > FV Player PPV > Payment Settings. This means you can avoid the EDD’s payment settings screen, which is a bit more confusing.
If you want to set additional payment methods, such as credit cards, you will have to do so in Downloads > Settings > Payment Gateways tab. EDD has two built-in gateways: PayPal Standard and Amazon Gateway, plus the Test Gateway.
There are, however, more than two dozens of different gateways, you can buy as official add-ons, for instance Stripe, Authorize.net, PayPlug, Coinbase or Payza. There are are also over fifty third-party gateway solutions, which you can easily implement into your installation, for instance Alipay, Beanstram, Bluesnap or Yandex. You can see the full list here.
Check the EDD documentation to learn more about payment settings.
Payment Process
When the user clicks on the purchase button (as you can see in the example below), the plugin adds the item to the user’s cart and the button changes to “Checkout“.

Checkout button
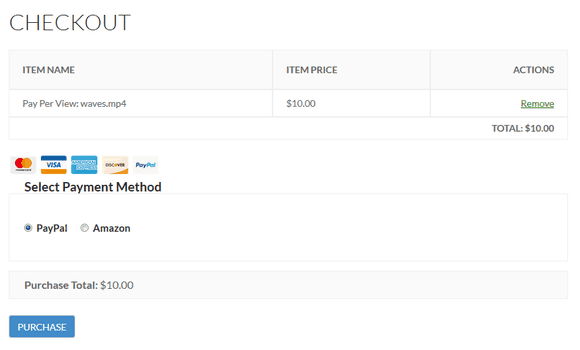
After the user clicks on the checkout button, he will be redirected to the checkout screen. Here he will see the items in his cart and he can choose the payment method (based on the payment gateways you have set).

The user can pick the payment method
If the user picks the default PayPal gateway, he will be redirected to PayPal website, where he fills out the necessary information and completes the payment. After it’s done, he will be redirected back to your website where he will see the first purchase confirmation, informing about the payment being processed.

The first purchase confirmation screen
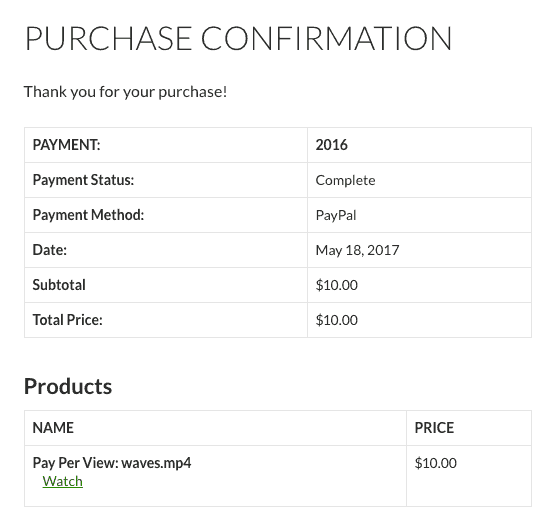
When this process if finished, the user will be automatically redirected to the final purchase confirmation with all the details about the payment.

The user will see all the details of his purchase
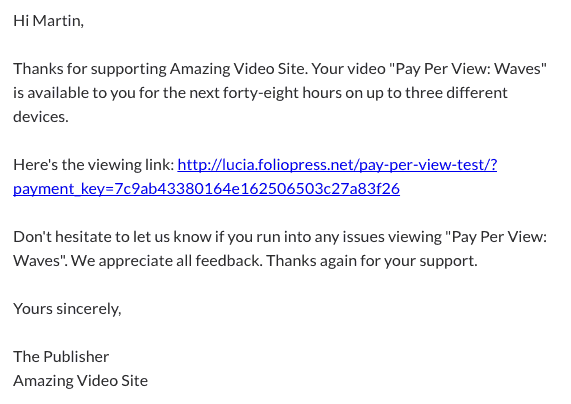
The final step in the purchase process it sending the user a confirmation email. It will be sent to the address the user has specified in his PayPal login. The default email template contains a brief text and a link to the video with the confirmation key.

The default confirmation email template will be sent to user’s PayPal email after the purchase
EDD allows you to keep track of all the purchases made on your website. Just open the Payment History in Downloads > Payment History.

Payment History in WP Admin
It also allow users to see the details about their purchase under the content they bought the access to. You will first have to paste this shortcode into the content of the page where you want your users to see their history:
[purchase_history]
Then the user (when logged in), will be able to see the purchase details like this:

Purchase history from the user’s point of view
Setting Up the Default Rental Duration
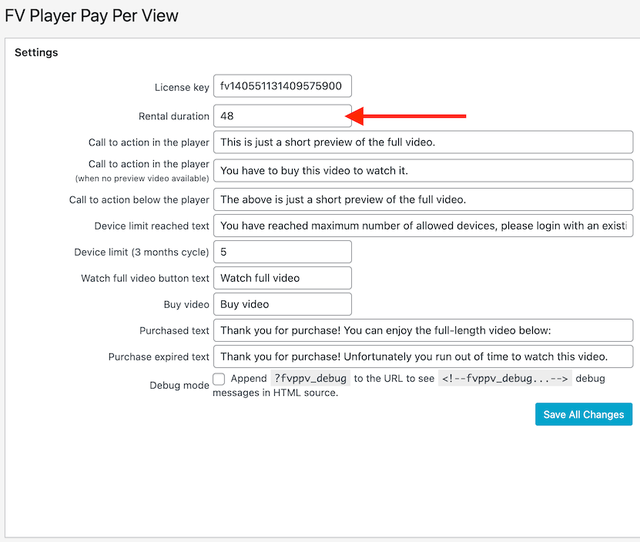
The default rental duration means the time for which the user will be able to watch the video after purchasing the access to it. In the first versions of this plugin it was set to 48 hours, but now you can set your own time.
You can find this option in Settings > FV Player PPV > Settings > Rental duration. As you can see, the format is in hours, so if you want to make the videos available for instance for a week, you will need to write it as “168”.
The time you set is a default value for all your videos available through FV Player Pay Per View.
Using Pay Per View With FV Player’s Shortcode Editor
After installing FV Player Pay Per View, you will be able to see a new tab in the shortcode editor:
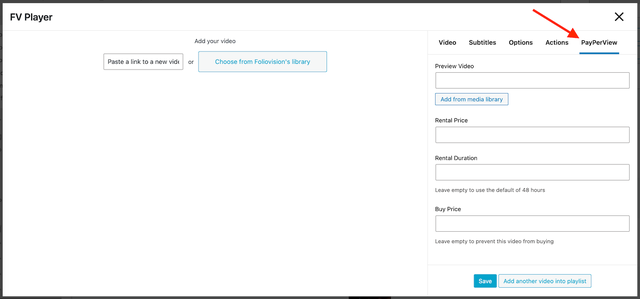
Now just follow this easy process:
1. Add the source video. This will be the video that you want to sell and it will be concealed behind the paywall. You can use any format or hosting solution that is supported by FV Player.
If you want to add some extra protection from downloading, we recommend to use an encrypted HLS stream setup with FV Player Coconut (you have to own the Pro license to be able to deploy this stream).
You can also add the splash image, specify the dimensions, or activate some of FV Player’s many features.
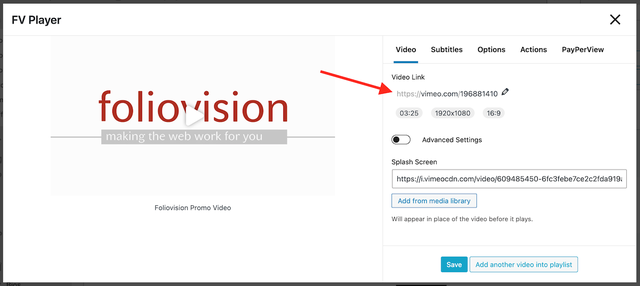
2. Switch to the PayPerView tab and paste the URL of your preview video into the Preview Video field.
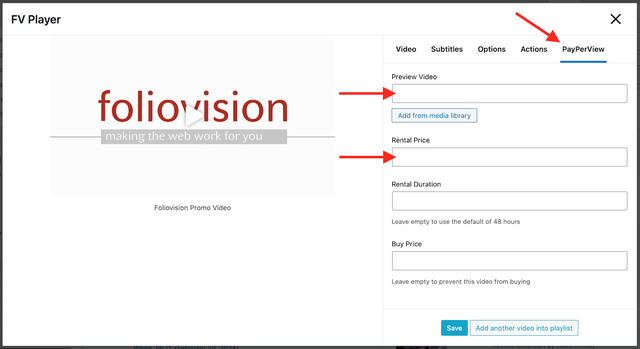
You do not have to set the preview if you don’t want to. If you leave the field empty, the video just won’t play and instead of playback, only the buy button will appear (see in the example below).
Now move to the Rental Price field and write in the value you want to be the price for viewing the video. For instance, number 5.5 will set the fee to $5.50.
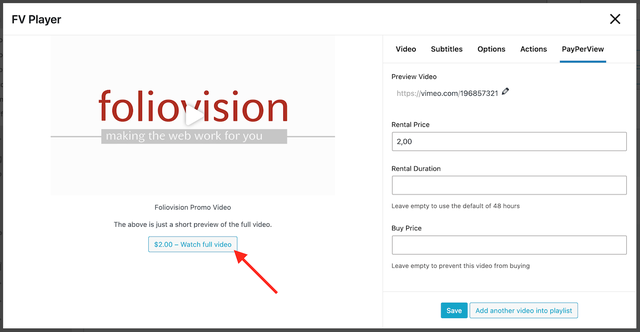
The plugin will automatically create a new Easy Digital Downloads product, which you will be able to find and edit in wp-admin > Downloads.
How the Pay Per View Looks
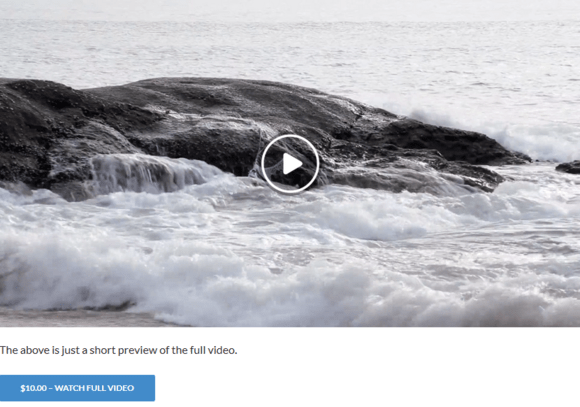
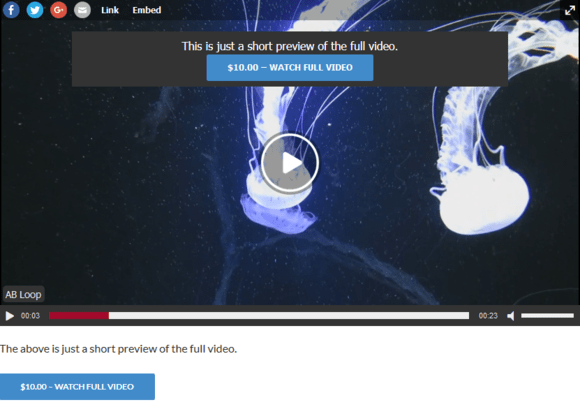
When the video is not purchased yet, it will just show the splash image just as a regular video, but below it, there will be a caption saying “>The above is just a short preview of the full video.”. There will also be a blue button with the price and the text “WATCH FULL VIDEO“.

Video in stand by before the purchase
After the user clicks on the play button, the preview video will launch. When paused, another buy button will appear in the upper part of the video box.

The preview video after pausing
If you decide to not use a preview video or a splash image, the user will see only an empty video box, which will show the purchase button after the user clicks the play button.
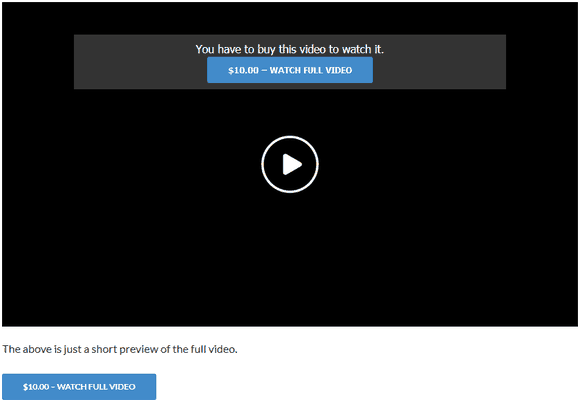
A video without splash image and preview video
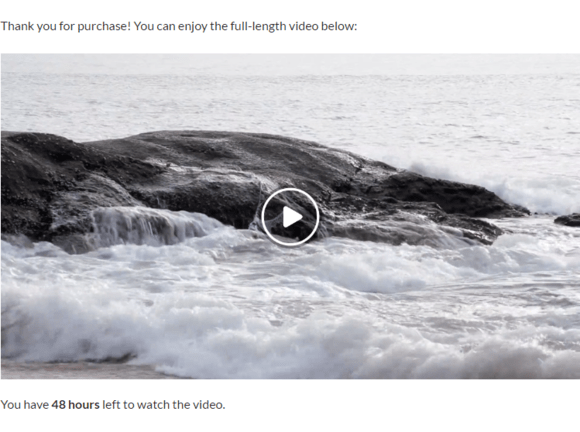
When the user pays the fee and therefore unlocks the full video, the text changes to “Thank you for purchase! You can enjoy the full-length video below:” on top of the video and “You have 48 hours left to watch the video.” below it.

The messages users will see after they pay the fee and gain access to the full video
All of the texts shown to the user, such as preview text in the player, purchase texts both above and below the player, etc., are all editable in the Settings > FV Player PPV > Settings tab.


