List of contents:
- How to Encode Multiple Audio Tracks
- How to Serve Multiple Audio Tracks
- How to Use Multiple Audio Tracks with FV Player
- Example
Adding multiple audio tracks to your videos opens up a world of possibilities. You can make your video available for as wide range of people as possible, or cater to the specific needs of your users. Subtitles are important, but sometimes they are simply not enough.
Whether you want to include various language speakers, add a curated commentary to your short film, or even provide your music students with various layers of a song, that’s where multiple audio tracks come into play.
How to Encode Multiple Audio Tracks
Note: For Amazon Web services, the encoding happens in Mediaconvert. If you’re using AWS, click here.
In order to stream a video with multiple audio tracks, you will need to add the tracks prior to hosting it anywhere. While the tracks are supported in many formats, not all software offers the feature to include them. After carefully considering the options, we recommend using the lightweight, free and open-source tool MKVToolNix, mainly due to it’s ease of use and availability across all platforms. Avidemux can also be used, but it proves to be a bit less flexible in terms of audio.
Note: Unfortunately, more popular alternatives, such as HandBrake do not support this yet, but hopefully will in the future.
- Download MKVToolNix here, install and open it.
-
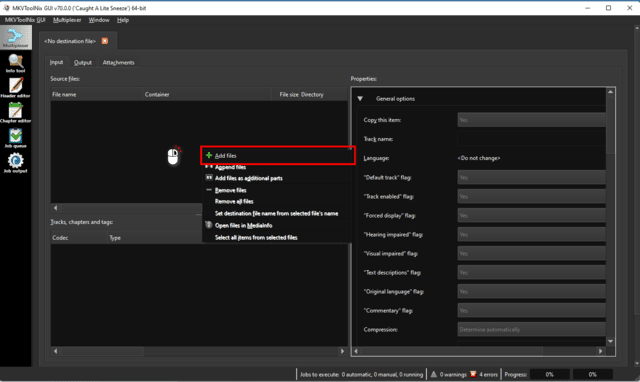
Right-click and pick Add files to add the video you wish to edit:
- Now follow the same process to add your first audio track.
-
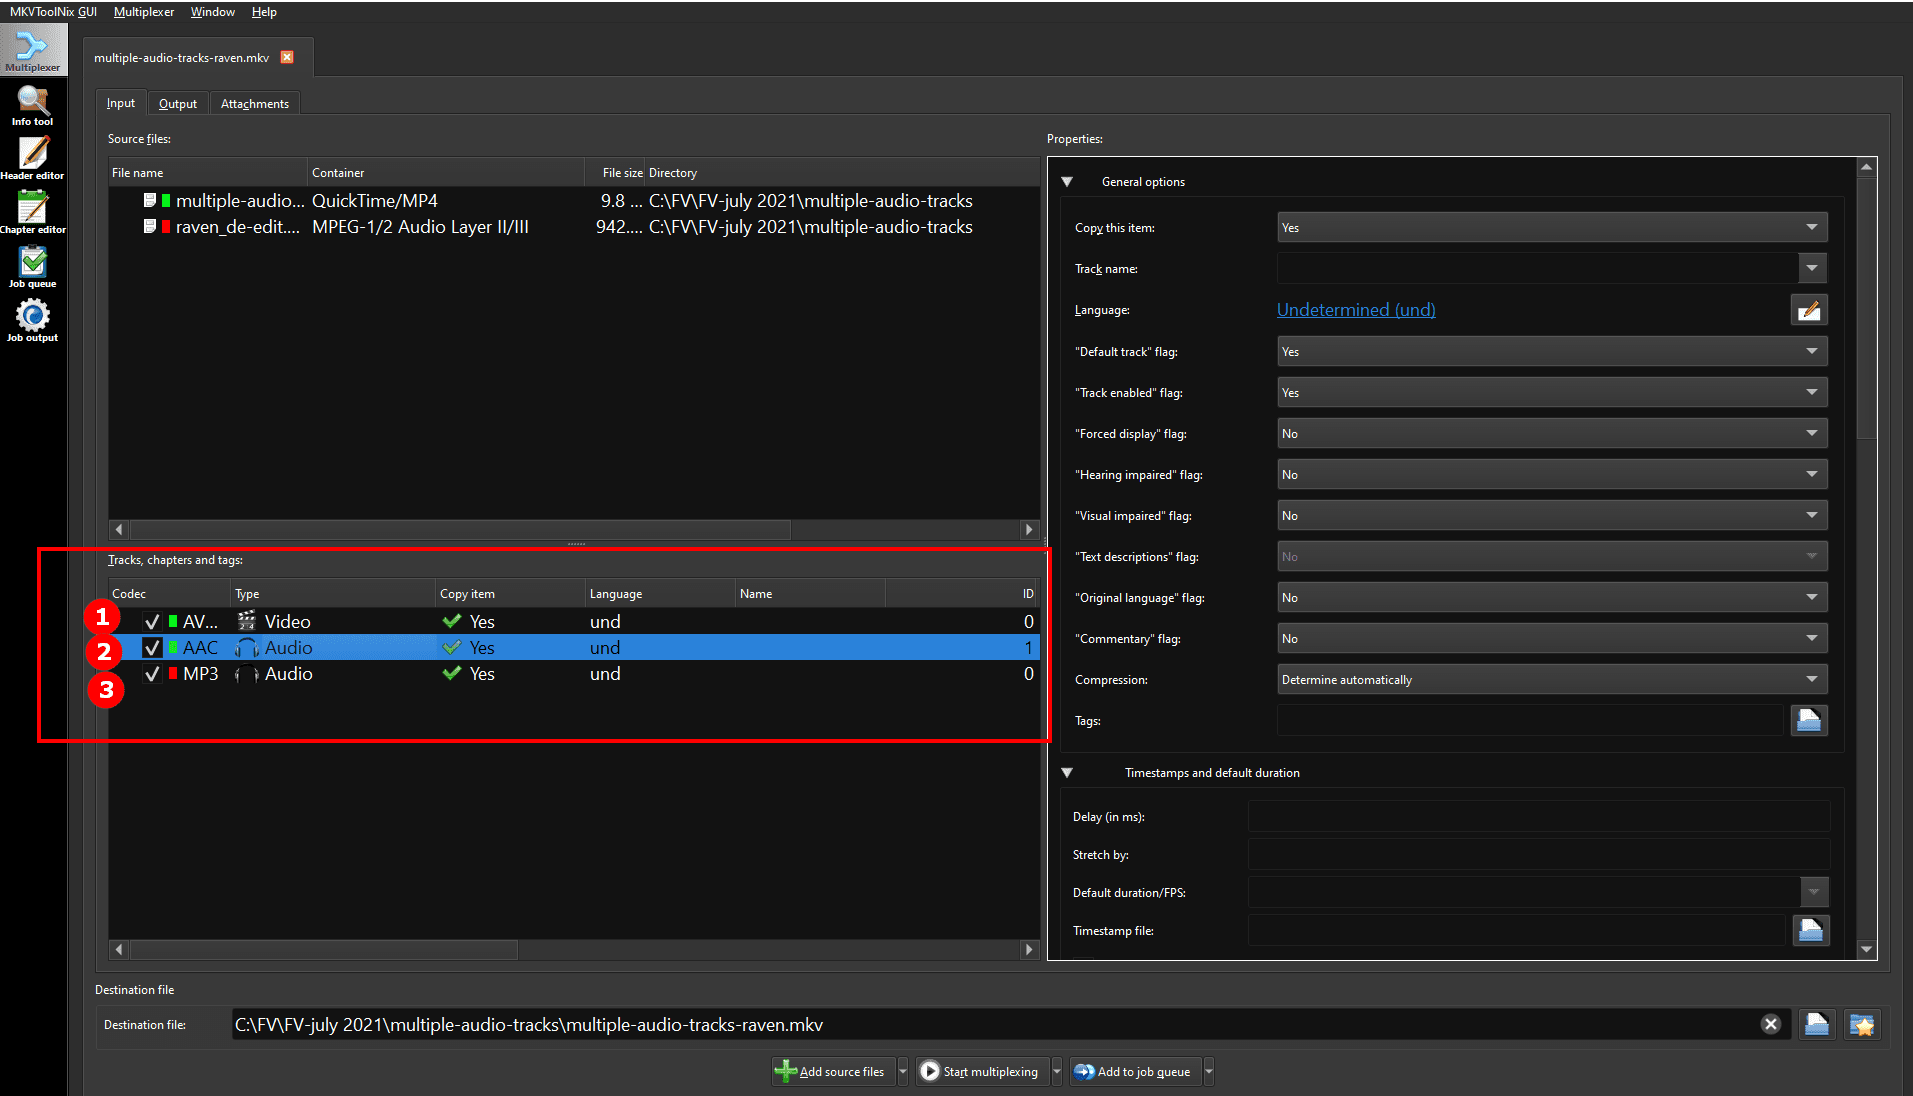
Once the additional audio track is there, you will see all the tracks and other parts (such as chapters, etc.) in the bottom left field:

The tracks present in our project at the moment are as follows:
- The video in mp4 format.
- The original audio track present in the video.
- The .mp3 audio track we have just added.
-
Make sure to pick the track you want to edit in the bottom field. Now you can edit it on the right side:
You can:
- Define the track’s name.
- Define the language tag.
- Add other common flags and much more.
-
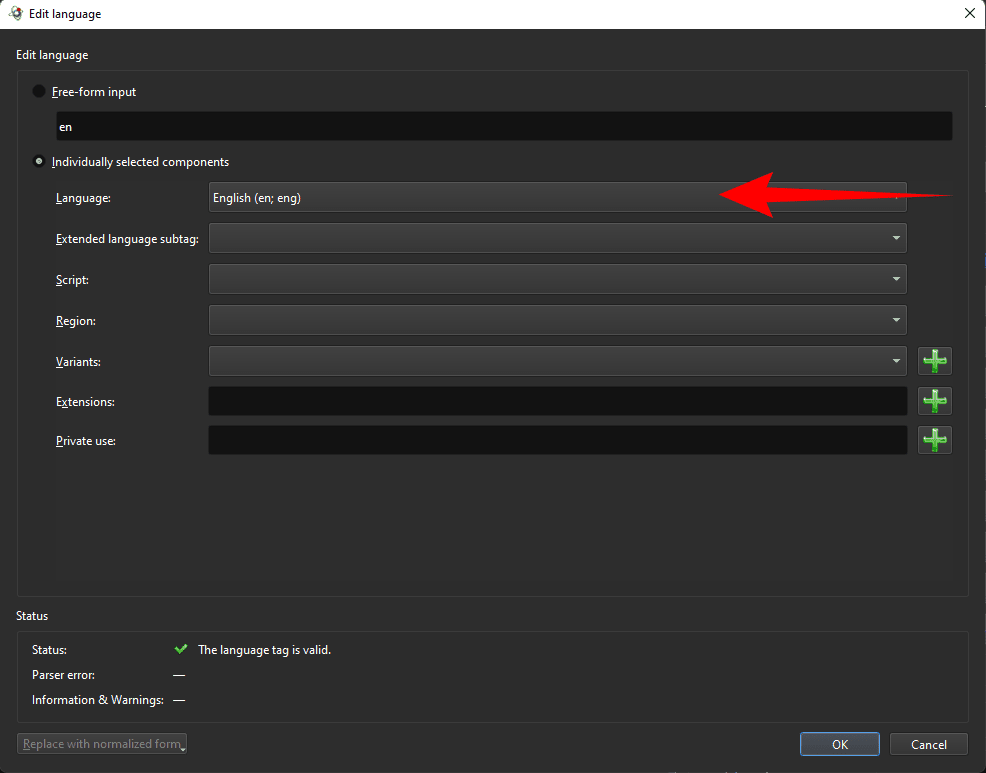
To define language, click the edit icon next to “Language”:

-
Now you can pick a tag from the drop-down menu, or even insert the tag as free form:

-
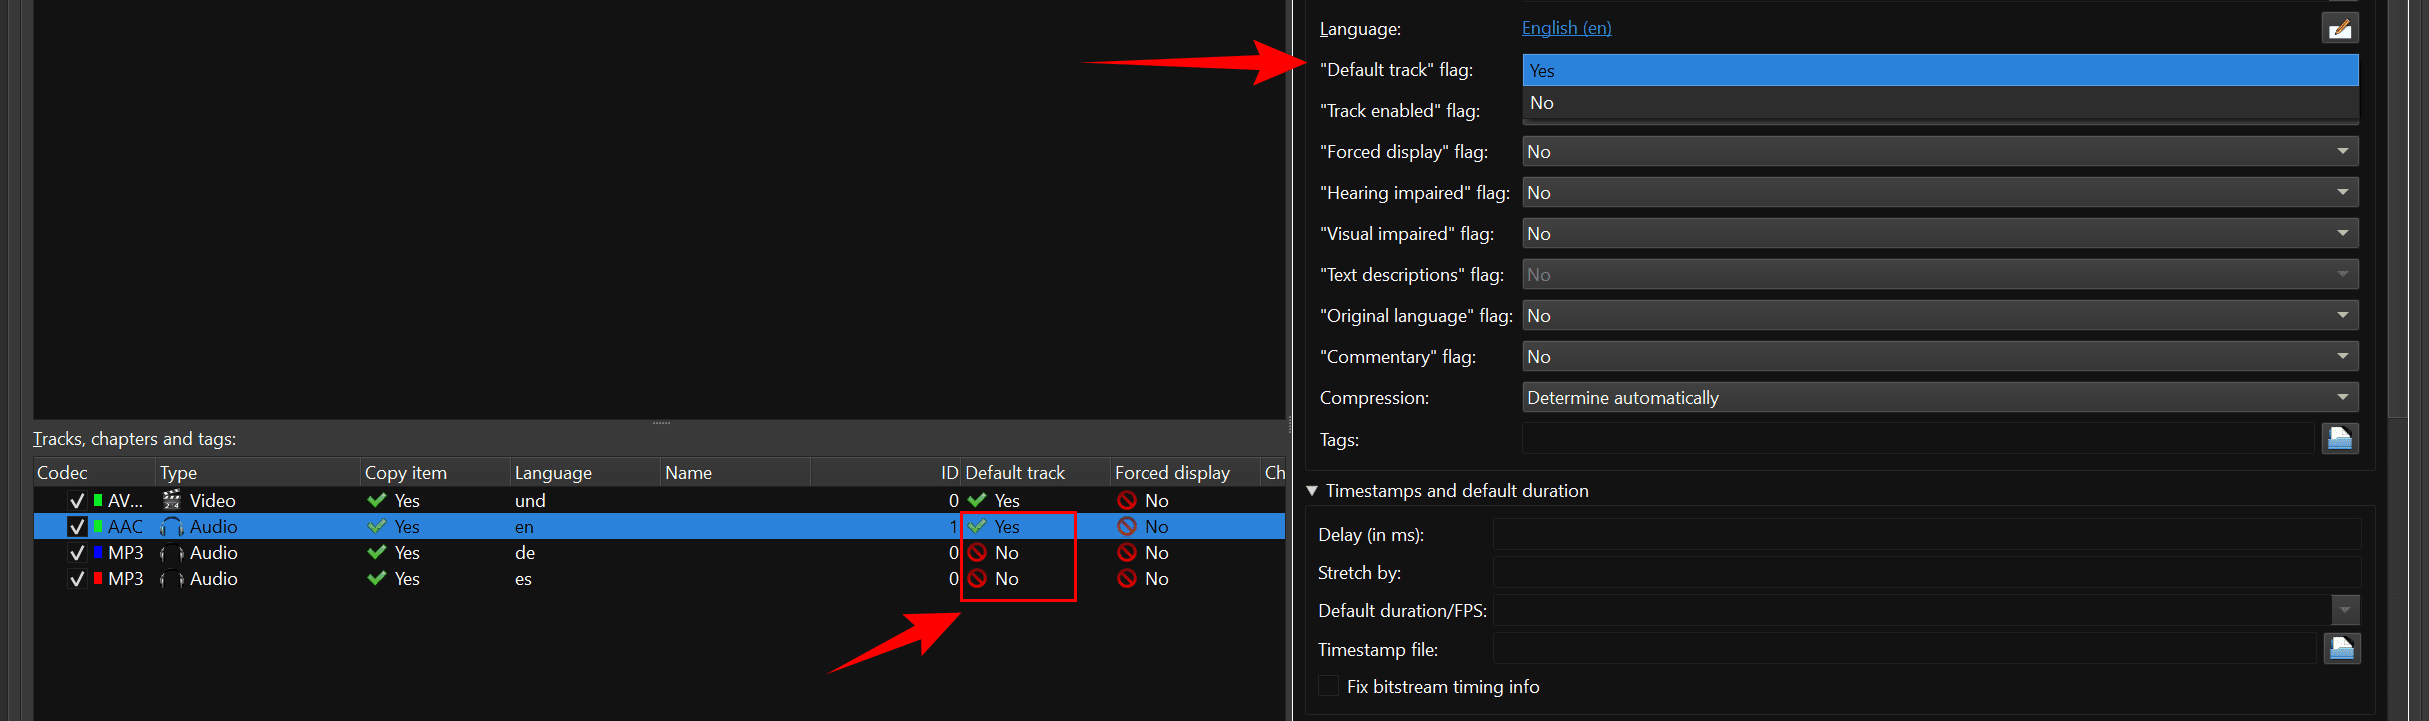
Repeat the tagging process for all the other tracks you wish to add. Make sure to set “Default audio” flag to Yes for the audio you wish to be default. And to No for all the other tracks:

-
Review and click Start Multiplexing:

-
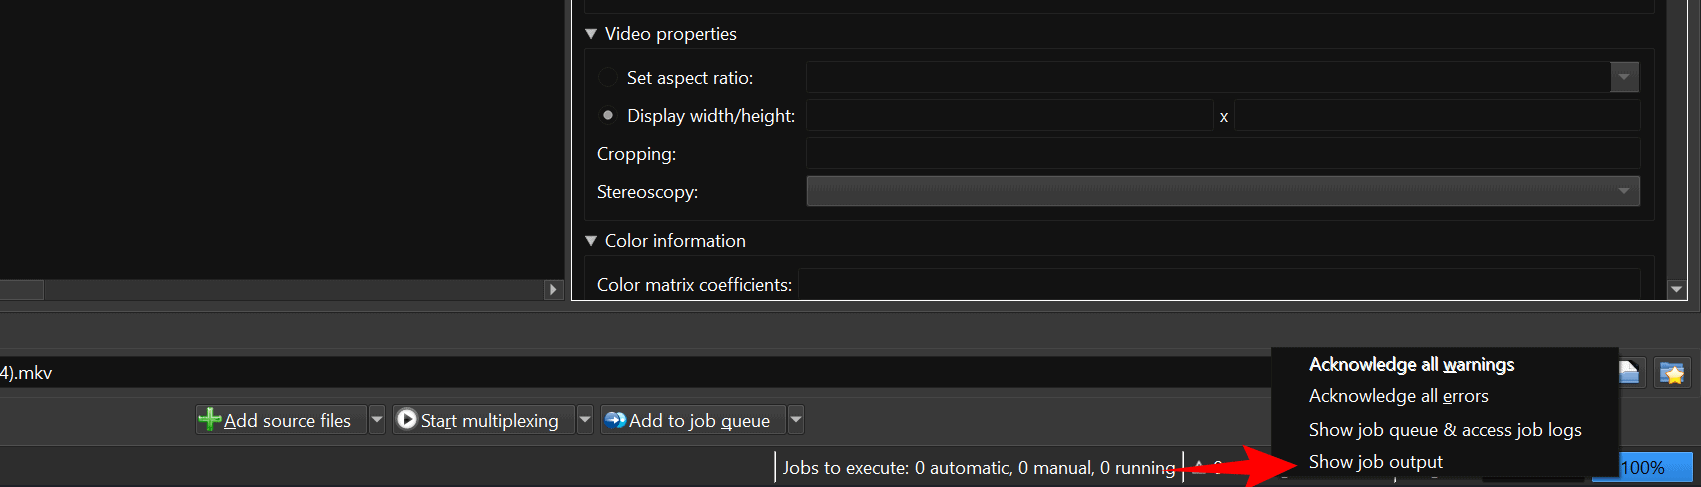
If you want to make sure, or if something went wrong, you can see the details of the job right-clicking the status bar in bottom right corner and picking show job output:


Not all hosting services support using multiple audio tracks. You will also want to encode the files into an HLS Stream to ensure that all browsers will be able to play the video properly.
Vimeo and YouTube do not support multiple audio tracks as of yet. YouTube is currently testing this feature and it could be available to the general public fairly soon.
How to Serve Multiple Audio Tracks
FV Player Coconut
We recommend using Coconut, as it fully supports multiple audio tracks. Just encode your video with multiple audio tracks using our free FV Player Coconut.
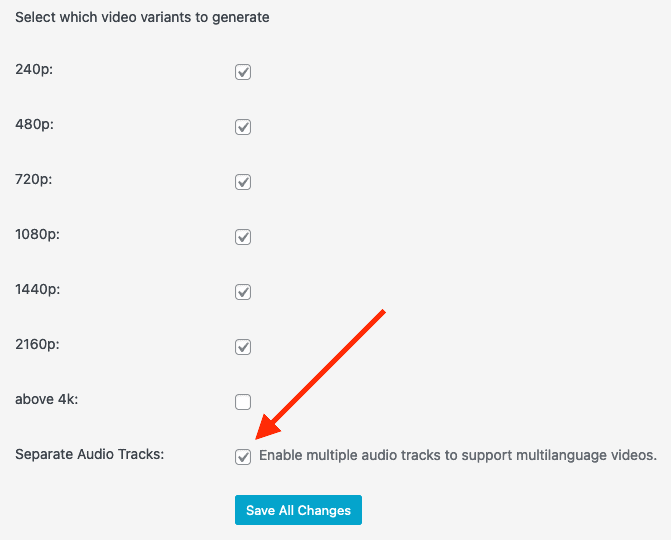
To enable the processing for multiple audio tracks you need to enable wp-admin -> FV Player -> Coconut Josb -> Settings -> Separate Audio Tracks.
Then follow the standard steps to post a video.
Custom Audio Track Labels
In some cases you might not want the different audio tracks for different languages, but some other purpose. Like different instrument tuning if you music theory website or different sound tracks for your movie.
Unfortunately Coconut ignores the custom labels and only understands the languages, so we need to fix that once the video is encoded.
- When you are preparing your multiple audio tracks audio file assign a unique random language for each audio track.
- Then encode the video using FV Player Coconut.
- Once the video encoded we need to edit the audio tracks labels in the main HLS m3u8 file.
-
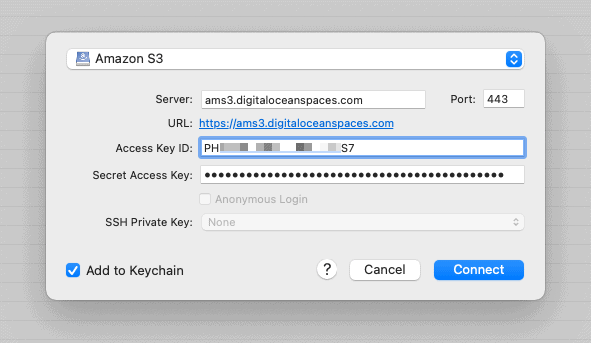
To do that connect to your target video Space on DigitalOcean. You can use CyberDuck which is free. Just pick the Amazon S3 connection type, provide your DigitalOcean Spaces host and access keys.

CyberDuck Amazon S3 connection dialog -
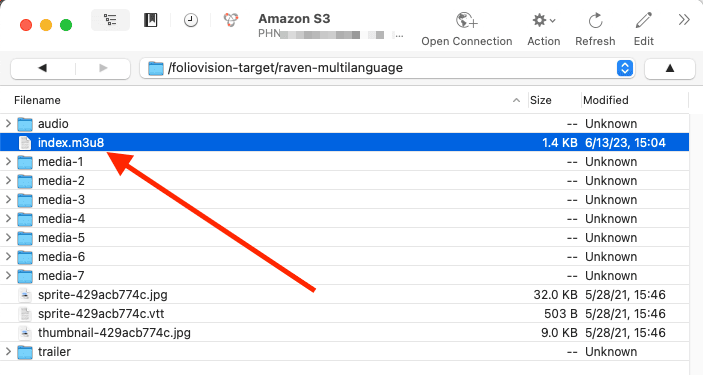
Locate the
index.m3u8file and open it for editing
Edit the index.m3u8 file -
Then change the standard language labels to what you need using your text editor:
#EXTM3U

# Audio
#EXT-X-MEDIA:TYPE=AUDIO,GROUP-ID="audio_aac",NAME="Eng",LANGUAGE="Eng",AUTOSELECT=YES,DEFAULT=YES,URI="audio/aac/eng/stream.m3u8"
#EXT-X-MEDIA:TYPE=AUDIO,GROUP-ID="audio_aac",NAME="Ger",LANGUAGE="Ger",AUTOSELECT=YES,URI="audio/aac/ger/stream.m3u8"
#EXT-X-MEDIA:TYPE=AUDIO,GROUP-ID="audio_aac",NAME="Spa",LANGUAGE="Spa",AUTOSELECT=YES,URI="audio/aac/spa/stream.m3u8"

(...)
Note: You can change order of these audio tracks too, just move each line up or down as needed carefully.
Note: The default audio track is determined by
DEFAULT=YES,so you will have to move that bit too. And for this to work on iPhone as well you will have to remove theLANGUAGE="..."attributes as well. -
Don’t forget to save the file.
-
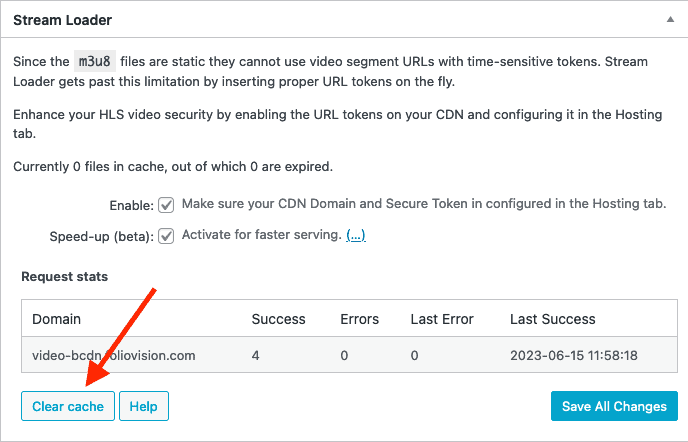
FV Player Pro’s Stream Laoder cache has to be purged as well:

FV Player Pro’ Stream Loader Cache Purge -
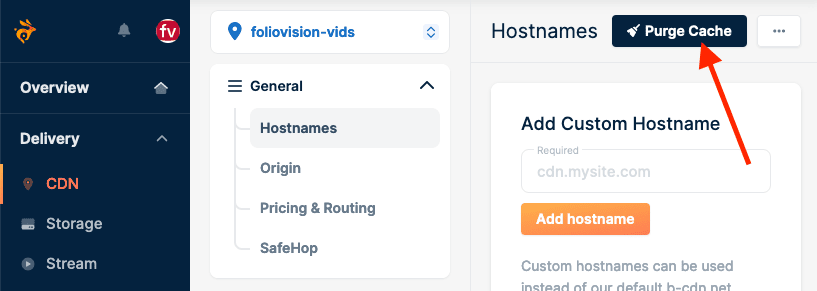
If you played the video already, you will have to purge the Bunny CDN cache as it will. That way it will load the new updated file.

Bunny CDN Purge Cache button
Amazon Web Services
Amazon Web Services supports multiple audio tracks too. With AWS, you do not need to use software, as the multiple audio tracks encoding happens all in the Mediaconvert console.
- Upload the audio files to your S3 bucket.
- Prepare the video input and outputs as per this guide.
-
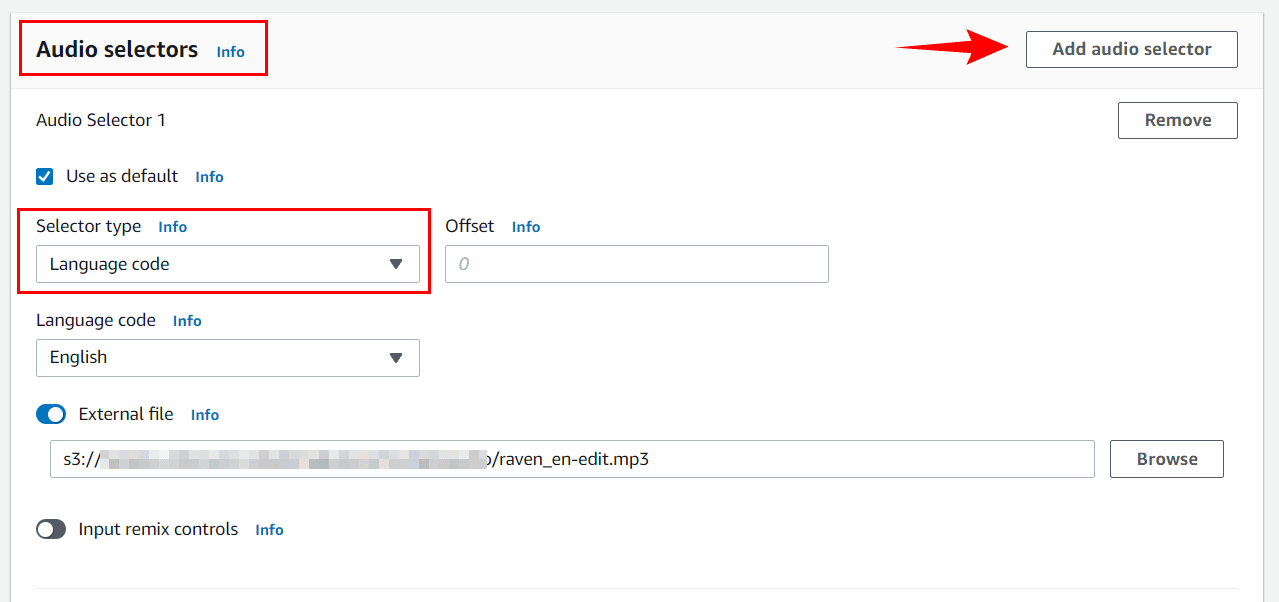
Go to Input and configure audio selectors.Choose selector type based on your needs and preferences (Language code, track, PID).
You can add as many of them as you need by clicking Add audio selector.
We recommend you add the audio files from your S3 bucket, as it is the easiest way. Browse S3 in the external file field.

-
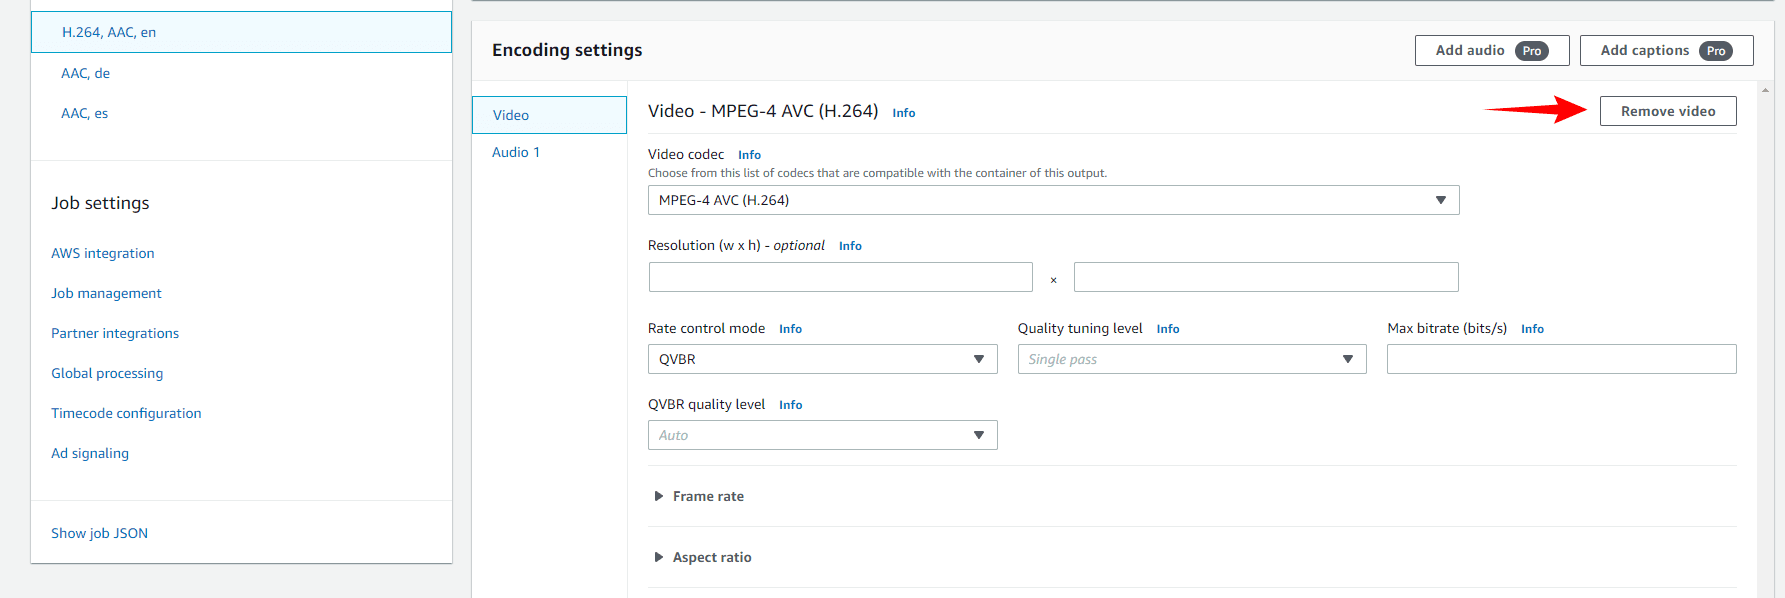
Now go over to the output group. You will need new outputs for each audio track. Do not add the audio into existing video outputs.
Remove audio from encoding settings of all the video quality outputs, and remove video from encoding settings of audio inputs.

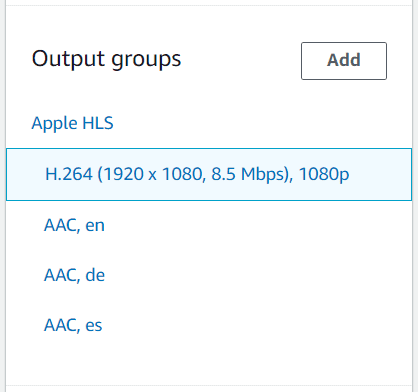
This is an output group with a single video and 3 audio outputs:

-
In each audio output, go to Output Settings -> Audio. Put in an arbitrary Audio group ID.
The Audio group ID must be the same in all audio outputs.
Then select the Audio track type – “Alternate audio, auto select, default” for the default audio and “Alternate audio,auto select, not default” for all the rest.
-
Underneath, in Encoding Settings -> Audio Source Select the correct number of Audio Selector created in step 3. None of the other encoding settings are required for this purpose.

Adding audio rendition sets to video output settings Double check, if all selectors have correct audio source and the same Audio group ID.
-
Finally, go into all the video outputs. There, go to Output settings -> Advanced. Write the Audio group ID you set in step 5. to the Audio rendition sets. In this case, our audio group ID is simply called “Audio”:

AWS requires you to set an arbitrary Name modifier – this will be appended to the file name.


How to Use Multiple Audio Tracks With FV Player
Just insert the link to the shortcode editor as you would a normal video, and FV Player will recognize the multiple audio tracks automatically.
Once posted, the video will have an AUD button on the controlbar, allowing you to switch between the audio tracks.
EXAMPLE