If you’re keen on digital photography, it is likely that you have ran into the discussion about Colour Space settings on your camera offering you main the main colour spaces – Adobe RGB (1998) and sRGB. Even more likely, you have came across the opinion that using AdobeRGB enhances the colours in your pictures and therefore it is worthy to consider shooting and editing in it.
Technically, the AdobeRGB represents wider colour gamut but is there any practical reason for choosing it as your preferred work space?
We’ve examined the efficiency by shooting and editing in both AdobeRGB and sRGB and compared the end results.
sRGB vs. AdobeRGB
Choosing between the main colour spaces Adobe RGB and sRGB depends on several circumstances which are reasonable to consider before shooting:
- The sRGB is an older colour space that represents a considerable part of total colour space and overtime became a standard used by every personal device available. Plus, it is tweaked for the web usage. Generally, if you work with a well-calibrated camera and monitor, the sRGB gets you great colour results anywhere, even in print.
- The AdobeRGB technically provides a wider range of reproducible colours. Compared to sRGB, this space represents about 35% more colour, primarily in cyan-green hues. Using Adobe RGB claims to bring out more details of your work, which in sRGB could remain unseen. Many photographers advocate and use this profile for such purpose, which makes it a commercial industry standard.
 1. Chromacity diagram showing the color range of the Adobe RGB (1998) and sRGB color gamuts.
If you considered AdobeRGB thinking you’ll enhance your photos and thus gain more out of your work, keep in mind the disadvantages of it:
- During an export of AdobeRGB file, colours are being squeezed into a smaller range and in order to expand them to their full range back again during re-opening, the correct software is needed to read them. Regular print labs don’t have the software that supports AdobeRGB and that could leave you disappointed with dull-coloured results.
- AdobeRGB is absolutely useless for sending e-mails or publishing on the Internet. As the browsers are adapted to sRGB, it is the safest bet for output to Web. If you’ve used AdobeRGB, always remember to convert your photos to sRGB and embed the correct colour profile, otherwise the browser assumes the profile is sRGB and that results in apparently muted tones of your picture.
- Compared to ProPhoto RGB space, AdobeRGB is much smaller in colour range and size. That decreases its overall efficiency as a working space for editing.
Editing
The original picture was shot in both JPEG and RAW format in AdobeRGB and sRGB version, with a Nikon Z 6 camera with a built-in 35.0 mm f/2.8 lens. Firstly, I’ve edited the RAW files in order to save the preferred settings which could be applied later to the JPEG’s. The scenery in the picture needed significant colour and light tweaking to demonstrate the range of the assigned colour profiles.
 2. Initial 16-bit Camera Raw settings
Normally, I don’t go for a wild-coloured look in my pictures but I wanted to make a visible change this time in order to trace the possible advantages of AdobeRGB.
Letting the natural light come in allowed the components in the picture to become more outstanding in their colours. I’ve made the light a little bit softer by lowering the basic Contrast and Highlight levels and additionally worked with the Tone Curve. After that I was ready to start with the colour enrichment. To begin with, I’ve elevated the Temperature to a warmer level (6000K). After that I’ve focused on the advanced HLS colour adjustments – mainly the strongly present Reds and Oranges of the objects and with regard to AdobeRGB specs also on Blues, Greens and little bit of Aquas which are supposed to be among the biggest virtues of the profile (see picture n.1). As last but not the least step, I’ve increased the overall Vibrance and Saturation.
Below, you can see how the Camera Raw settings evolved, step-by-step :
 3. Open in full-screen mode to track the changes in Camera Raw settings.
 3. Open in full-screen mode to track the changes in Camera Raw settings.
After the identical edit of both RAW files was finished, I’ve exported them and applied the same changes to both original JPEG files.
Results
[twentytwenty]
[/twentytwenty]
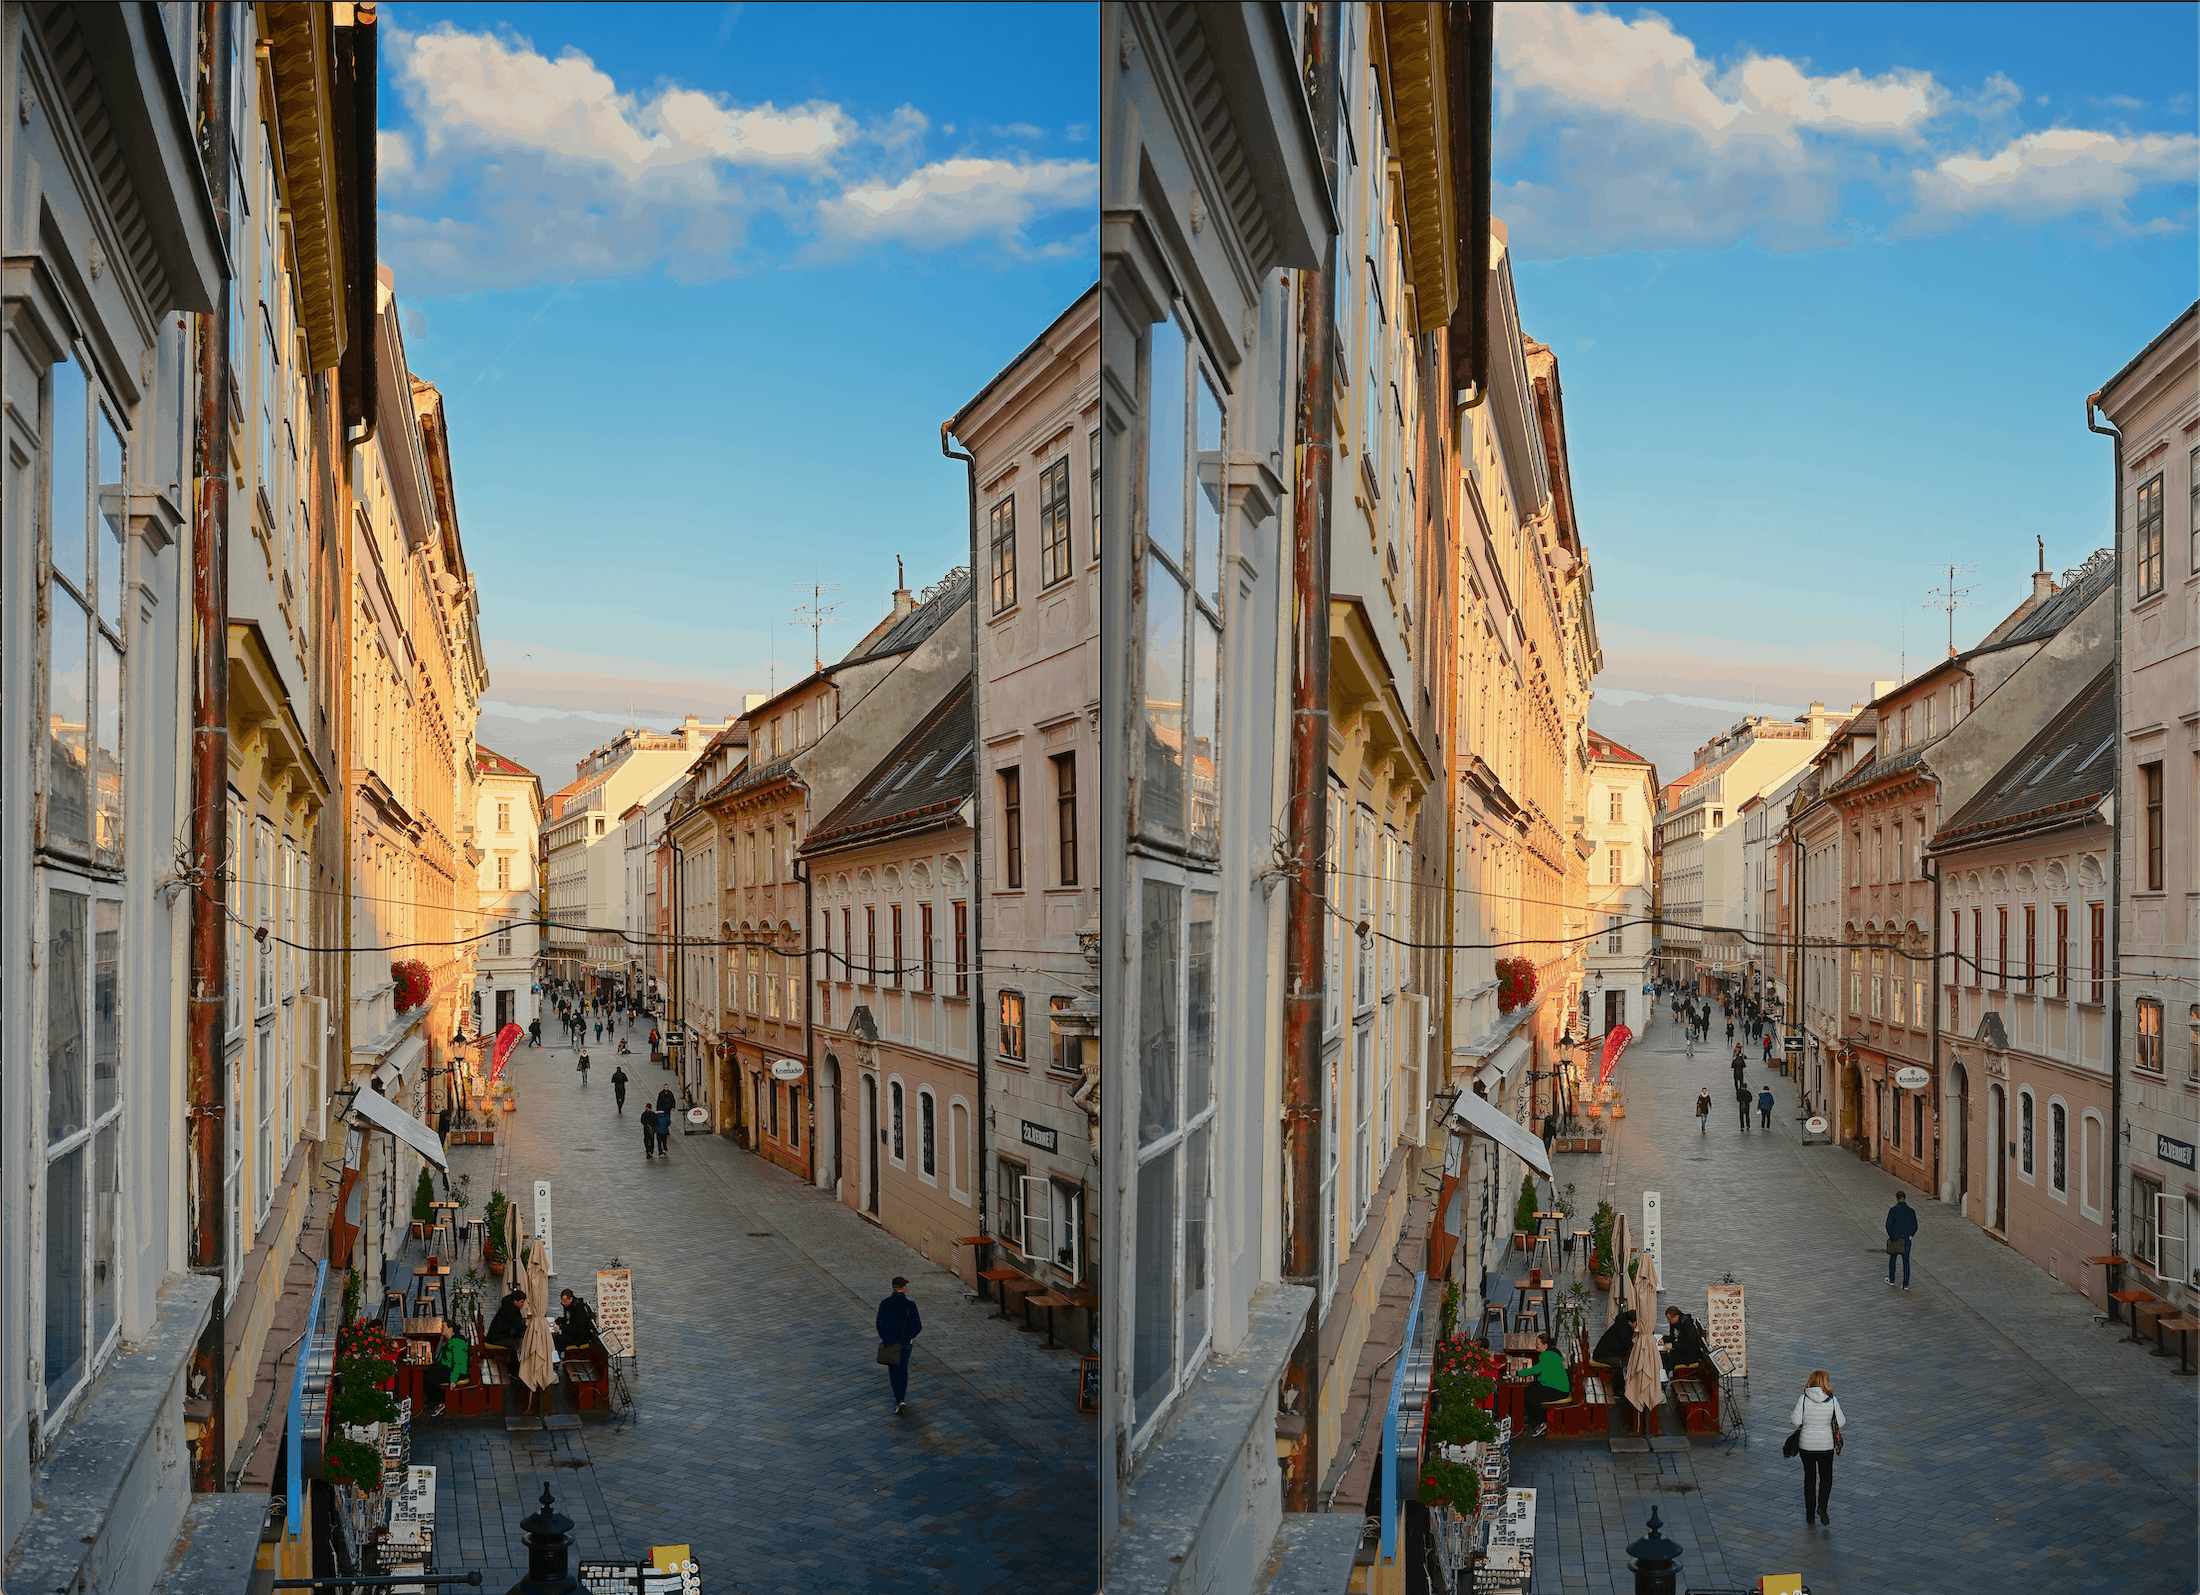
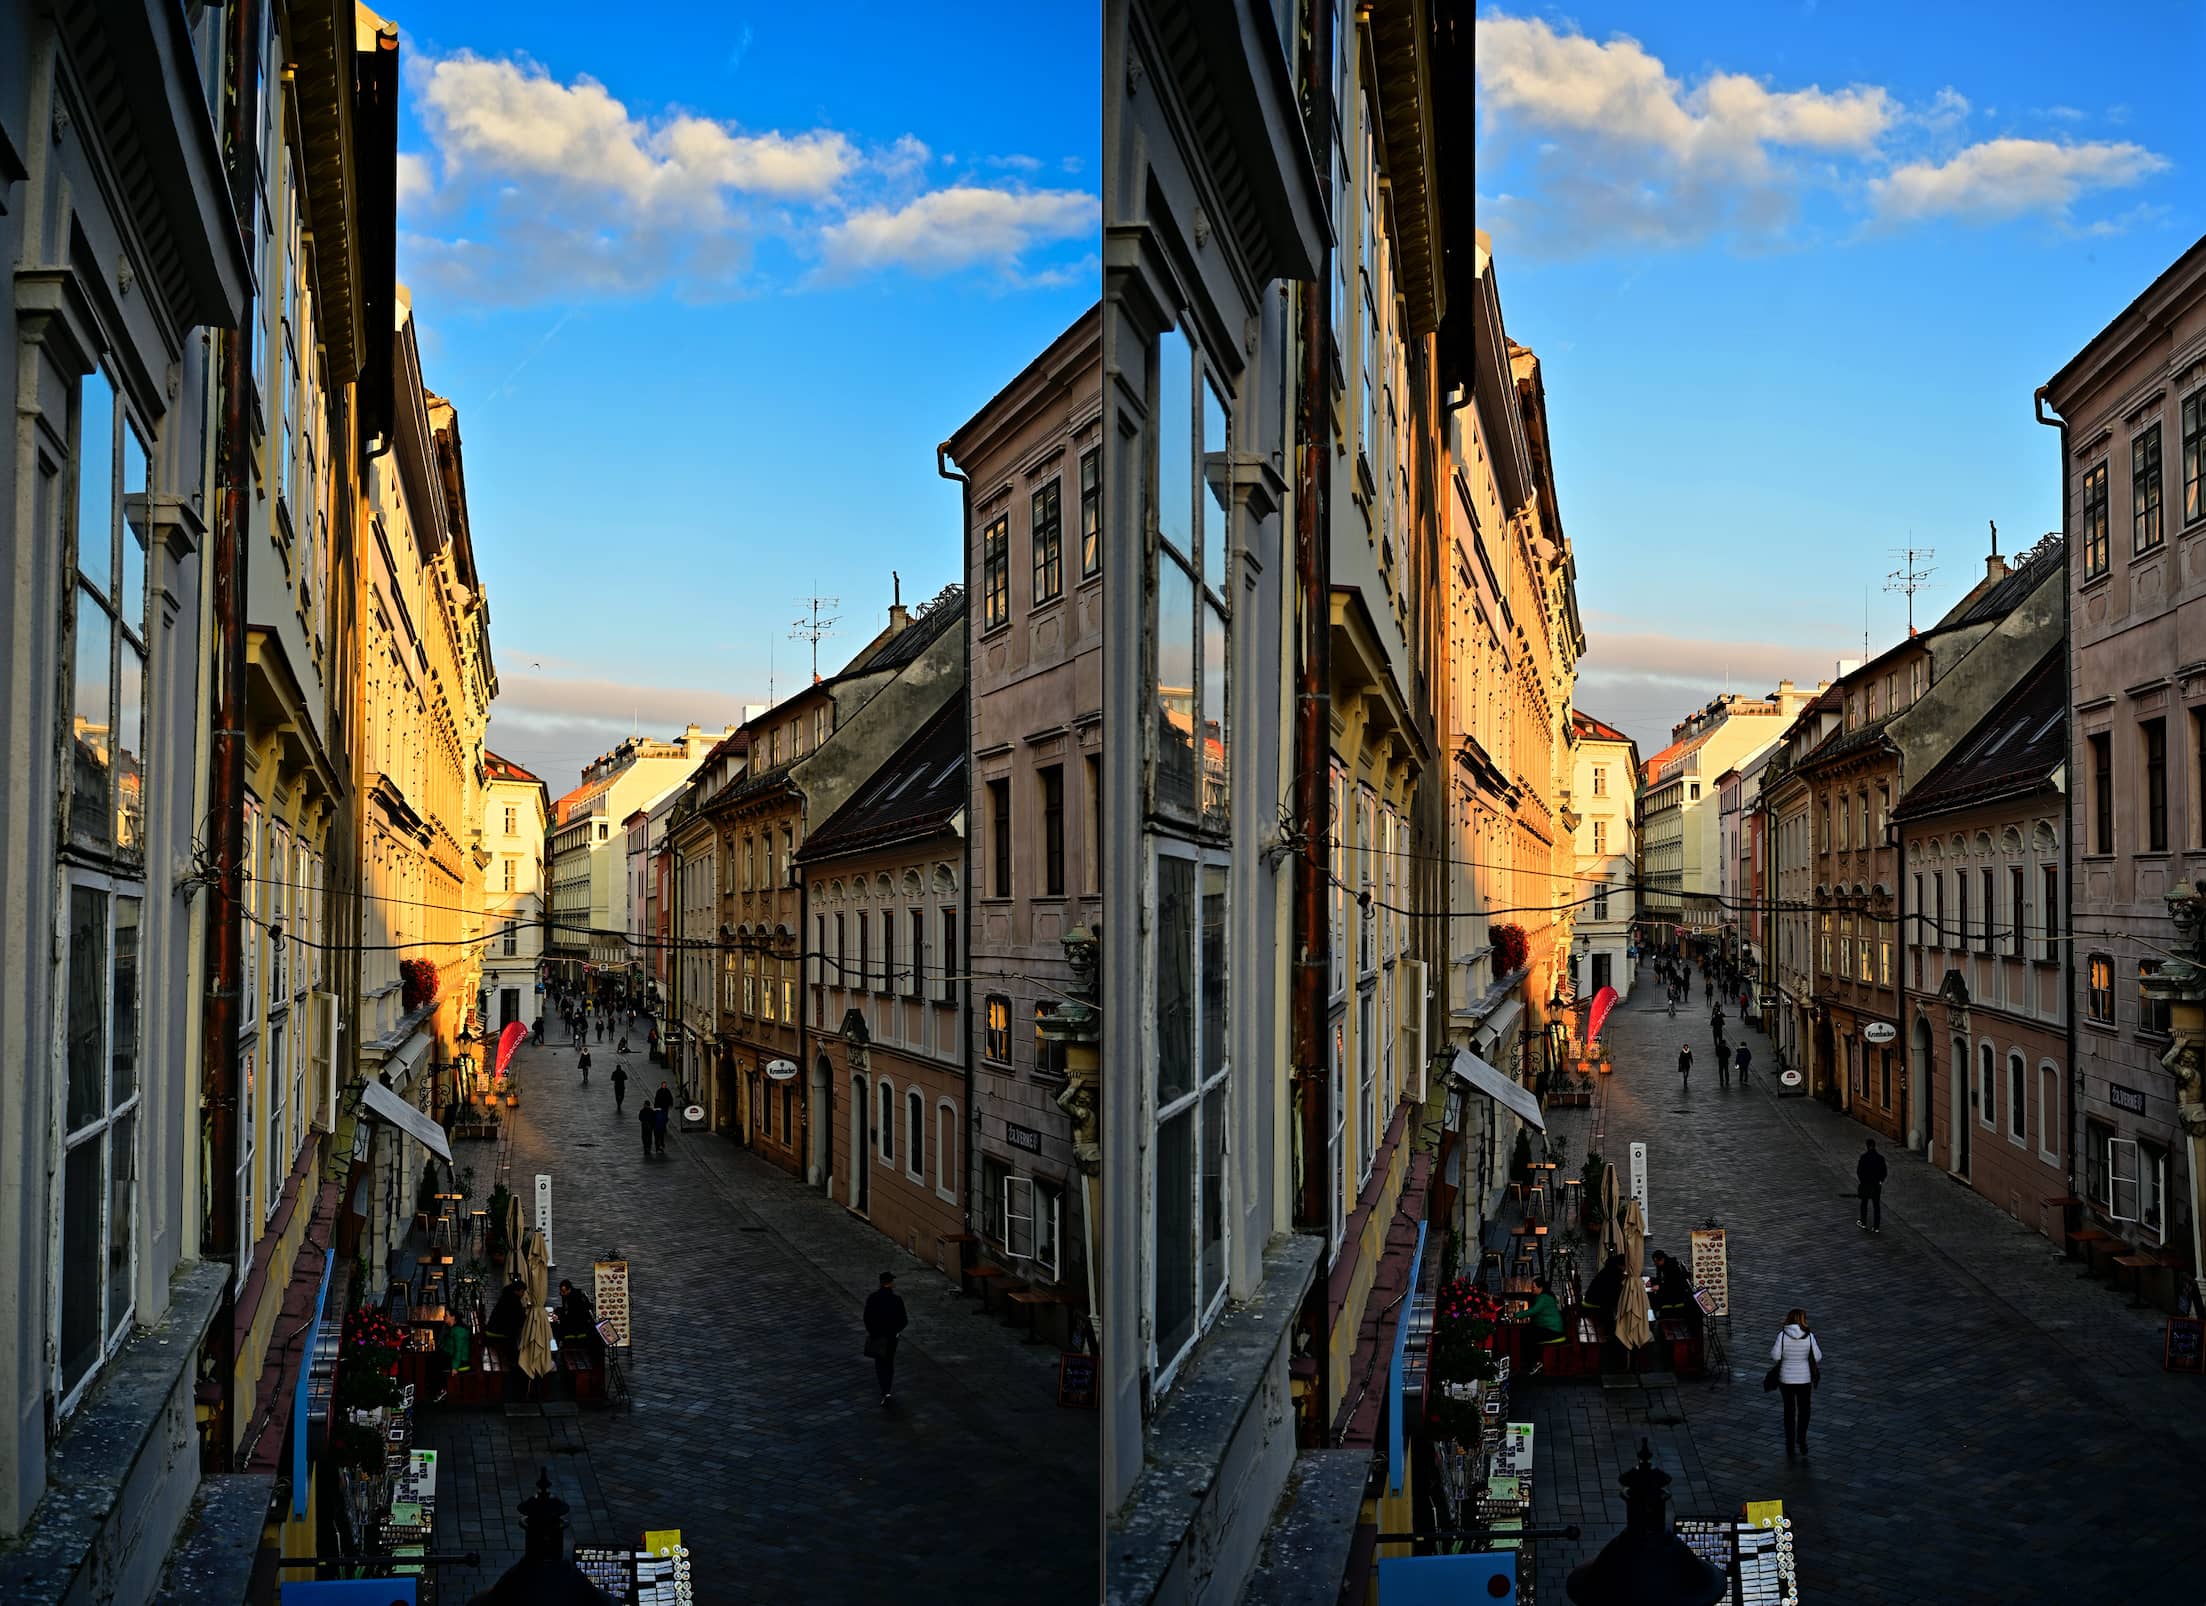
Left: AdobeRGB, Right: sRGB
To my surprise, the compared JPEG pictures don’t differ very much in the colour quality. However, you can spot a notable difference in the area of sky – more complex blue tones and less banding effect makes the AdobeRGB image version of afternoon street more sophisticated compared to the sRGB.
 Detail of blue hues (Left: AdobeRGB, Right: sRGB)
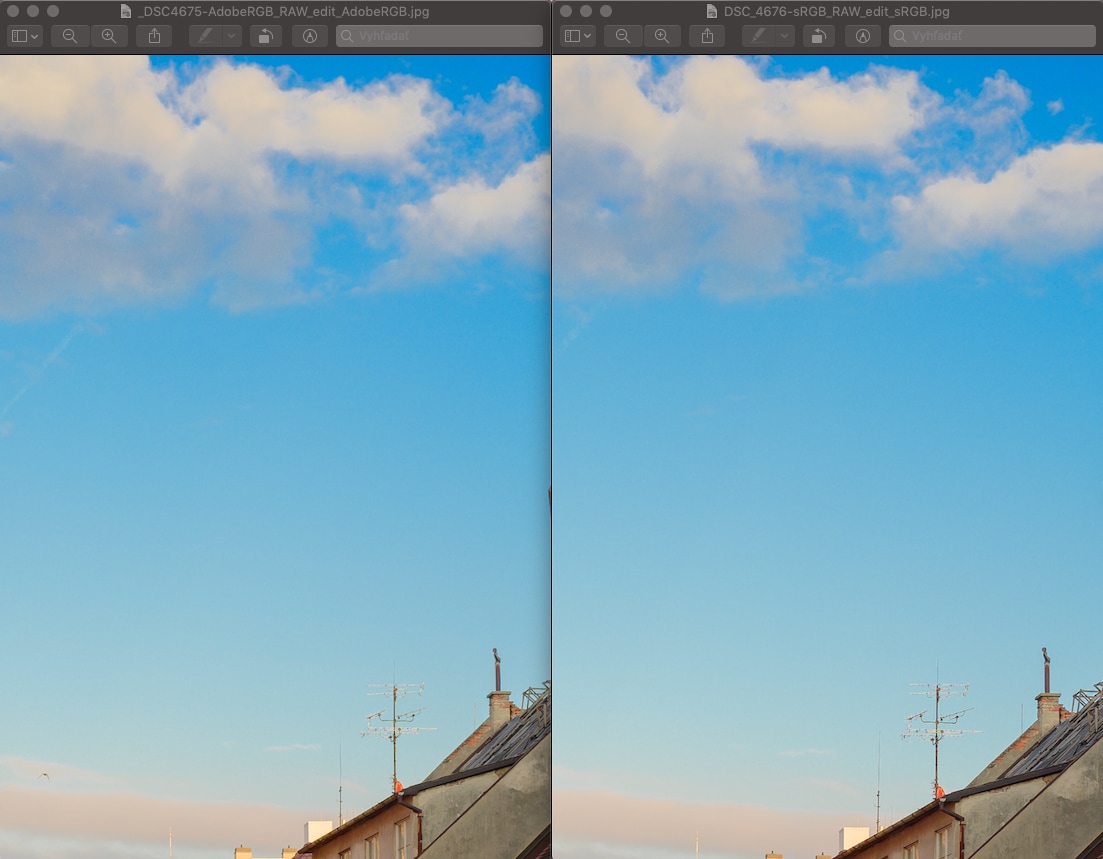
Although the blue colours in the sRGB image suffer, it doesn’t include the greens:
 4. Detail of green hues (Left: AdobeRGB, Right: sRGB)
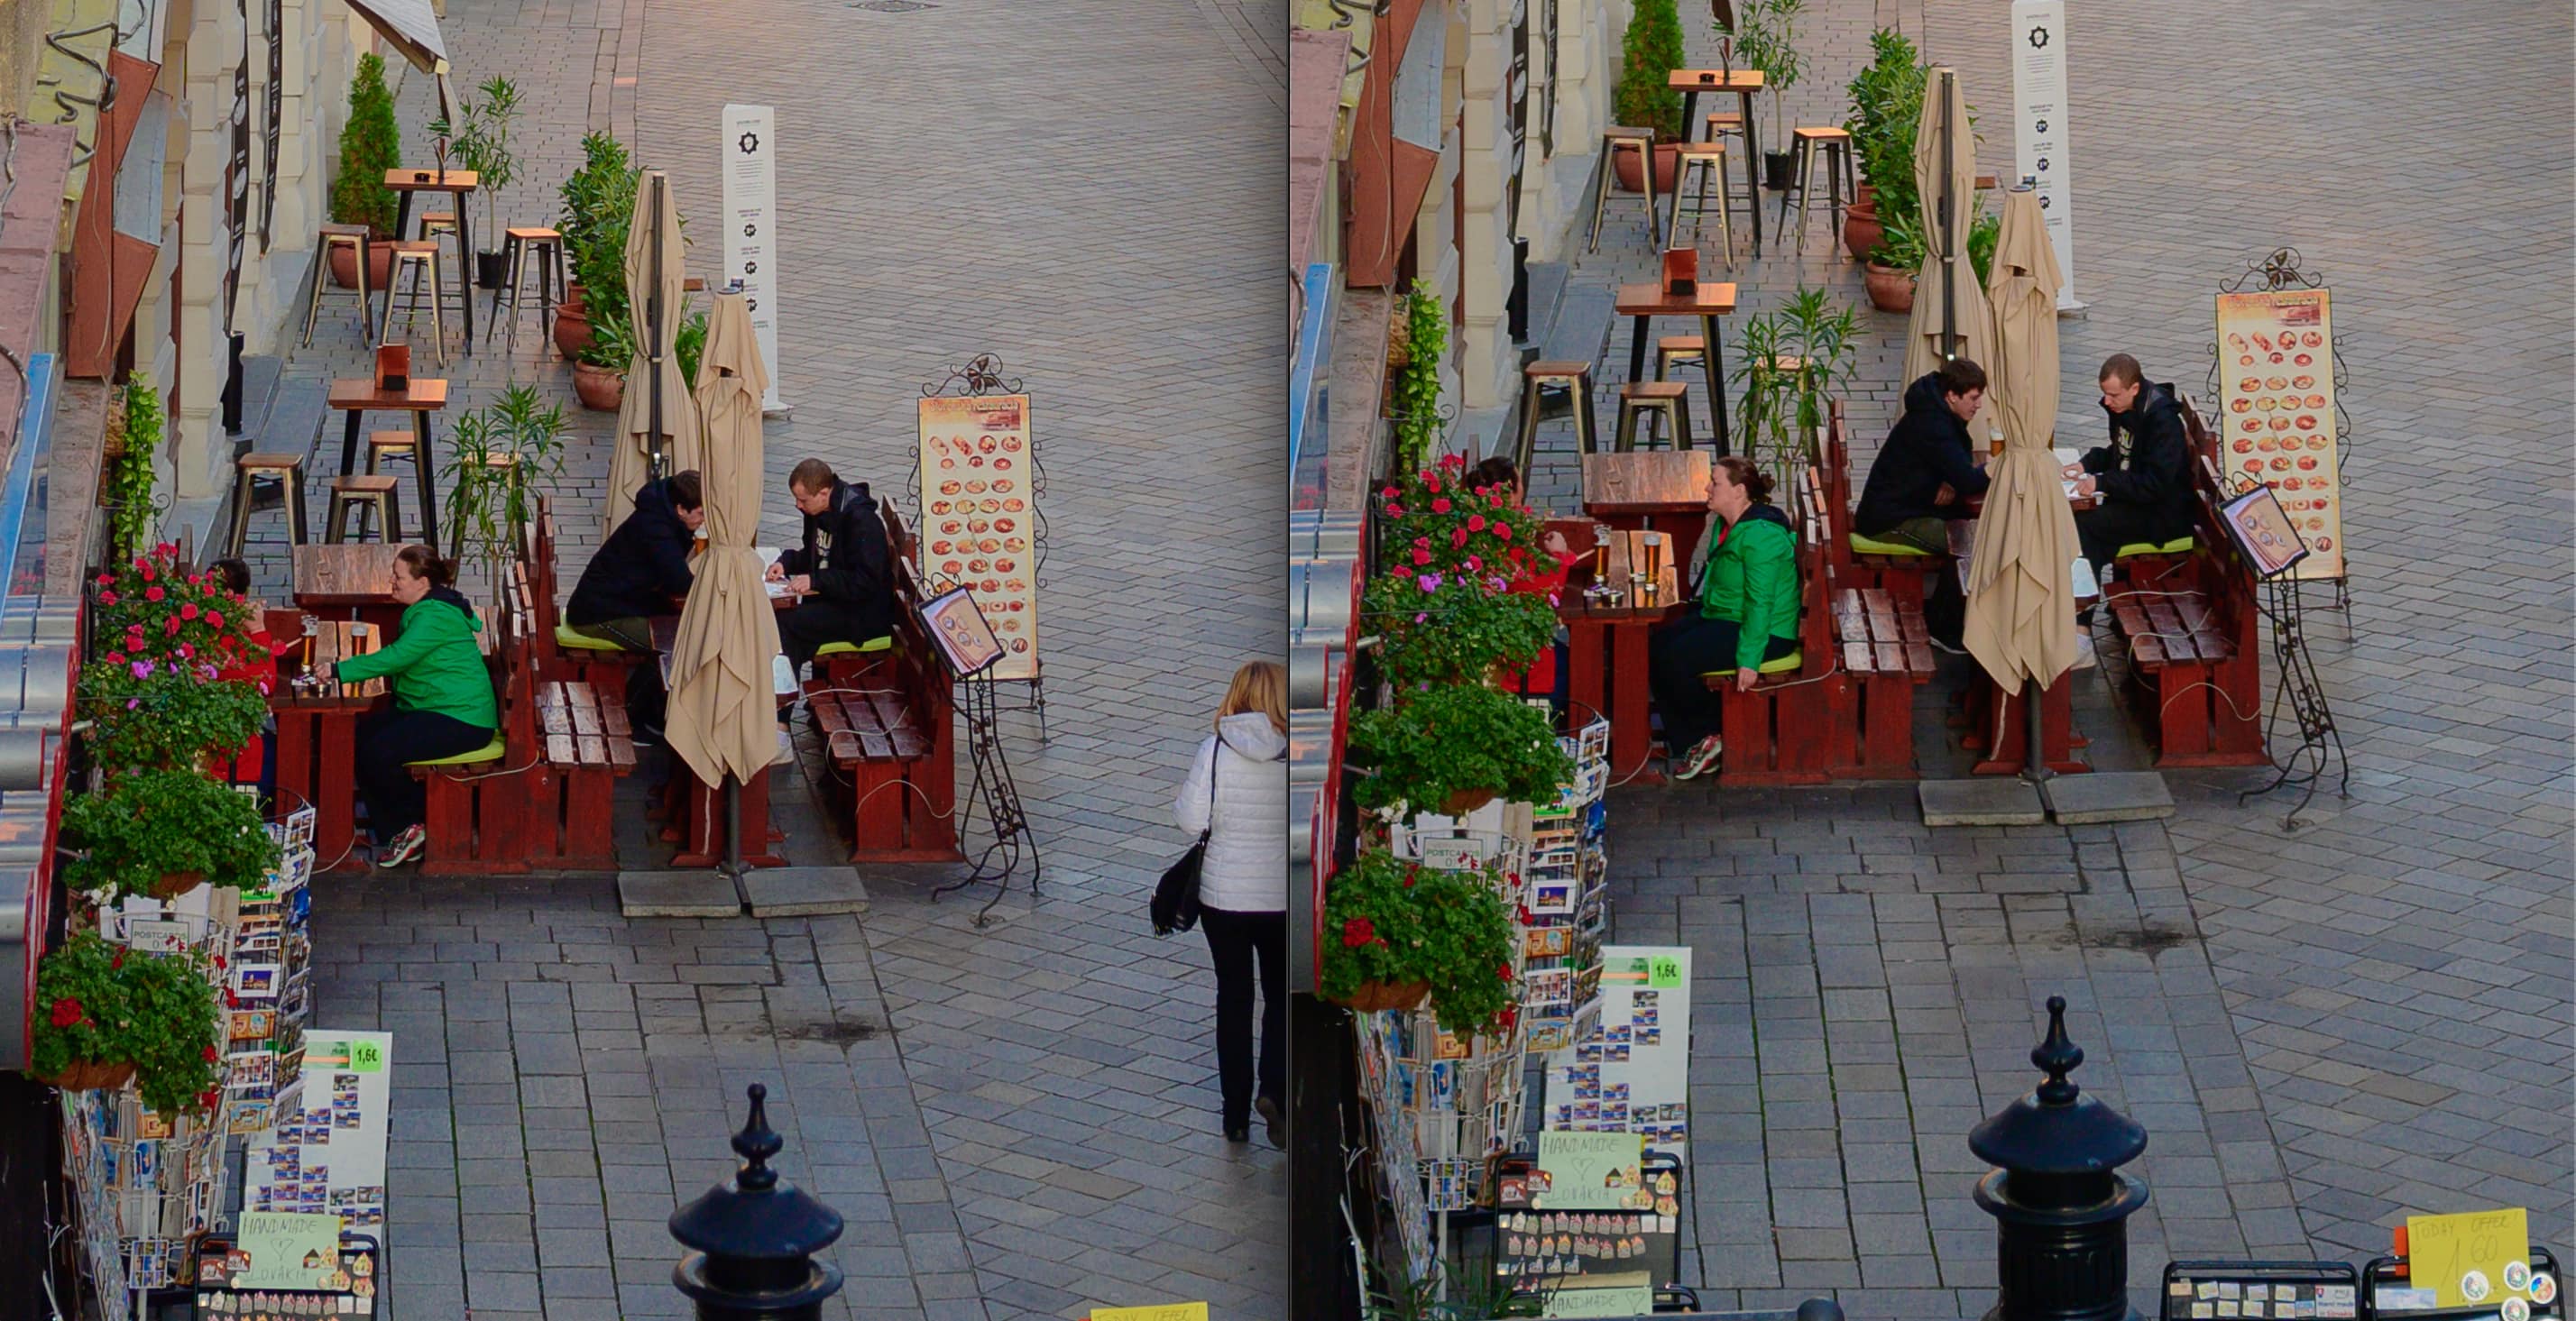 4. Detail of green hues (Left: AdobeRGB, Right: sRGB)
Adobe Photoshop vs. DxO PhotoLab
Another factor influencing the results is the software you use for post-processing. My software of choice was Photoshop and as you could see above, the results were very moderate. However, the same pictures, edited in DxO PhotoLab software, came up with more significant differences between in the outcome. Of course, I wasn’t expecting the same results as the changes applied in DxO PhotoLab were not identical to the ones from Photoshop edit but that doesn’t erase the stronger feel of
- obviously richer blue colours (AdobeRGB)
- worse banding effect in the area of sky (sRGB)
 5. JPEG’s edited in DxO PhotoLab (Left: AdobeRGB, Right: sRGB)
If you are shooting RAW, then it really doesn’t matter what colour profile you pick on your camera. The RAW images doesn’t include any colour information and therefore these files don’t have any colour space associated with it. Colour profile information only applies to the JPEG version of the image. The praised AdobeRGB colour profile did bring out certain colour qualities in the test.
The question to be solved is – what could be a practical reason for someone to post-process the pictures in a JPEG format? Let me know in the comments below!
Chiara Rendeková
Chiara was born and raised in the neighbourhood of Petržalka in Bratislava. Besides studying Marketing Communication at Comenius University, she happens to be an observer, mostly through the lens of a camera.
Leave a Reply